I see more and more Saber enthusiasts wanting to add a chamber to an existing hilt or creating a saber from scratch with the chamber's design planned on in advance. From what I gather with the different sabers on the market including Ultra's , is the the interior ID's don't differ too much from manufacturer. The standard MHS interior is 1.25" the smaller sabers seem to run in the 1.125" to even as small as 1".
Now I realize many people dont have access to the machines or tools necessary to fabricate this stuff (or even the time). So I wanted to start this thread as interactive in what ideas have worked, or not, also what commonly found materials can be used to create the right look. The greatest thing about this hobby is the unlimited choices that you have to create something totally one off with out breaking the bank

1st off, simple tools. A screwdriver set, allen key set, and a dremel with cutting grinding bits is a great start, also a simple small jewelers file set is very handy with a discipline in it's own right. For modifying your existing saber, you need to be able to create an opening for the chamber and also have it jive with the existing electronics. As far as more advanced tools go, a small drill press is invaluable, in that it can of course drill straight holes, and with a little skill it can be used as a small lathe for parts, with a 50.00 x-y axis vise and some small end-mills, you now have a mini-bench mill! ( craigslist is a great place to find home shop tools for chhheeep).
Back on topic, for a larger US hilt (Archon for example) TCSS makes many different sized chassis discs both out of aluminum and laser cut acrylic , they also have the rods , nuts bolts and tubings to create a full rail system. This here is the base for a saber I call "project X" this is one I have been wanting to build using a very modular approach and it is a bit complicated in some parts, I would like to at least be able to get the "jist" across for inspiration. Photo #1 this is an aluminum disc from TCSS that measures 1-1/4" across by like an 1/8" thick
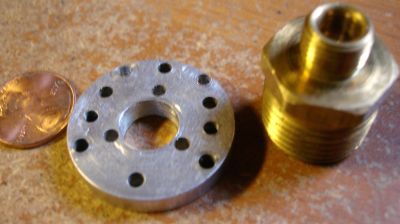
Next to it is a simple brass plumbing part that will be used as the main crystal base/holder
The disc in the pic has already been modded in that I added 4 more holes for support rods (there will be 6 total, you can get away with just 2)
I used my small drill press with a 1/8" drill bit to add the 4 holes, one trick I learned is to have a small section of hilt on hand and a 4-40 threaded screw to hold the heatsink and base together for alignment (the heatsink I'm using is an old style one that someone had drilled into swiss chees before I got it)
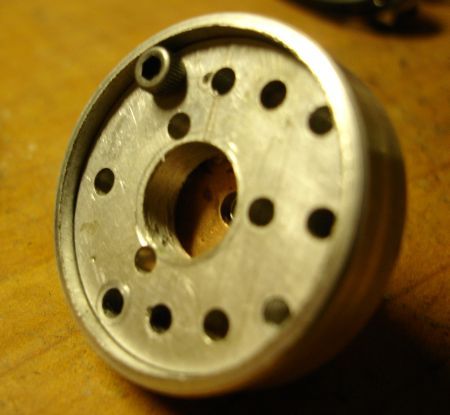
Speaking of the LED-holder/heatsink, once again they come in a few different variations and are usually the easiest part to use as a chambers top plate
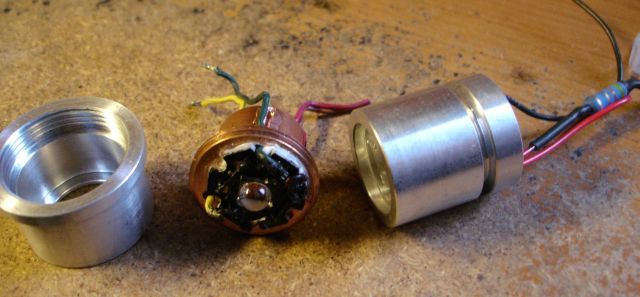
Shown here is a new style heatsink with a RRRR led-engin, a 1" heatsink led combo with RB wired in series in an all aluminum affair.
Here is a pic of the swiss cheese heatsink and now heavily filed (on the drill press) brass plumbing piece (this can also be done with old style lamp parts from the local hardware store)
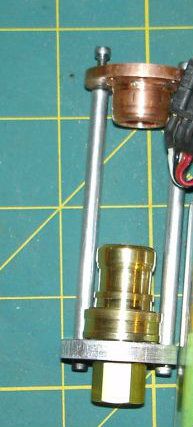
the rod is thin aluminum tubin that will have a 4-40 all thread rod for support (found at the local hobby shop in the model airplane section) Ok guys ,what ideas do you have??? Please share!!!


