Click here for lightsabers
  • Home
  • Help
  • Login
  • Register
Pages: [1] 2   Go Down
Author Topic: $5 simple crystal chamber  (Read 7795 times)
Duhjoker
Knight Lance Corporal
*

Force Alignment: 5
Posts: 63


« on: April 06, 2016, 06:23:11 AM »

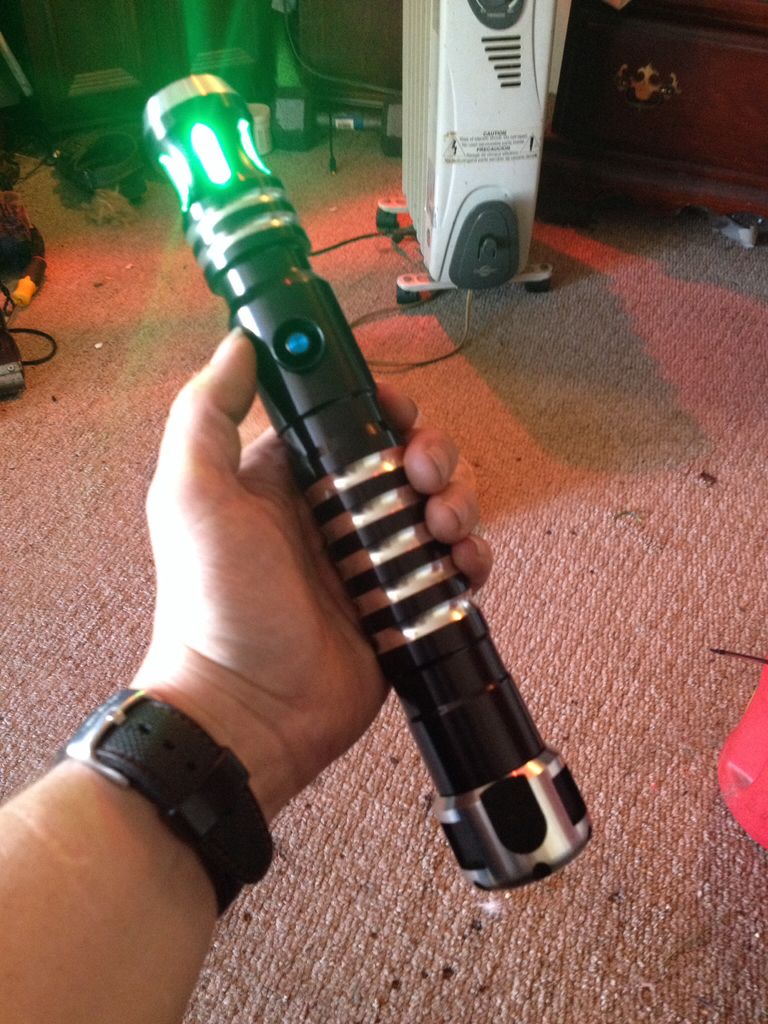
    My new Dark Initiate LE V4 came today and I am loving it.


    But now I want to start one of the modifications I mentioned in an earlier thread. As the title says this a $5 simple crystal chamber. First let's talk about pommels. For this to fit properly in your saber, deeper Pommel will make the best choice as there is room for the LED board and the parts needed. I would recommend this any way since the pommel will give off accent light. Also the further up you can jam the battery box inside the better. I'm using a stunt saber with out sound so I may have more room. For me it's about 3 1/2".

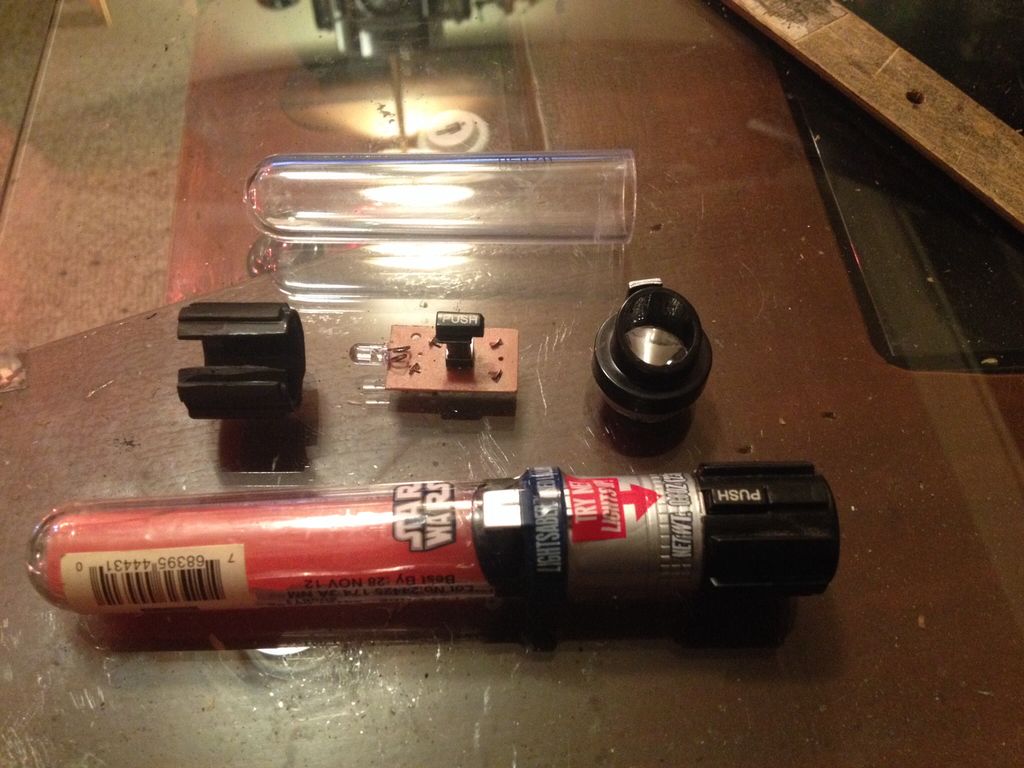
Next the parts. I found these light saber candy suckers at the local grocery store a couple years ago for a $1 a piece. I looked them up and you can buy them everywhere online but my local get-all store still sells them near the collectibles and trading cards area if not on the candy aisle. They are newer but will work the same.

I was originally going to use the red saber but it was cracked. The first thing you want to do is remove the tube and crack the upper two pieces of the hilt from the lil pommel. It should be pretty easy to do with out breaking. Once that is done look at the silver painted hilt piece for an indented line that goes around the diameter. Use this as a guide to cut half the hilt off. Then grind it down on the bottom so it comes up to the flashlight lens pieces inside the hilt.


   Next take the LED board out of the pommel and place it backwards In the plastic pommel upside down. This puts the LED lower in the hilt to allow for more stuff plus the light will come on automatically when the hilt is powered on, remove the chamber from the hilt and the button will release to turn it off for safety. Next drill a hole in the lens just big enough to hold your crystal tightly in place.

   You will need some soldering skills next. Very carefully pry the guarded button out of your saber and solder two long leads to the wire leads that run to the big sabers LED then run them through the tube. From here you will need a couple diodes to drop the power to 3v. Now remove the clear LED from the board on and replace it with what ever color you desire the crystal to be. Now solder the leads to the LED switch board.

Now replace the board in the candy saber's pommel upside down and backwards and glue the hilt part with the lens on to the candy saber pommel. Also at some point the candy sabers pommel will need to be sanded down and repolished with high grit paper so it will fit in the ultra saber pommel. Not too much though you want it tight so it doesn't wiggle.


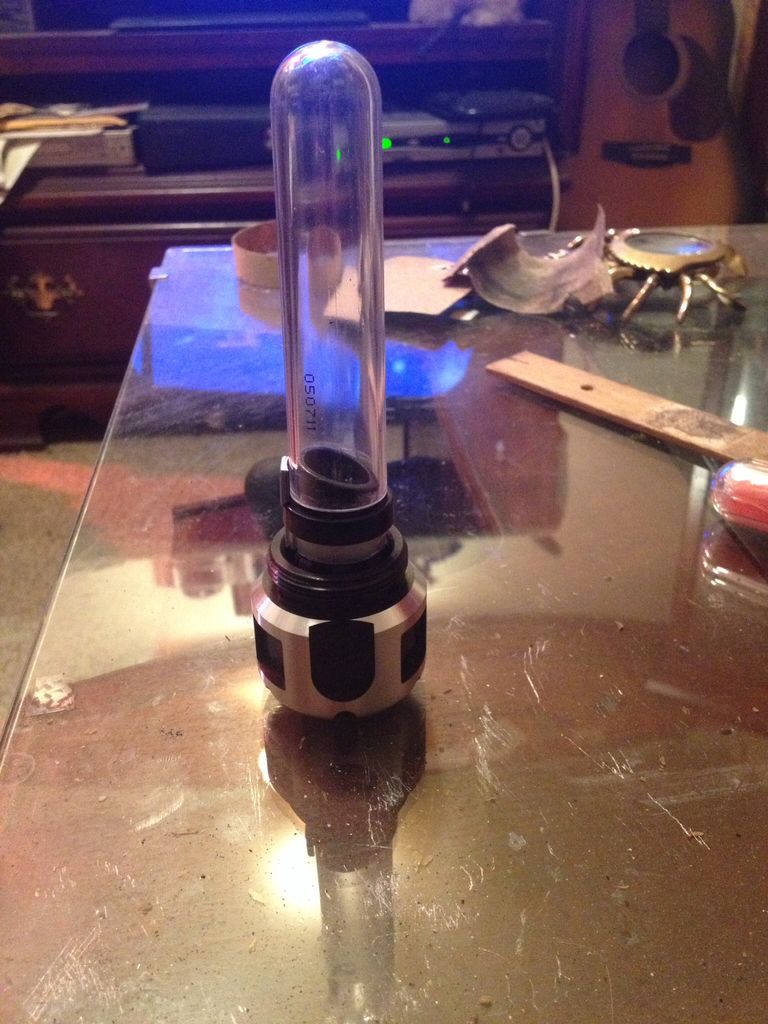
Now from here you can cut the candy sabers tube down tight enough that it's not touch the crystal but still fits the shaft of the ultra saber and glue if you like but let's talk about further customization.

The tube could be drilled and wires pulled out of the bottom tube to wrap around your crystal or make it look like a Mercury switch. If you have access to sheet metal and tin snips you can cut small pieces of steel and imbed them into the plastic to look like electrical or hard ware. Different colored wires soldered along side burnt up capicitors or what ever you have laying around will also add nice touches to the aesthetics. Just use your imagination and go wild.

   That's my plan any way. Gonna try to go parts hunting in the next few days so I'll report back my progress with pics.

   I would like some advice on diodes and power though. What kind of diode/s would I need to bring the current down to 3v or do they actually make 5v LEDs?


Logged

Jape
Force Sensitive
*

Force Alignment: 2
Posts: 9


« Reply #1 on: April 06, 2016, 08:16:10 AM »

Looks like a good idea and work in progress so far! How much of a coincidence it is for the custom crystal chamber to have come from a Star Wars lightsaber product haha!

I cannot advise as to the use of a LEDs etc; but I have seen a lot of girls posting on Instagram about these crystal wire wraps which seem to be used as jewellery a lot at the moment - and since they are a current Instagram trend; no doubt the supply of materials etc are readily available (having problems posting an image link on this phone - but a quick Google search will show you what I mean!)

As opposed to having the electrical wiring from the saber wrapped around the crystal; this wire could potentially be used to extend out of the chamber and out of the line of sight, and then be twisted into rounded off points pressed up against the pommel/LED housing to provide a rattle free and stable. From what I've seen of exposed crystal fan art and concept art from the films and games - the more asymmetric and handmade the assembly looks the better!
Logged

Halnis
Knight Lance Corporal
*

Force Alignment: 13
Posts: 74


« Reply #2 on: April 06, 2016, 01:38:13 PM »

I love this! Going to swing by my dumpmart once im off work

Sent from my SM-G900V using Tapatalk

Logged

"There must be both dark and light. I will do what I must to keep the balance, as the balance is what holds all life. There is no good without evil, but evil must not be allowed to flourish. There is passion, yet peace; serenity, yet emotion; chaos, yet order. I am a wielder of the flame; a champion of balance. I am a guardian of life. I am a Gray Jedi."  ~
Leor Danal

RevanReborn
Technomancer of the Graflex Order
Knight Commander
*

Force Alignment: -1086
Posts: 1121


« Reply #3 on: April 06, 2016, 02:22:50 PM »

Very cool!  I love this type of modding-  I'll be watching this for sure, got a scratch crystal chamber for a graflex in the works ATM.  Point coming asap. 
Logged

Duhjoker
Knight Lance Corporal
*

Force Alignment: 5
Posts: 63


« Reply #4 on: April 06, 2016, 10:02:10 PM »

 Want to point out that after cutting your light saber candy "blade" you will need to sand and file down the  emitters diameter to get the blade to fit back on. Also the plastic used by the company that made these is real soft and super glue will soften it so be careful of your glue joints so there no squeeze out of the outside diameter.

The blade tube is kinda soft too. Try to keep it covered with some masking tape that's easy to remove while modifying it. This will prevent scratches.

  If you do get some light scratches twisting the tube in a soft piece of cloth and you can buff it out.
Logged

Samhain138
Dark Lord of the Menace Order
SaberForum.Com Moderator
Knight Commander
*****

Force Alignment: -2171
Posts: 2325


Aw, crap.


WWW
« Reply #5 on: April 07, 2016, 02:24:16 AM »

Is that crab a magnifying glass?
Logged

Duhjoker
Knight Lance Corporal
*

Force Alignment: 5
Posts: 63


« Reply #6 on: April 07, 2016, 02:46:29 AM »

Yep sure is. See food get it
Logged

Duhjoker
Knight Lance Corporal
*

Force Alignment: 5
Posts: 63


« Reply #7 on: April 07, 2016, 06:55:21 AM »

Well as it happens the domed end of the candy saver blade cracked way too much to use so I started working with the open end and this is what I have......


And this ........


The black spur pieces are servo horns for MG995 servos left over from another project along with the lil press eyelets. The black circle is a motor mount for an RC plane but haven't found a use for. And lastly some pull up resistors I had.

   I think I'll glue the spur on then circle the tube with the resistors. Once I locate a green LED I can wire it. Gonna try to go get a crystal too. Just a Quartz piece will do and scatter the light well.


Logged

Duhjoker
Knight Lance Corporal
*

Force Alignment: 5
Posts: 63


« Reply #8 on: April 07, 2016, 07:29:31 AM »

Took the eyelets and glued a nail in then two more eyelets on the nail and clipped. This is what I came up with.


Had a hard time finding a cylindrical item that fit the eyelets to the right you will see a dumb dumb sucker clipped.

Logged

Duhjoker
Knight Lance Corporal
*

Force Alignment: 5
Posts: 63


« Reply #9 on: April 07, 2016, 07:50:37 AM »

  I haven't decided how I'm gonna attach the other end of the resistors yet.

Logged

Duhjoker
Knight Lance Corporal
*

Force Alignment: 5
Posts: 63


« Reply #10 on: April 07, 2016, 08:43:10 PM »

  Finished my cap to the chamber. I like this better than the above. I circled the top side with the resistors and fed the wires through the holes on the servo arm. Then I soldered an eyelet to batch of wires sticking out.


Logged

Duhjoker
Knight Lance Corporal
*

Force Alignment: 5
Posts: 63


« Reply #11 on: April 08, 2016, 12:07:55 AM »

  Think I'm going to have change the thread to $10 simple crystal chamber.

    I went out today a procured a crystal and an LED that's rated at 12v maximum so now I don't have to use the OG LED board. I can straight wire it to the switch!!!

So far the prices are

    LED ---------------------$2.79
    Candy saber-------------$1.00 to $1.99
    Servo horns--------------¢.10
    Eyelets -------------------¢.25
    Resistors -----------------$2.00
    Crystal -------------------$3.00

   
Logged

Duhjoker
Knight Lance Corporal
*

Force Alignment: 5
Posts: 63


« Reply #12 on: April 08, 2016, 07:44:19 AM »

       Ok the lil LED I procured today was not nearly bright enough to use. Got bored and decided to hook the power up to the LED that came with the candy saber and wow is it bright.

    I started a new pommel cause the experimental one was kinda ugly with glue and crap plus I wanted to use the un-cracked part of the red candy sabers blade. I ran out of super glue making the first one and its parts and do some dressing up with the wires and other parts but here's a preview..........


    It's super bright!!!!!!!


   Ok since the LED I bought is going unused it brings out total back down to....

Candy saber-----------------------$1.00 to $1.99
Servo horn-------------------------¢.10
Brass eyelets-----------------------¢.25
Resistors----------------------------$2.00
Crystal -----------------------------$3.00

                                                 $6.35 (+¢.99?)

   The prices for the servo horns, eyelets and resistors are about what you expect to pay a piece of bought in small bulk quantities. Except the crystal every thing I used I had lying around. I'm not a hoarder but I do save stuff that might have more than one purpose. I know I said this earlier but just use your imagination and experiment. The first try may not work so don't get discouraged and above all Have fun.
« Last Edit: April 08, 2016, 08:16:13 AM by Duhjoker » Logged

Duhjoker
Knight Lance Corporal
*

Force Alignment: 5
Posts: 63


« Reply #13 on: April 09, 2016, 01:10:00 AM »

All finished with the crystal chamber. Also added a thumbscrew to the blade tensioner


Logged

Duhjoker
Knight Lance Corporal
*

Force Alignment: 5
Posts: 63


« Reply #14 on: April 10, 2016, 09:30:37 PM »

  Ok so I decided to do a $5 upgrade to my $5 simple crystal chamber.


The clear plastic tube on the first chamber sucks horribly and scratches to easily. I used gold paint to make the chamber look more metallic but it still looked crappy to me unlit so I bought 3 Brass pieces and cut a slit one for the crystal view. The middle piece that I'm using as a coupler just needs a tiny bit of filing to get the top piece and bottom piece to lock together. I'll have to make some drill holes for wires and may use an eyelet or two.

Logged

Pages: [1] 2   Go Up
Send this topic | Print
Jump to: