Click here for lightsabers
  • Home
  • Help
  • Login
  • Register
Pages: 1 2 [3] 4 5 ... 7   Go Down
Author Topic: Misread Prophecy V3  (Read 22540 times)
Isola815
Knight Commander
*

Force Alignment: 594
Posts: 1214


"Most Redacted"


« Reply #30 on: January 05, 2017, 01:52:27 PM »

I am using an existing on/off switch, but the sort I wanted doesn't exist. So I am building a plate that will operate the switch that will be hidden in the hilt and very much not intended for this purpose. Hard to describe but will be clear as day when I post up the pictures.

 I need this thing to look old and cobbled together, so a shiny AV switch or pristine new plastic switch was a definite no no.
Logged

Lord Canterbury
Dark Knight of The Scorpion Order
Knight Commander
*

Force Alignment: -1313
Posts: 1972


Fish Fingers & Custard


« Reply #31 on: January 05, 2017, 02:22:20 PM »

Yep - that's a weathered hilt all right!

Nice work!
Logged

Winning? Is that what you think it's about? I'm not trying to win. I'm not doing this because I want to beat someone, or because I hate someone, or because I want to blame someone. It's not because it's fun. God knows it's not because it's easy. It's not even because it works, because it hardly ever does. I do what I do because it's right! Because it's decent! And above all, it's kind! It's just that. Just kind.


~ The 12th Doctor in "The Doctor Falls"

Corwyn VonBeck
Knight Commander
*

Force Alignment: -340
Posts: 1071


Grey Knight


« Reply #32 on: January 05, 2017, 04:57:13 PM »

wow... I saw a complaint once about the thinness of the walls at the recessed grips, but that worked heavily to your advantage here! I love how eaten away things are after that soak... really enhances the whole "Ancient Relic" backstory... although "Ancient Relic that was accidentally dropped in a volcano a few times, and lost at sea at least once" may be more fitting. A more extreme weathering I dont think we will ever see! awesome work man.
Logged

scifidude79
8-bit Defender of the Aeon Order
Knight Commander
*

Force Alignment: 2106
Posts: 6326


« Reply #33 on: January 05, 2017, 05:11:59 PM »

OK! Sorry for the epic pic post... but I did more than I thought I would today.

Don't ever apologize for awesome.  I can't speak for anyone else, but I didn't want the pics to end.  You're truly creating a masterpiece here.

I'm going to have to try this drain cleaner trick sometime.  Is there a particular brand anyone recommends, or is it just doer's choice?  Also, did you dillute it at all, or is it just straight drain cleaner?
Logged

Calculon
Knight Commander
*

Force Alignment: 435
Posts: 560


We Will Win!


WWW
« Reply #34 on: January 05, 2017, 06:02:21 PM »

Holy damn! What a transformation! Nice job with the weathering. It looks layered like abuse from different encounters. Plusages!
Logged

The Wolfpack Lives!

Taegin Roan
Knight Commander
*

Force Alignment: 2066
Posts: 6252


Lord of the Force


« Reply #35 on: January 05, 2017, 09:05:03 PM »

I think that saber is now too beautiful to even think of dueling with. But man, what a great job you've done at killing that thing. Cant wait to see the finished product.

point to you
Logged

"I am the Outcast's Shadow" - Taegin Roan
"Confronting fear is the Destiny of a Jedi" - Luke Skywalker
"So this is how liberty dies: with thunderous applause." - Padmé Amidala

Isola815
Knight Commander
*

Force Alignment: 594
Posts: 1214


"Most Redacted"


« Reply #36 on: January 05, 2017, 10:31:07 PM »

Don't ever apologize for awesome.  I can't speak for anyone else, but I didn't want the pics to end.  You're truly creating a masterpiece here.

I'm going to have to try this drain cleaner trick sometime.  Is there a particular brand anyone recommends, or is it just doer's choice?  Also, did you dillute it at all, or is it just straight drain cleaner?

I used Draino brand pellets. You just mix it with cold water and it dissolves. Do it outside though because the gas from the chemical reaction will fill a house or workshop very quickly.

I used one full container lid of pellets with 1.5 gallons of water. VERY strong mix. Use less if you don't want it as severe as mine Wink

Also thanks to everyone for the comments Smiley
Logged

scifidude79
8-bit Defender of the Aeon Order
Knight Commander
*

Force Alignment: 2106
Posts: 6326


« Reply #37 on: January 06, 2017, 04:36:01 AM »

Thanks a lot for the info on the drain cleaner.  One thing I love about this forum is the never ceasing flow of great ideas.  Smiley
Logged

Jeadus Teal
Knight Arbiter
*

Force Alignment: 203
Posts: 298


« Reply #38 on: January 06, 2017, 09:48:59 PM »


Wow it is amazing how your saber has gone from this top image to this incredibly detailed custom with all the damage and weathering.


I like that you are adding a crystal inside the saber too.


Kudos for showing your progress for your custom saber. It looks incredible Isola815 and a point to you.
Logged

" Who's the more foolish? The fool, or the fool who follows him?"

“Do or do not. There is no try.”

Isola815
Knight Commander
*

Force Alignment: 594
Posts: 1214


"Most Redacted"


« Reply #39 on: January 07, 2017, 03:28:17 PM »


I like that you are adding a crystal inside the saber too.


Kudos for showing your progress for your custom saber. It looks incredible Isola815 and a point to you.


Thanks Smiley It won't be a full-on crystal chamber. Just a nice little nod to it Smiley point right back at you for taking the time to look through my thread, thanks Smiley


I haven't been able to do any work on the saber so far this weekend as I had to get a bunch of furniture from Ikea, build it, move old furniture, move the stuff, clean... you all know how it goes. It's a time drainer Sad

I need to run out and get some matte clear. I only have super high gloss on hand at the moment Sad I also need to make a trip to a 12v store and pick up some clear speaker wire. So I may spend most of my day tomorrow running around getting things for this project (that I forgot to get before I started) instead of spending it on actually doing this project. Poor form on my part.  I'm hoping I can at least get my blade plug made, and blade modified. If I can get those two done I will consider my efforts from the other day as part of my weekend work, and therefore my weekend a success  Grin
Logged

Jediseth
Knight Commander
*

Force Alignment: 828
Posts: 1551


"If I told you, you wouldn't like it." Han Solo


« Reply #40 on: January 07, 2017, 04:28:19 PM »

I love crystal chambers. I can't wait to see it when your completely finished.
Logged

Guardian : GB, FOC Red, V4, 11-15                        Reaper: V4, BR, 4-17
Chosen One CE : Emerald, V4, 12-15
Consular: Emerald V4, 1-16
Manticore: BR, FOC Orange, QD, V4, 11-16
Monarch: Emerald, V4, 2016 Autumn Raffle -1st
Arbiter: V4, SD, Silver FOC, QD, 3-17
Archon V2.1, Diamond, 4-17

Isola815
Knight Commander
*

Force Alignment: 594
Posts: 1214


"Most Redacted"


« Reply #41 on: January 08, 2017, 12:57:37 PM »

I really only got about 15 minutes to do anything sorry guys. Here's a few pics:

Started work on a custom blade plug. I had a crappy midgrade lying around that (unknowingly) volunteered as tribute.

Hacked a piece off for the plug:


Notched it:


Notched the blade as well:


I washed all the dust and plastic out of the blade, but will need to clean up the film, reinsert it, glue it, cut it out of the notch, glue some more, then test it.

I'm aging my "bypass" wires. Someone at work had a fantastic idea of using clear wire so I can make the wire inside corrode instead of using black or red wires. So I have one soaking in salt water and one soaking in drain cleaner to see which one gives me a better corroded effect.


Tomorrow's job is to modify the covertech wheel:


And that's really all I've got for you sorry. This weekend got taken up with a hell of a lot of home reorganizing that I just didn't want to put off any longer than I had to.
Logged

scifidude79
8-bit Defender of the Aeon Order
Knight Commander
*

Force Alignment: 2106
Posts: 6326


« Reply #42 on: January 08, 2017, 04:25:30 PM »

I love how you post cool stuff, and apologize for not posting more.  It's all good, dude.  Smiley

That's a nifty tip on the corroded wire trick.  Plus, you're using Batman and Wonder Woman glasses, which is cool all by itself.  Grin
Logged

Isola815
Knight Commander
*

Force Alignment: 594
Posts: 1214


"Most Redacted"


« Reply #43 on: January 09, 2017, 03:16:54 AM »

Currently bower-birding at work looking for things to make my blade plug out of  Cool

Logged

Isola815
Knight Commander
*

Force Alignment: 594
Posts: 1214


"Most Redacted"


« Reply #44 on: January 09, 2017, 02:25:07 PM »

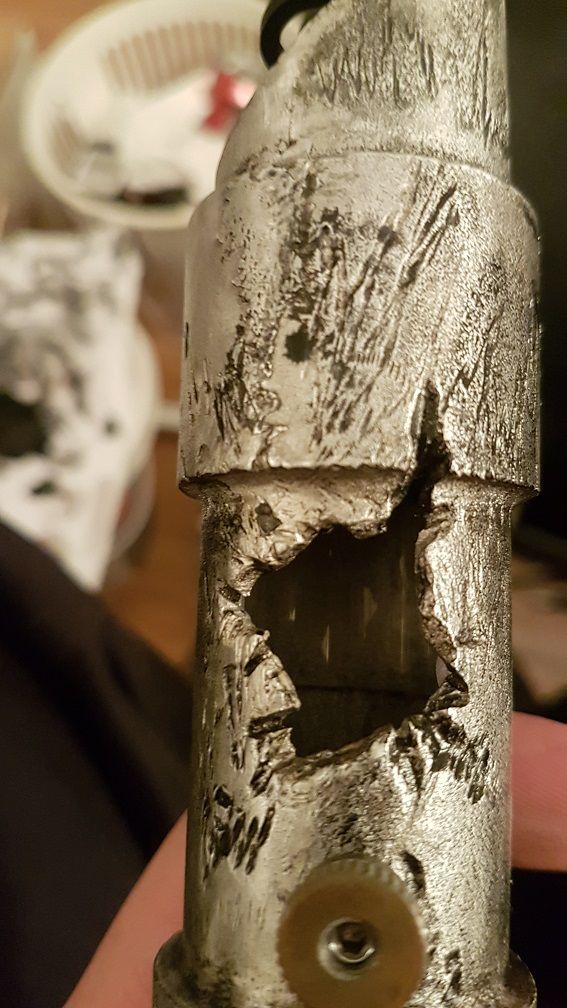
So today was some of those fiddly little jobs that take up heaps of time, but really help it all come together  Grin

I attached the crystal to the LED module. Just with hot glue so I can remove it if I ever want to steal this SRD module for a different hilt and put something else in this hilt. I ordered a couple of plugs that I might wait on before I wire this back up that will give me a sort of QD option that I could install on all my other sabers. I really would love to use the SRD in a better hilt and leave this to just be green. So I'm thinking whatever US hilt I choose to have SRD in, when I order it, I'll order it as AS or CG and move that module into the Prophecy, and have my SRD moved into something cool Smiley


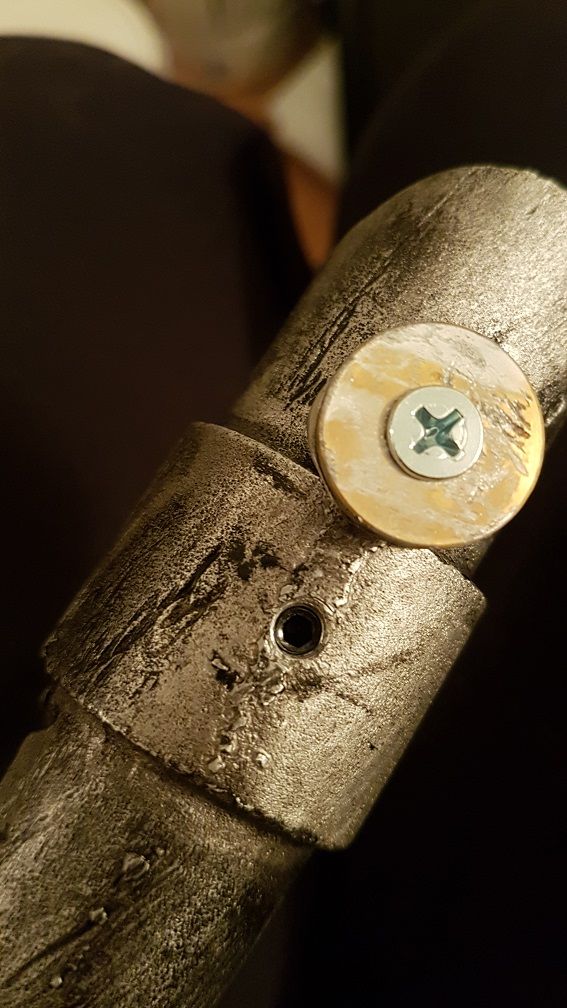
I turned one of the thumb screws (still to be textured and weathered up a bit more. just a test fit for now) into my LED module retention screw because OMFG I am sick of hearing these things rattle around when the blades are out.


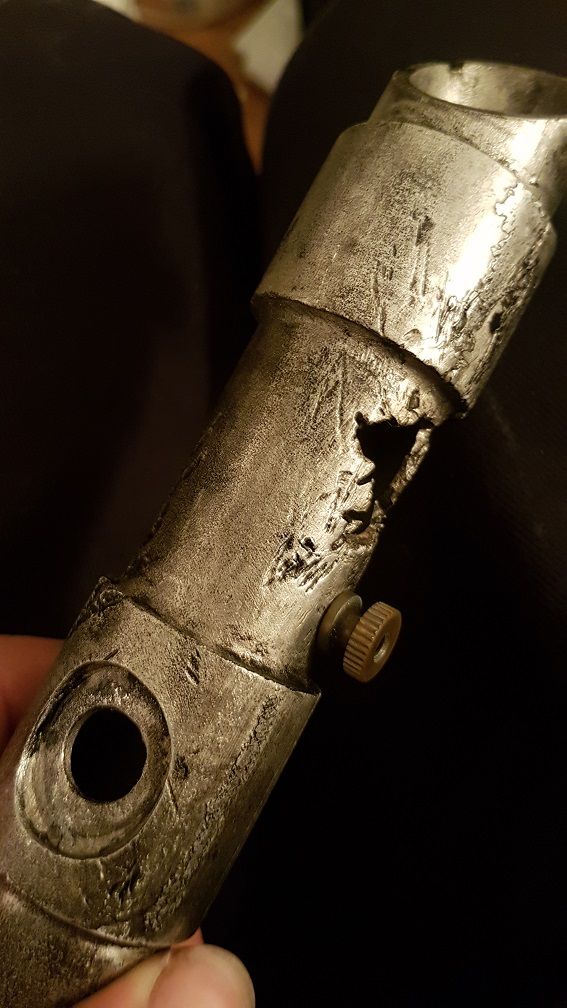
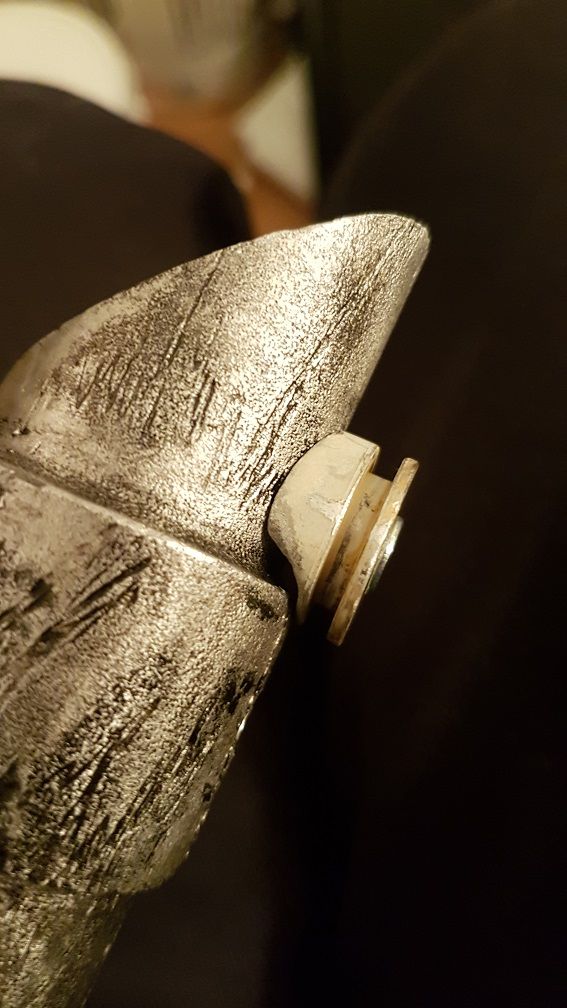
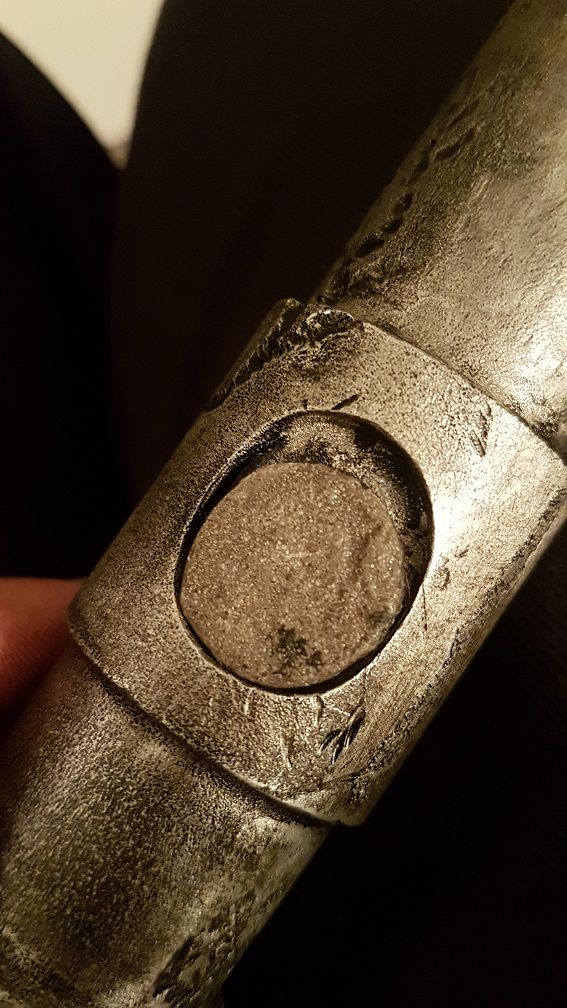
Covertech wheel, notched and attached. Just need to take it in to work tomorrow (because the bench grinder will be much easier than the dremel) and take the fraction of an inch off the top of that screw as well as cut down the length of it a bit. Then once I know it's fitted correctly I can finish making it dirty. FYI it already slides in and out of the clip as it is with that slight overhang, I just want it to look damaged instead of one shiny new screw. I also installed a black blade retention screw instead of the shiny silver ones. Also got one of these black ones for my Catalyst too Smiley


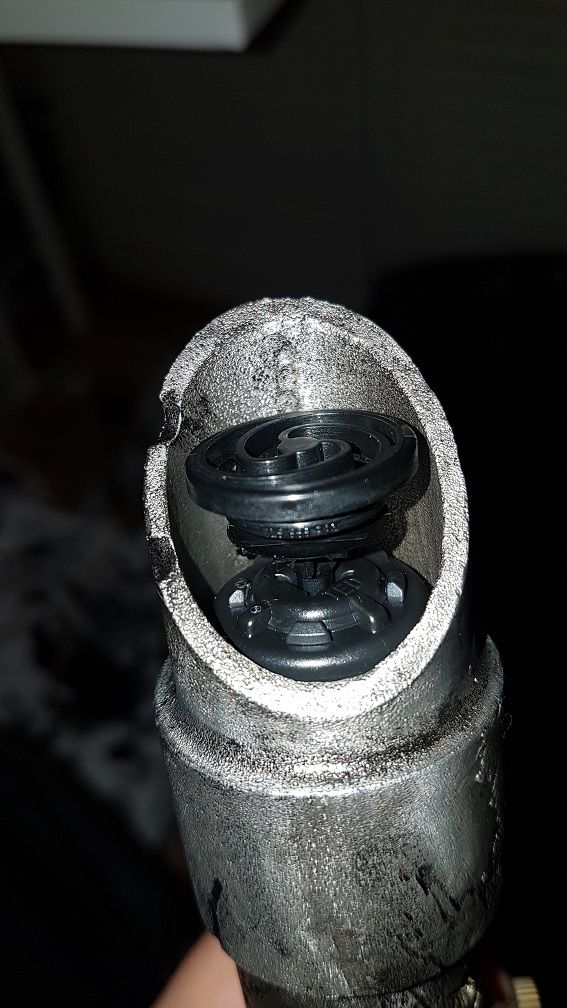
So my blade plug. This is how it will sit, with the notch. If you look on the back wall you can see the plastic of the piece of blade. But it leaves the window open for the crystal to be seen. The blade that I cut will provide the same service.


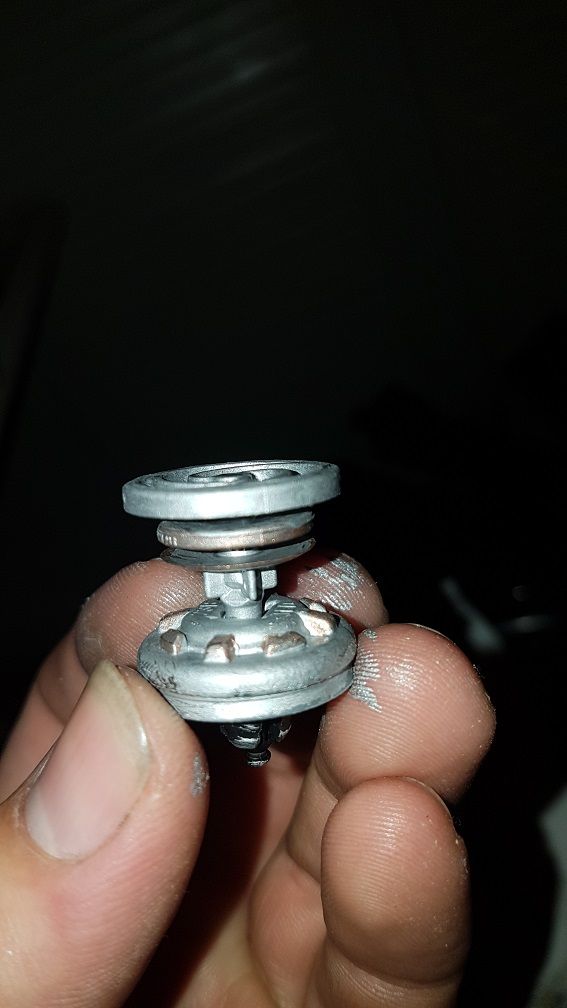
The top of my plug is going to be this


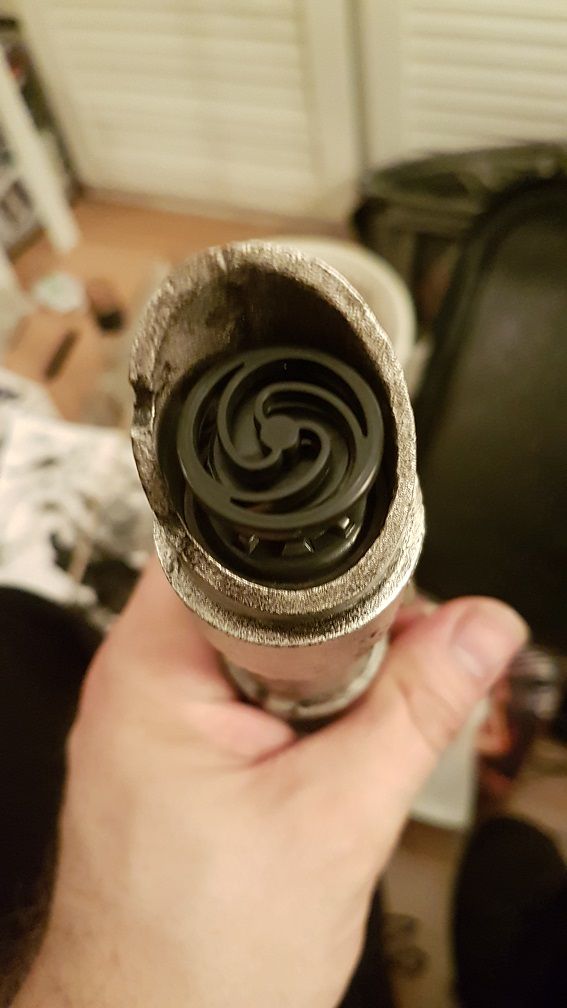
Which will sit as it does in those pictures, but I am painting it up to look more mechanical/electrical. That black thing it's resting in is just some round piece of plastic to stop me getting paint on my bedside table, it's not part of the plug.


This will take some time, a few coats, a bit of swearing and some very painted fingers, until I have it looking like an old, worn, dirty emitter assembly.


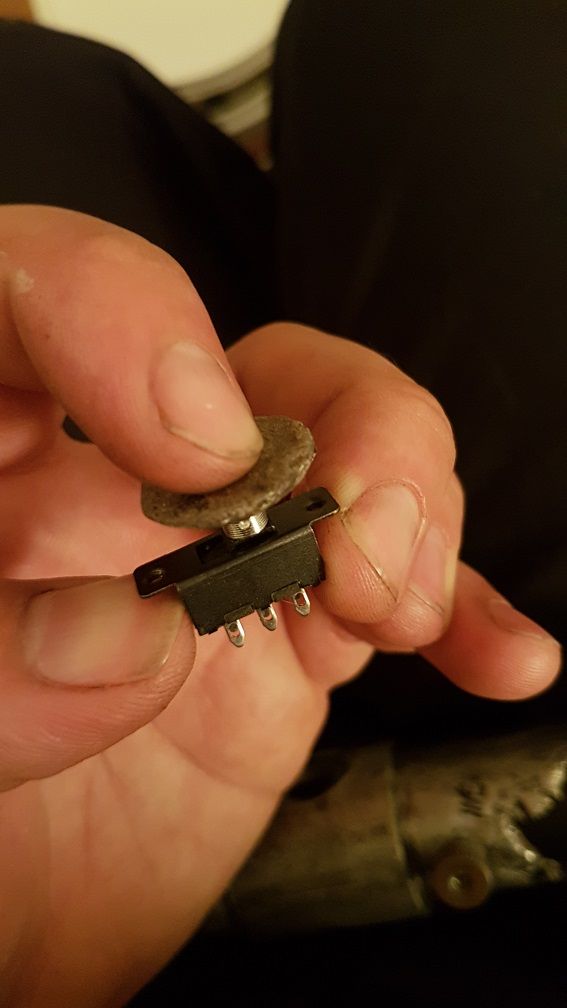
RevanReborn - this part might interest you as you were wondering about my switch.

So as I said I'm not building one from scratch. I am using this small 2 position on/off slider switch (something different instead of all the push button sabers).


And for the top of the switch both to cover the switch in the hole, and to fit with the saber design, I have assembled a little plate of sorts.


This will be fixed to the top of the switch and will be the thumb control for the on/off slide function.


 Now you guys can probably see why I had to extend that switch area and take it out of round. I needed a channel for my switch plate to slide up and down in.


Apart from that I shot a couple coats of clear over the hilt and the pommel. Once I have finished texturing and weathering all the other piece I'll shoot clear over them too.

Ok, that's all for now!
Logged

Pages: 1 2 [3] 4 5 ... 7   Go Up
Send this topic | Print
Jump to: