Click here for lightsabers
  • Home
  • Help
  • Login
  • Register
Pages: [1]   Go Down
Author Topic: Mid-grade wrinkles  (Read 1654 times)
Mo24678
Knight Apprentice
*

Force Alignment: -6
Posts: 22


« on: February 11, 2017, 12:03:53 AM »

Hi
So I own an US for 6 months, which I haven't used to duel and I keep it displayed on the US stand in a horizontal position. Over the last couple of months, there are very noticeable wrinkles/creases running in a spiral from the middle of the blade down to just above the emitter.
Maybe it's because it's too near the window and it gets cold here? I'm not really sure why it happened, but if anyone had or heard of similar issues can you advise on if there's a way to smooth the creases out?

p.s I tried to attach an image but I couldn't work out how to do it!
Logged

Landen Se-Sentien
Shadow Sentinel of the Manticore Order
Knight Commander
*

Force Alignment: 1828
Posts: 3781


I work in the Darkness in service of the Light


« Reply #1 on: February 11, 2017, 12:17:54 AM »

Heat variations will cause wrinkles in the blade film. Sometimes it will fix itself. If not, you can remove the glue from the inside of the blade, and then a few taps of the blade while it's vertical or some twisting with your pinky finger should straighten it out.
Logged

Signature banner by DarthScrub

Vivectius
Dark Liberator of Lost Posts
Knight Commander
*

Force Alignment: -719
Posts: 2018


I always feel like he’s judging my posts.


« Reply #2 on: February 11, 2017, 05:00:43 AM »

 Roll Eyes

Let me guess, at night the heat is lower than it is during the day, and during the day at times the blade is in direct sunlight.

As Landen said, heat can cause the film it wrinkle (it's really just cellophane).  His suggestions on how to fix it are pretty much spot on.  Move it to a new location first to see if it works itself out.  I'd actually have it sit vertically for a couple of days before putting it back on the stand.  Try tapping it on the floor vertically first, and if that doesn't work, then remove the glue and tap it again or give it a twist.

Also, since it's only been 6 months, the saber is still under warranty.  You can contact US at info@ultrasabers.com and see what they say.  Remember, removing the glue in the blade will void the warranty, so I'd contact them before moving to that step.
Logged

You only live once. Wrong.
You only die once.  You live every moment of your life.
The question is, are you alive, and living your life? Or just here, and watching your life go by?
------------------------------------------------------------------
I am the bone of my sword
 Steel is my body and fire is my blood
 I have created over a thousand blades
 Unknown to death
 Nor known to life
 Have withstood pain to create many weapons
 Yet those hands will never hold anything
 So, as I pray, Unlimited Blade Works.

Mo24678
Knight Apprentice
*

Force Alignment: -6
Posts: 22


« Reply #3 on: February 11, 2017, 11:00:36 AM »

Thank you both so much for the helpful advice. I'm not confident removing the glue, so I'll see if US are happy to replace it or send it back for them to do it. If not, I'll try what you said. In the meantime, I'll keep it vertical and away from sunlight for a few days and see what happens.
Much appreciated!
Logged

Landen Se-Sentien
Shadow Sentinel of the Manticore Order
Knight Commander
*

Force Alignment: 1828
Posts: 3781


I work in the Darkness in service of the Light


« Reply #4 on: February 11, 2017, 12:55:31 PM »

Also, sometimes smacking it against couch cushions can work. Viv and I know a lot about doing that.

Just try to stay away from the TV. It upsets the Mrs. Well, my Mrs. anyway.
Logged

Signature banner by DarthScrub

B1ondeange1
Game Master
Knight Commander
*

Force Alignment: 3214
Posts: 5377


You can't take the sky from me....


« Reply #5 on: February 11, 2017, 03:15:28 PM »

I would put it in a different area first out of the sun. I don't think warranty covers wrinkles in the blade film, not after they have been safely delivered and it could be related to use/ user error (a local friend enquired about film wrinkles once). You can try hitting something lightly with it as that can straighten out wrinkles, but it can also put more in. Sometimes even just wiggling the still glued film by sticking your finger inside the blade can help.

Reality is, if you want to use it then it will get wrinkles. It happens. I've given up being worried about it. Best solution I found, was my two worst wrinkled blades were the ones I cut down and bye bye wrinkles! Grin
Logged

M4-QT droid
Shayla Jaste Cosplay
Perth Spartans

archon v2.1, consular, dominix v3 LE, bellicose, 2x dark initiate v3 LE, dark initiate v2 LE, Aeonix v2, raven, 2x shock, 2x manticore, electrum wind em/v4 obs

Mo24678
Knight Apprentice
*

Force Alignment: -6
Posts: 22


« Reply #6 on: February 11, 2017, 08:58:21 PM »

I would put it in a different area first out of the sun. I don't think warranty covers wrinkles in the blade film, not after they have been safely delivered and it could be related to use/ user error (a local friend enquired about film wrinkles once). You can try hitting something lightly with it as that can straighten out wrinkles, but it can also put more in. Sometimes even just wiggling the still glued film by sticking your finger inside the blade can help.

Reality is, if you want to use it then it will get wrinkles. It happens. I've given up being worried about it. Best solution I found, was my two worst wrinkled blades were the ones I cut down and bye bye wrinkles! Grin

Thanks that makes sense. How would I cut it down? I tried searching for a video but can't find any and I don't wanna mess it up even more. I'm sorry I'm such a noob. I have no idea what tools/skills I would need to attempt something like that.
Logged

B1ondeange1
Game Master
Knight Commander
*

Force Alignment: 3214
Posts: 5377


You can't take the sky from me....


« Reply #7 on: February 12, 2017, 06:43:29 AM »

A tutorial I posted

So I just sent this via PM to Jedi Knight Matatabi, but figured I would post it here as well. Maybe It'll help someone else when they want to cut their blades Smiley Keep in mind this is what I did and found to work, others may have other methods or suggestions.


----------------------------------------------------------

Ignore my messy hot gluing, I was tired when I did it and I only had my old damaged hot glue gun which burns the glue making it yellow, couldn't find my new one and I had to get them glued up.


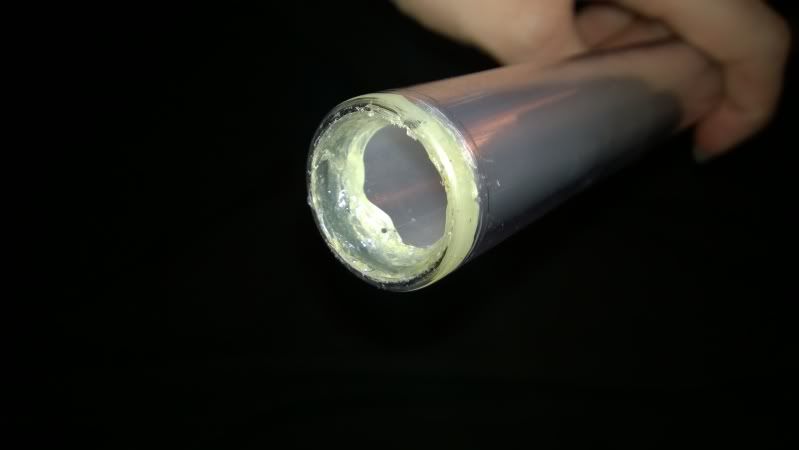
That is the inside of the blade- if you look at your new one (which wont be quite as messy on the gluing) you'll see that they also have a bit of a gap at the bottom of the blade between the blade and the film, it allows them to glue the film in place properly. Your original blade will probably be about 5-10mm (sorry, I don't know the inches conversion, but itll be small) so that's about what I did.

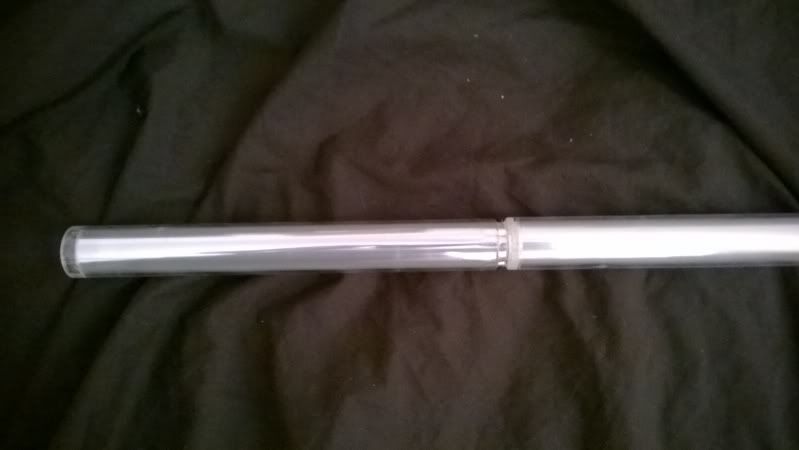
Use the pipe cutter to cut around at the length you want. Do it carefully and slowly, you are better off taking a long time than damaging the blade- coz it makes the blade bend quite a bit where you are cutting it. When you finally break through it, the section you are cutting off will still be attached to the film via the original hot glue- so when you pull that, the film will move out of the main blade (imagine the next picture as still attached, I didn't think to actually take photos as I went).


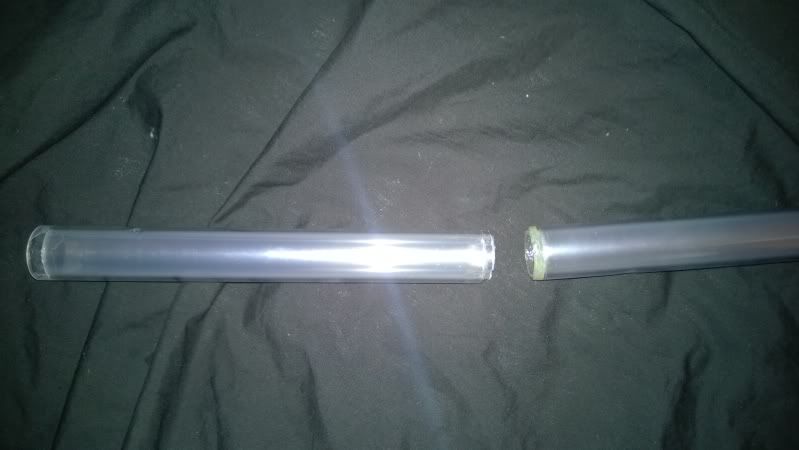
You can see that about 5mm of the film is sticking out of the offcut. What I did was pull the offcut down to expose that 5mm of film and used a very sharp knife to cut it flush with the main blade plastic - I used one of those box cutters/ safety blade with the trapezoidal shaped replacement blades, and used a fresh blade. Or you could use a snap and cut knife, craft knife, scalpel, scissors, but make sure they are very sharp coz there are A LOT of layers of thin film to get through and it'll take a while, and you don't want to make too big a mess of it!

The first time I attempted this I discovered that it was damn difficult to push the film back inside again- what I did was use the offcut to push it back in, since the offcut film hanging out the end is the same length as the distance you need to push the blade film back in. This was much easier than trying to push it in with my fingers, as all that did was buckle and warp the film without moving it. Then run a bead of hot glue around the inside of the base of the blade, making sure it contacts the film. Since my hot glue gun was buggered and the tip is all ruined anyway, I used the hot tip to smooth it out a little, then added a bit extra glue coz it didn't quite grab all the layers properly the first time.


If you are cutting your blade down a bit and have the space to do so, I would recommend doing a practice run at a longer blade length to get a feel for how to do it, that way if you do stuff it up you've still got the extra to fix it with. I was cutting my blades from 36" to 28" so I had plenty of room to practice on one. I also started with one of my older blades with warped film, coz if I ruined that one it wouldn't matter, I've got plenty of blades. As it was it actually fixed the warping and now you can't tell which was the damaged one Smiley


Cant for the life of me find the actual tutorial thread i made though  Roll Eyes it had a few tool pics in it

EDIT: here we go, found the actual tutorial. For some reason I didn't get a hit with my first search Smiley How to shorten your blades
Logged

M4-QT droid
Shayla Jaste Cosplay
Perth Spartans

archon v2.1, consular, dominix v3 LE, bellicose, 2x dark initiate v3 LE, dark initiate v2 LE, Aeonix v2, raven, 2x shock, 2x manticore, electrum wind em/v4 obs

Mo24678
Knight Apprentice
*

Force Alignment: -6
Posts: 22


« Reply #8 on: February 12, 2017, 02:34:52 PM »

Brilliant tutorial! Thank you very much indeed.
Logged

Pages: [1]   Go Up
Send this topic | Print
Jump to: