Been busy as a mofo of late, but finally got a few minutes to make a little more progress on this today.
First thing I had to do was take the 12mm switch hole out to 16mm for the recharge port idea that I'm going to incorporate into this build. I'm using a single cell 5V usb power pack again, but I want a port outside the saber I can plug in to this this instead of having to remove the pommel like on the Mustafar.
I thought I had a 16mm drill bit... but I don't. So I had to mill it out with the Dremmel.
Then to scuff up the surface with a very course grit sandpaper to provide as much texture as I can... or the next part won't work!
This involved a lot of weeping and many apologies to the hilt. It felt like taking a pen knife to the Mona Lisa... The Liberator is such an underrated hilt and I felt so bad for scratching the hell out of such a beautiful piece

Heartbreaking stuff... But I have decided that seeing as this Liberator has been such a trooper to become the donor for this build. I am going to replace it with a full sound equipped version down the track. I still want a nice stock liberator in the collection

You can see in this photo that the hilt has been sanded in multiple directions to make sure the surface is very scuffed
Because I am going to need to use this stuff

Because of these two reasons
That's right. I'm going to cover this sucker in WOOD! I've seen other people do leather, and car wraps and contact. But I didn't want a cheap looking imitation wood grain. I want actual natural material. So I have taken the bark from a melaleuca tree (also known as a paper bark tree) and am going to attempt to wrap the hilt with it.
So... apply glue liberally to both surfaces
Wait for it to start to go tacky and then
You can sort of get an idea how thick the layer of bark is from those photos and these
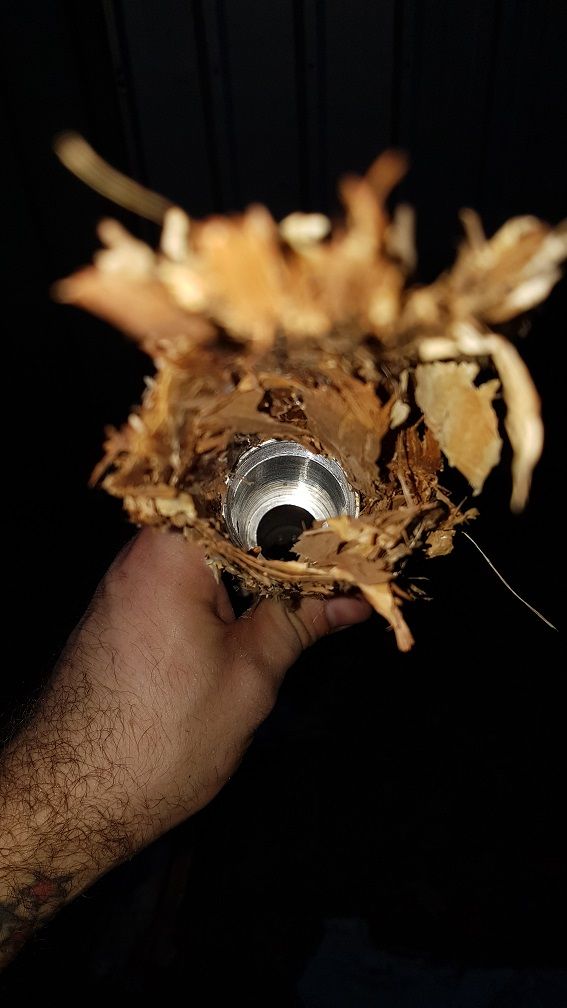
The idea is to let the glue dry, and then hand sand the bark down to 1. Get rid of the flaky layers so it actually has a smooth finish, almost like a staff, and 2. Try to bring the shape of the hilt back into the design. At the moment the bark is about 1/8" thick. But I should be able to take that down to 1/32" and still have a good coverage that will show the natural grains and direction of the wood patterns in the layers. If I accidentally go too thin, then I'll glue another piece on to patch it and keep sanding until it's back to where it needs to be. Adding patches or extra pieces will actually help add more depth to it and I will probably wind up doing that even if I don't screw it up the first time. I imagine that I will stuff it up at least once though as I have never tried this before. I'm not even sure if it will work


I have also ordered a yari extension that will be getting the same treatment when it arrives.
That's all the update I have for you guys for now. I haven't done any work on the other two builds as yet.
Now to watch the glue dry...