Click here for lightsabers
  • Home
  • Help
  • Login
  • Register
Pages: [1] 2   Go Down
Author Topic: Outer rim lab updates: Rev's technomancing journal  (Read 3921 times)
RevanReborn
Technomancer of the Graflex Order
Knight Commander
*

Force Alignment: -1086
Posts: 1121


« on: February 18, 2017, 02:34:56 PM »

LC inspired me lately with some of his threads- got the idea to create one place to catch a lot of my tinkerings, brainstorming, testing etc, and not be just flinging this stuff all about the forum lol.  So now a lot of my general technomancing fun can just collect here- pretty handy/ convenient Smiley.  Sort of like a log for the outer rim laboratories.  Just keep your safety glasses close lol, cause I can't gaurantee I won't be blowing some stuff up. 

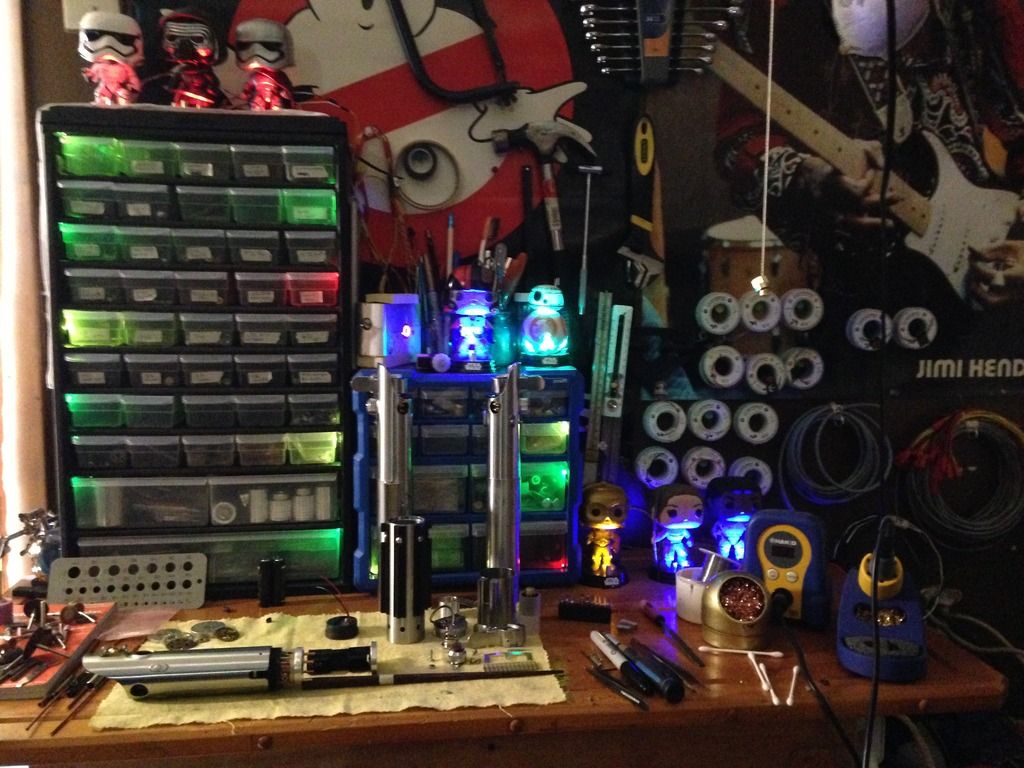
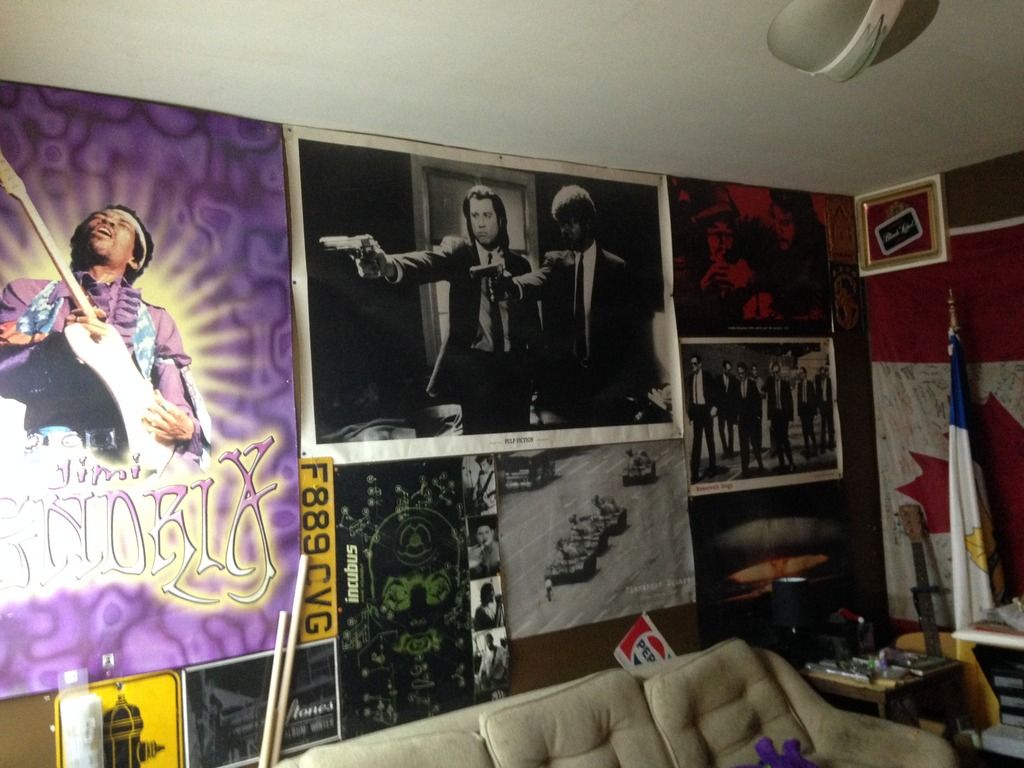
Haha, so, on that note, welcome to the outer rim lab Smiley
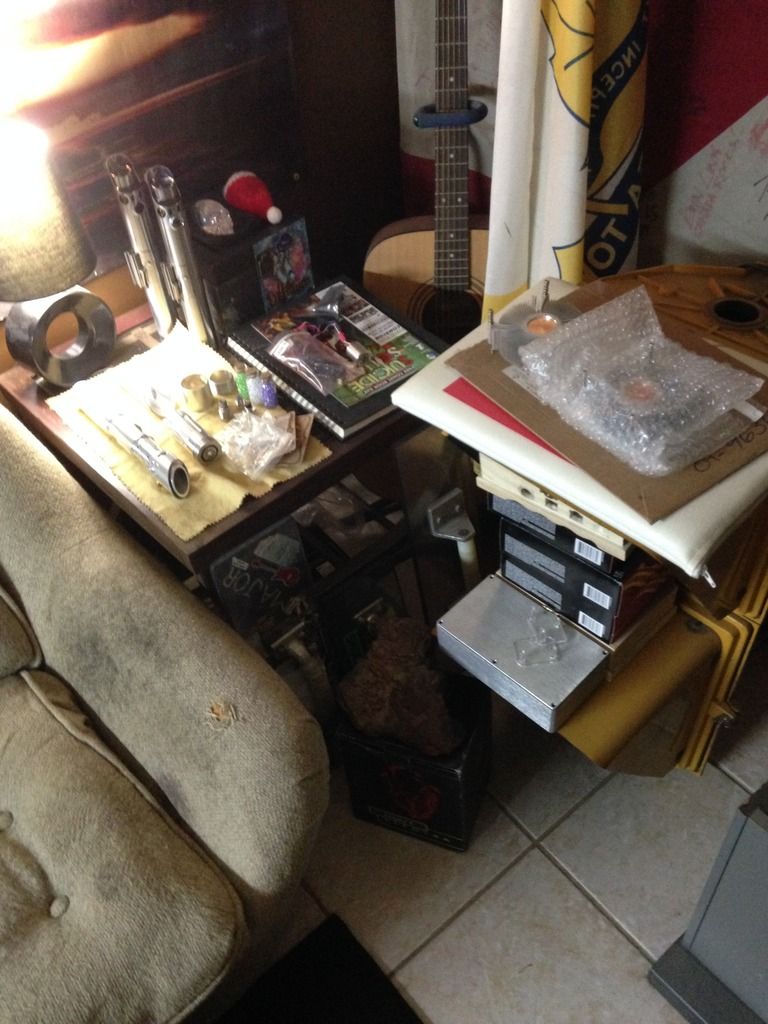
.  My humble little hang out-  basically just a little hobbit's work bench jammed in a corner lol, tho it's ever expanding...and I'm already at the point where I need a bigger space- so I'll keep you posted on that. 

But yeah, what sketchy technomancing lair would be complete without flickering/ shifting rgb lightning in the parts cabinets and some bobbles to nod as you work lol.


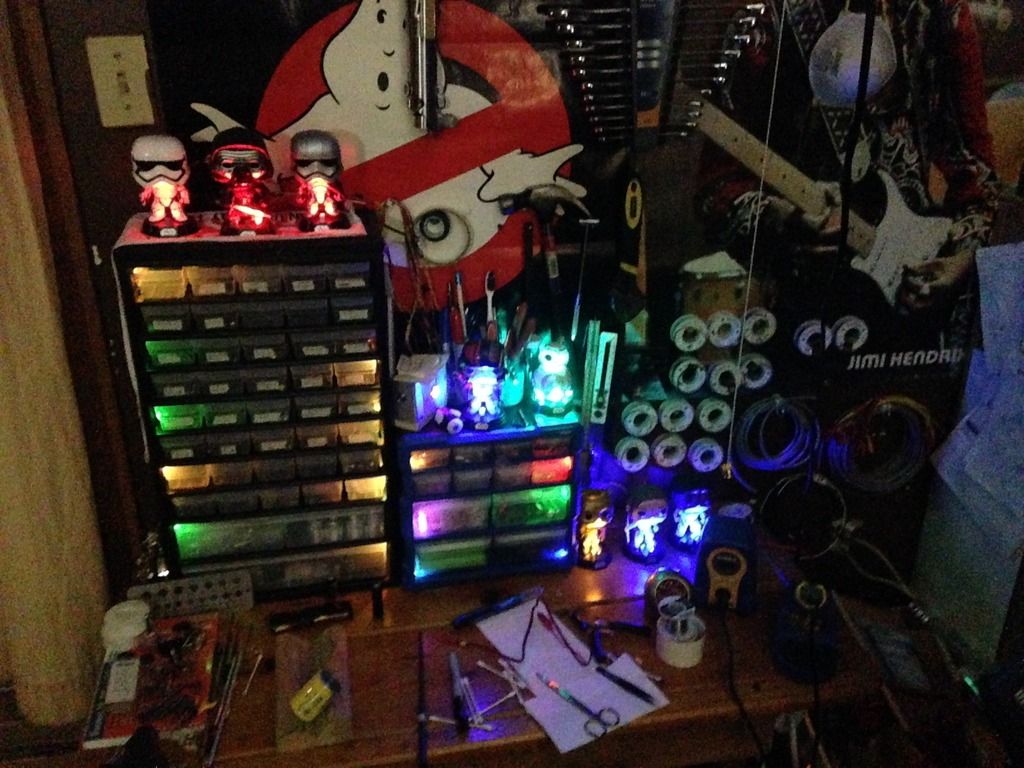
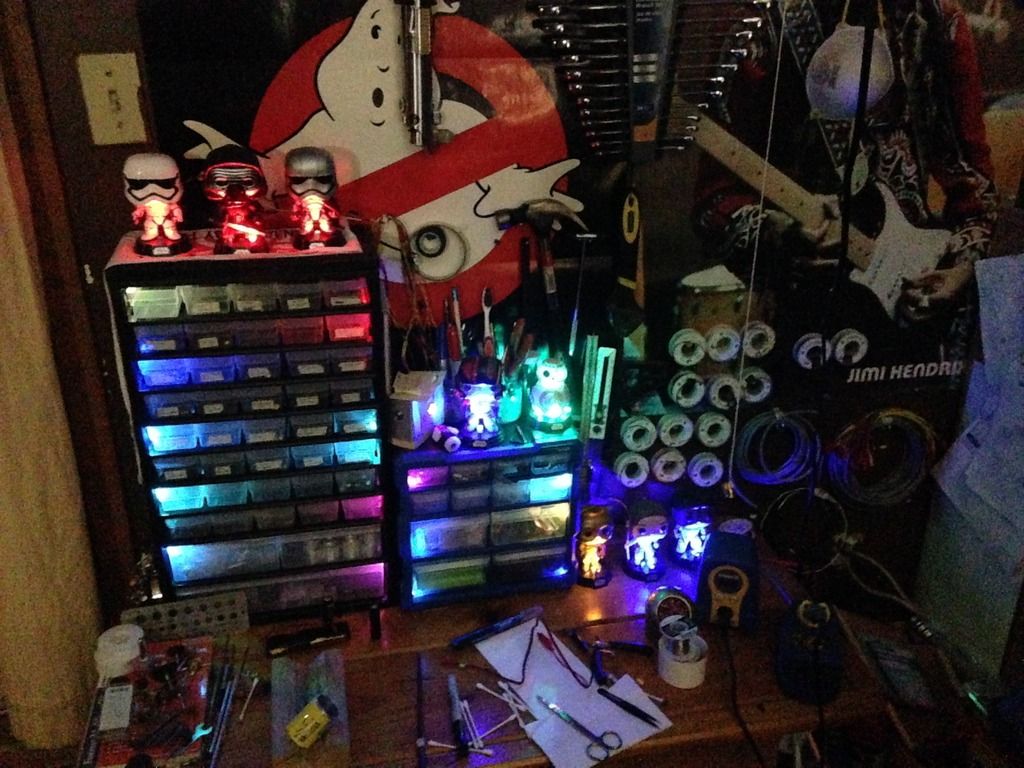
Piles of guts, projects at various stages, commissions, upcoming surprise gift sabers, etc, everywhere you look (hence the pending changes to space lol).


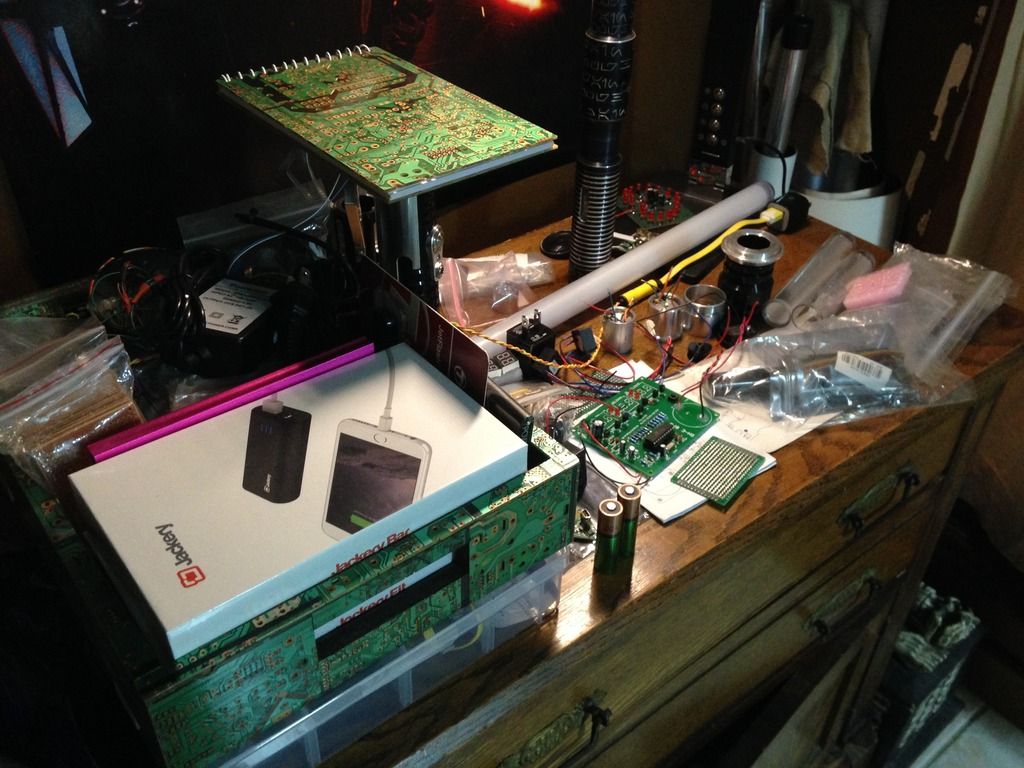
The circuit board note book isn't leveiting lol, it's obscuring a project for someone.

They're like 'on deck' circles in ball- they're staying warm etc lol.  But I hate how cluttered it gets, I'm a neat freak kinda lol. 
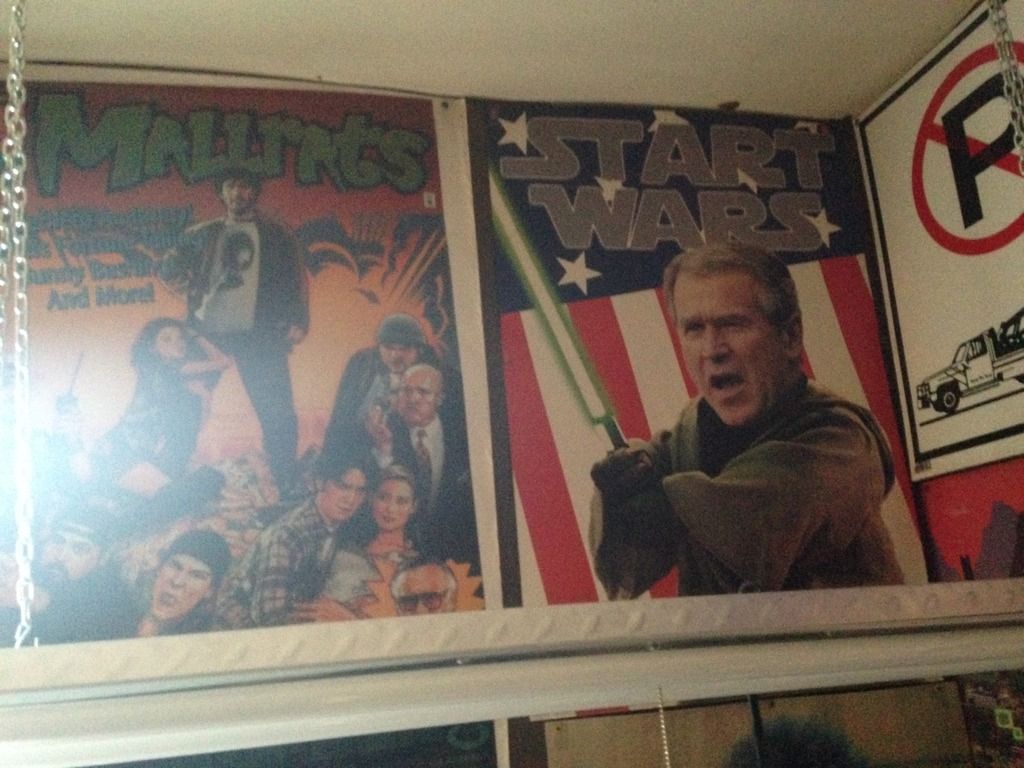
You'd be surprised how much stuff I have jammed in this little room lol, at the stuff I can crank outta this little corner.  Bins on top of bins on top of bins, inspirational posters, working traffic lights and crosswalk signs, you get the idea- saber lab/ man cave.


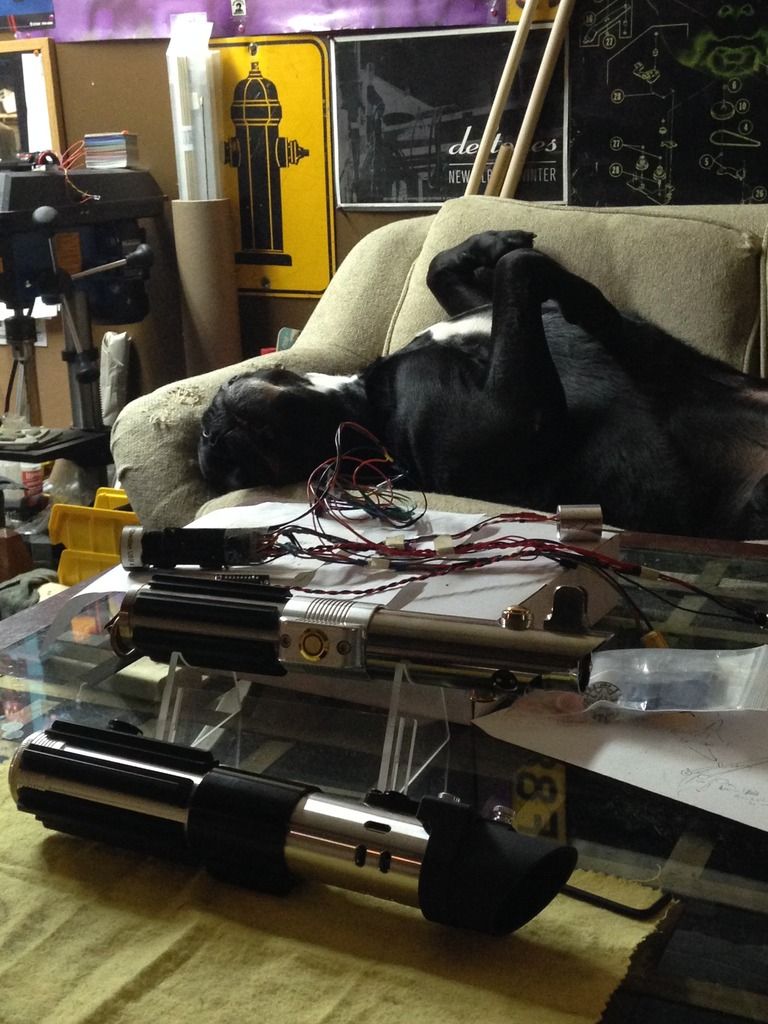
So yeah- feel free to drop in here any time you wanna see what kinda bizarre shenanigans I'm up to ATM in general- just watch out for the giant guard dog.


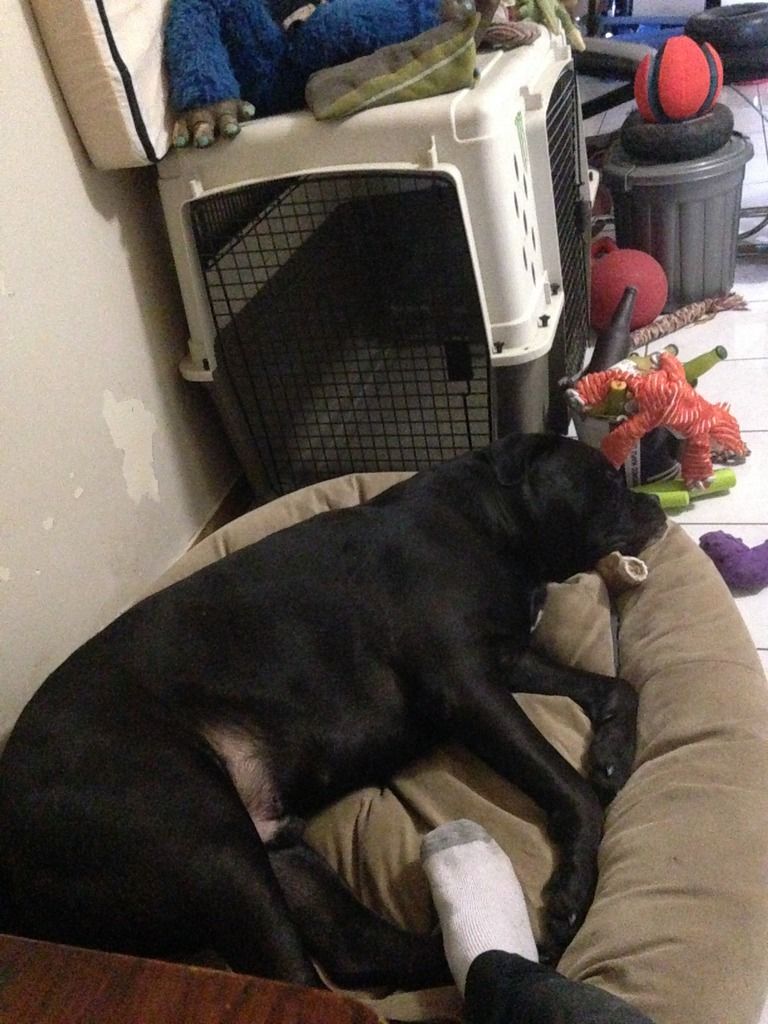
... (ahem!) I SAID, just watch out for the giant guard dog.

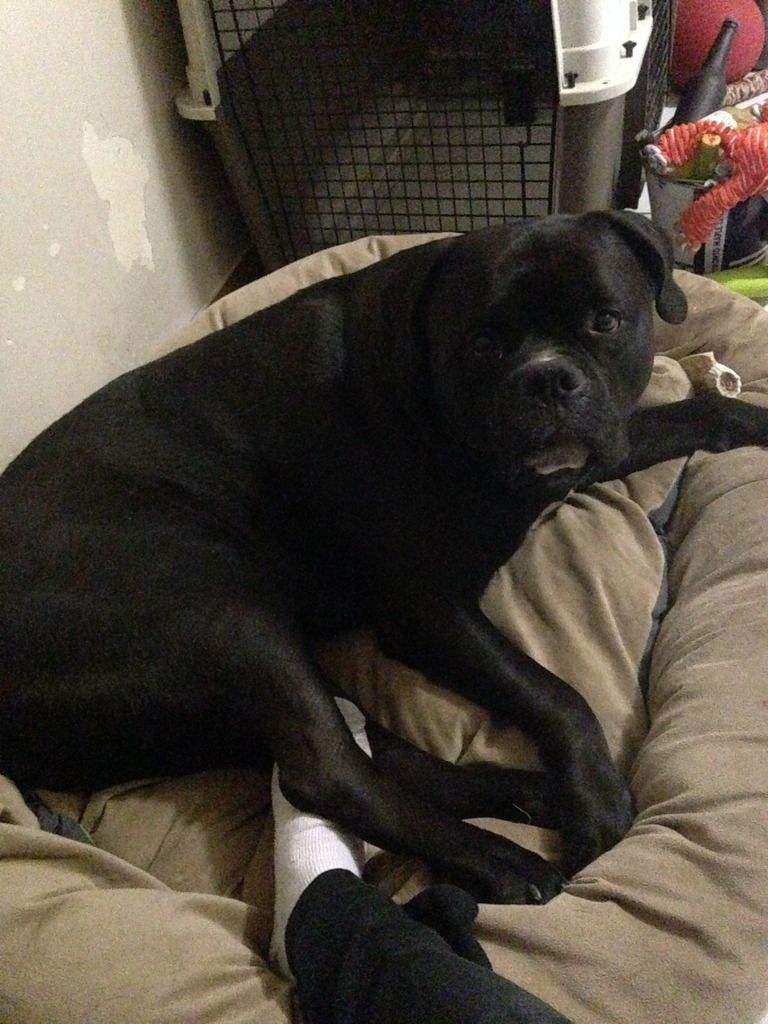
"Wha?!  I'm good- I got'em!  Huh?"
...


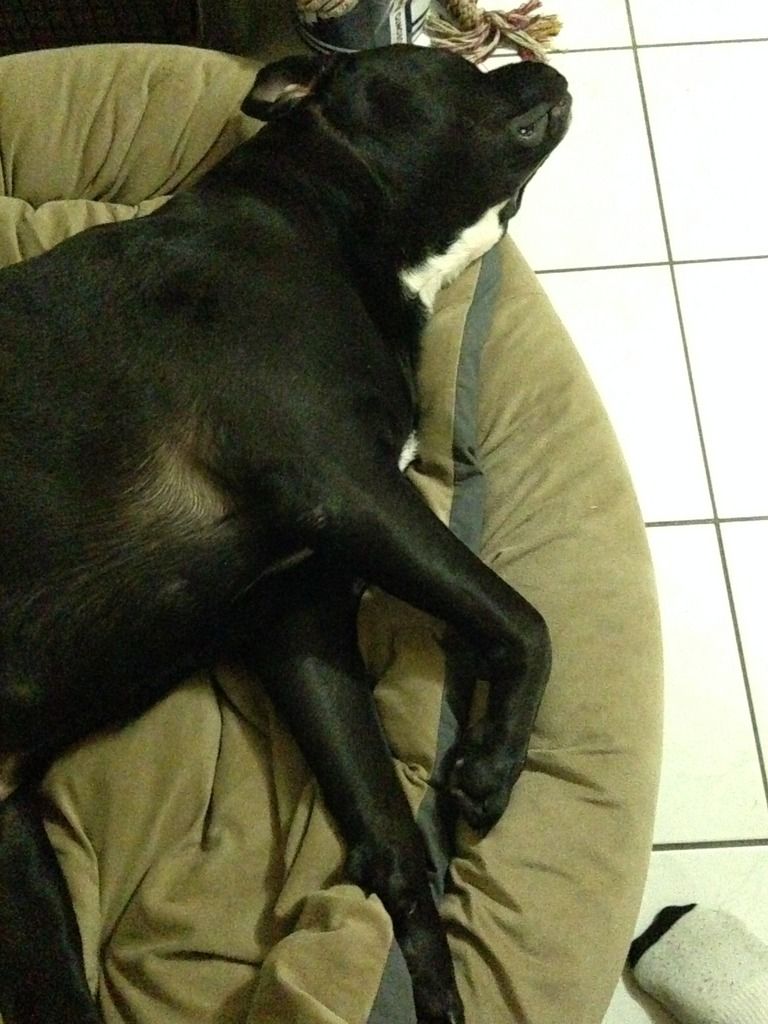
Clearly, nothing gets past this guy.


So... let's see- how should I kick this off?  Been meaning to do something like this for a while but so pressed for time. 

Recently I've been preparing to get into acid etching.  Ordered a few kg's of sodium chloride and cupric sulphate- but while I'm waiting for that to arrive I figured I'd try out another type of etching, cause there's a million and one ways to skin that cat (what a terrible expression lol, sorry cat people). 

Electro etching is simple, the principles involved are the same as in regards to plating, so we'll monkey with that a little in time too, and I could do it for free with stuff I already have here in my apartment.  Even within this type of etching there's diff ways to approach this- if you were doing a large/ full hilt type etch you'd do it a different way, same principle as what you'll see here, only you'd submerge the part much like you would for an acid etch.  This will all start to make sense to you the more tests I run in here- you'll see what I mean. 

But this time I'm just gonna test a method of 'spot etching' I guess you could call it.  Later today I'm gonna get some pics of the parts and steps involved and also post a video of it in action, but for now I'll give you the run down of my first experiment (yesterday while I waited for a chosen one to arrive).  Very easy, no mess, almost no prep.  All you need is a metal part to etch, some vinegar, salt, a power source/ battery about 9V or higher, q-tips or swabs or something like that, and a couple pieces of wire or some aligator clips etc. 

Throw a healthy pinch of salt into a shot glass full of vinegar.  Slam it when the little voice inside goes "I bet you're not man enough to do that".  Then do up another one, for use this time, and give it a stir.  Ready your power source with the pieces of wire or clips on each terminal +/-, so you've got a positive and negative lead coming off it.  Hook the POSITIVE lead to your metal part- aligator clips work great, but you can literally tape a wire onto the piece.  Then dip a q-tip/ swab into the vinegar solution.  Now attach your NEGATIVE lead to that sopping wet q-tip, close'ish to the tip, BUT NOT TOO CLOSE, make sure that the bare wire/ metal of the negative lead DOESN'T SHORT TO THE PART you're etching.  So just leave a half centimetre gap between the negative lead and the tip of your wet q-tip, or whatever you're comfortable with where you know you won't accidentally bring it into contact with the work piece.  Again alligator clips are great for clipping to the q-tip.  Now you're ready to etch Smiley

Millions of ways to get a patten marked out- to watch the process for the first time, i'm just taping off a scrap piece and cutting out wierd shapes with an exacto.  All that matters is you have the area you don't want etched protected.   So you rub the wet swab over the area to be etched, trying to get the area evenly.  Don't touch the actual negative lead to the work piece, and for gods sake if you're using Li ions make sure they're protected against short circuiting/ thermal runaway.  You'll smell it, hear it, see it bubbling etc as you rub- that's normal.  As the tip starts to get all grimey, replace with a new swab, dipped in solution.   Repeat until desired depth/ contrast reached.

 Like I said- later today I'll get some pics and video up- but here's what I got after about I'm guessing 20-25 mins using apple cider vinegar I borrowed from neighbor, and about a 15V power source (4 14500 Li ion cells).  I planned to keep going but curiosity got the better of me lol and I wanted to see how it was working so I removed tape.  Just a scrap piece after all.  Then a chosen one showed up at my door and I took a break Smiley


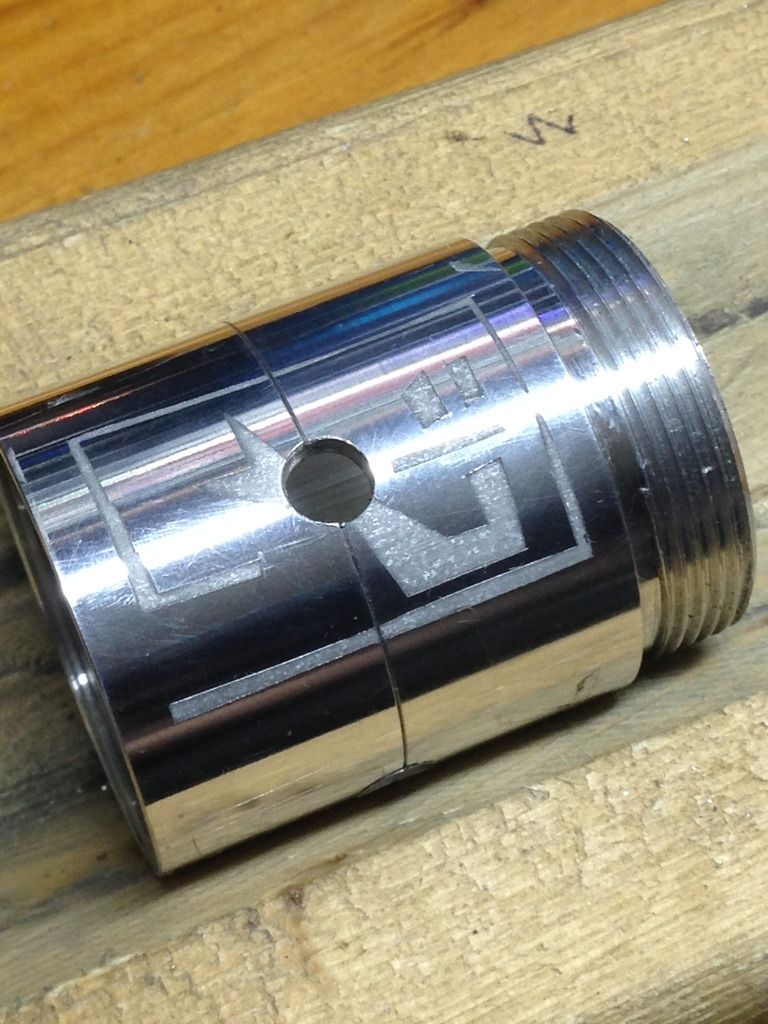
Try to show you from diff angles/ lighting so you can see- in such a short time it etched quite deep/ dramatic.  It can make nice edges, especially considering how not careful I was when I taped/ cut pattern for this test lol. 

What excites me about this is how much nicer a finish it can give for engraved names/ symbols etc IMO, plus the options you have for tweaking this... like I just ripped off tape to see it- but what if I had taken a little more time to get deeper, left tape on after, and hit the recess with aluminum blackener, paint, nail polish, gold leaf, etc... for that matter, what if I had left the pattern all taped up- switched my leads around so negative is now on work piece, tossed that into a jar of the vinegar solution, hooked the positive up to a piece of brass rod, and set that (brass only, no touching the actual lead) into the solution with the work piece... I could have plated the recess and created my own brass inlays.  At least I think it works mostly like that- may have to blow up test a couple things first in regards to that- but we shall see, we shall see.

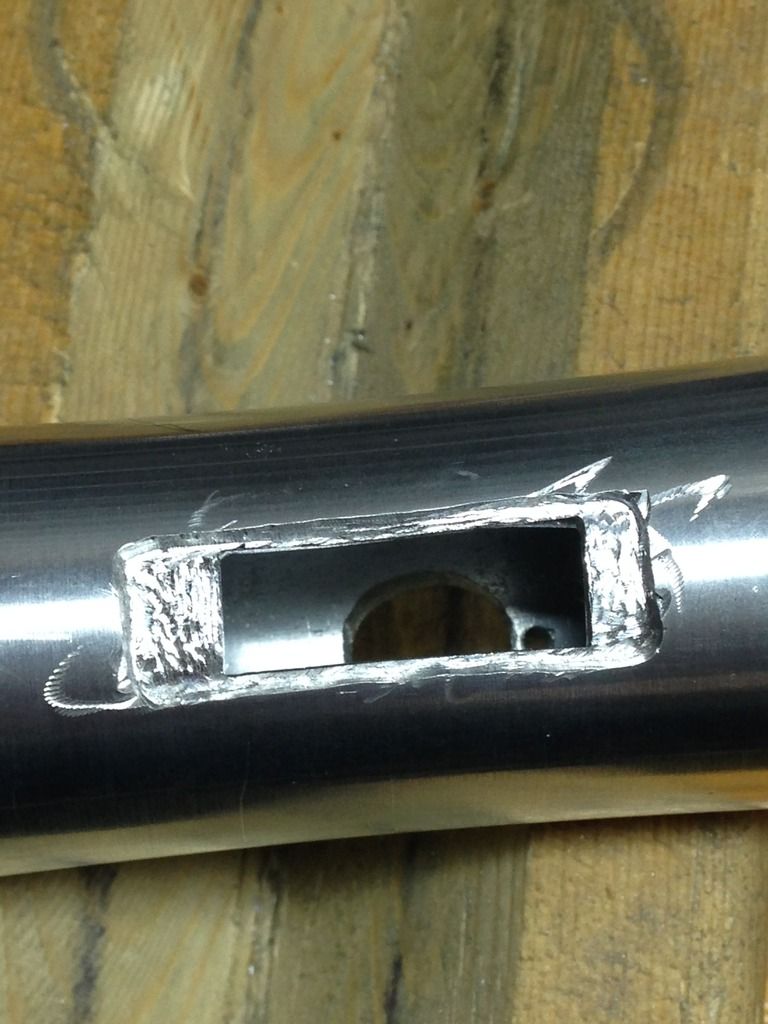
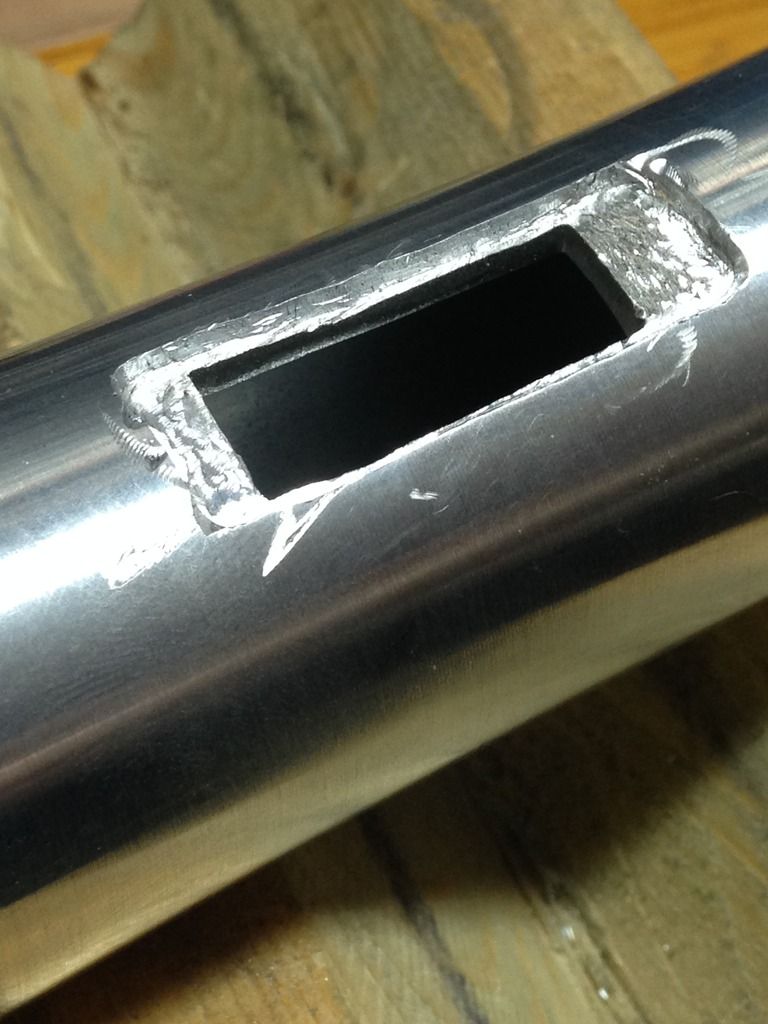
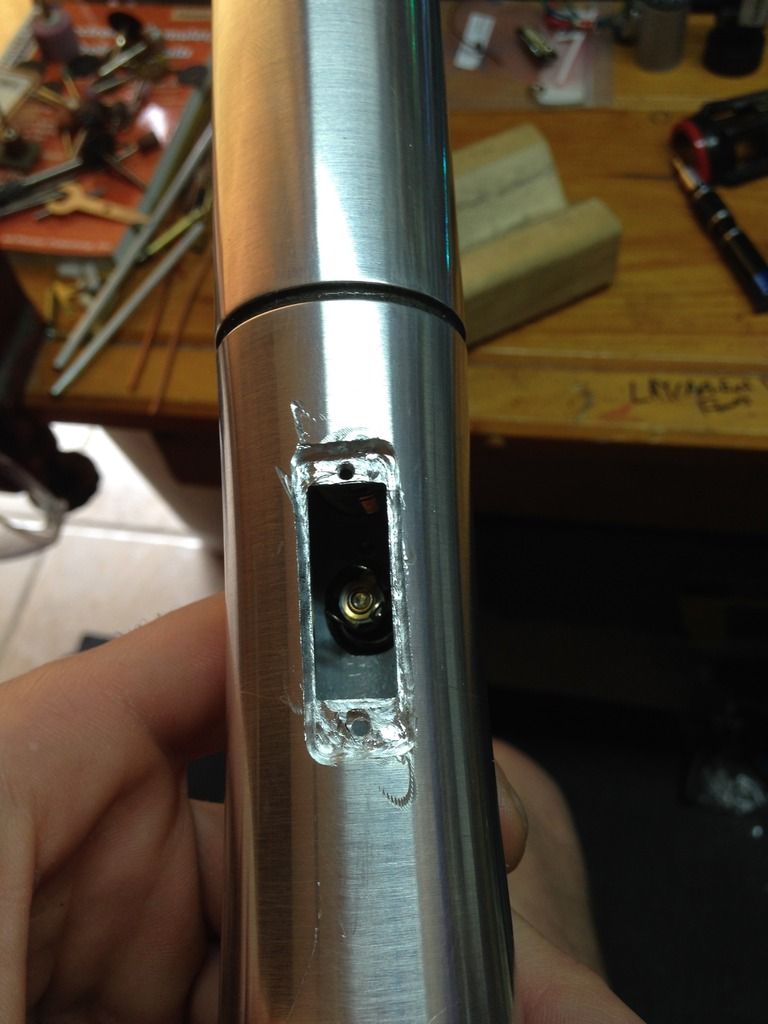
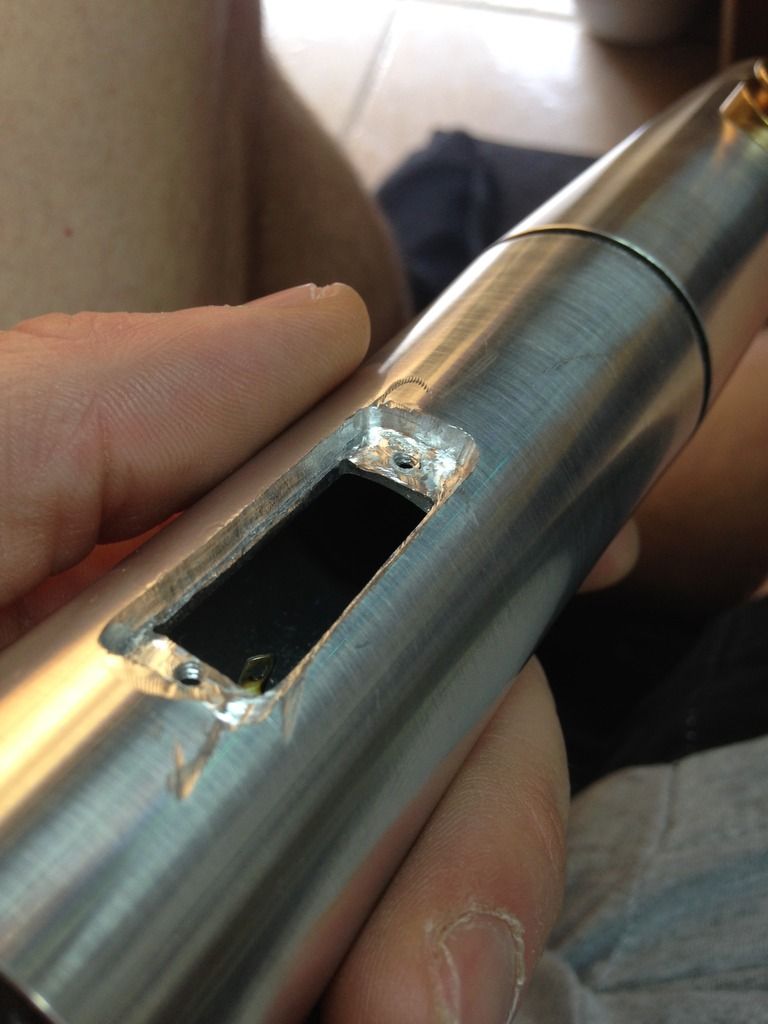
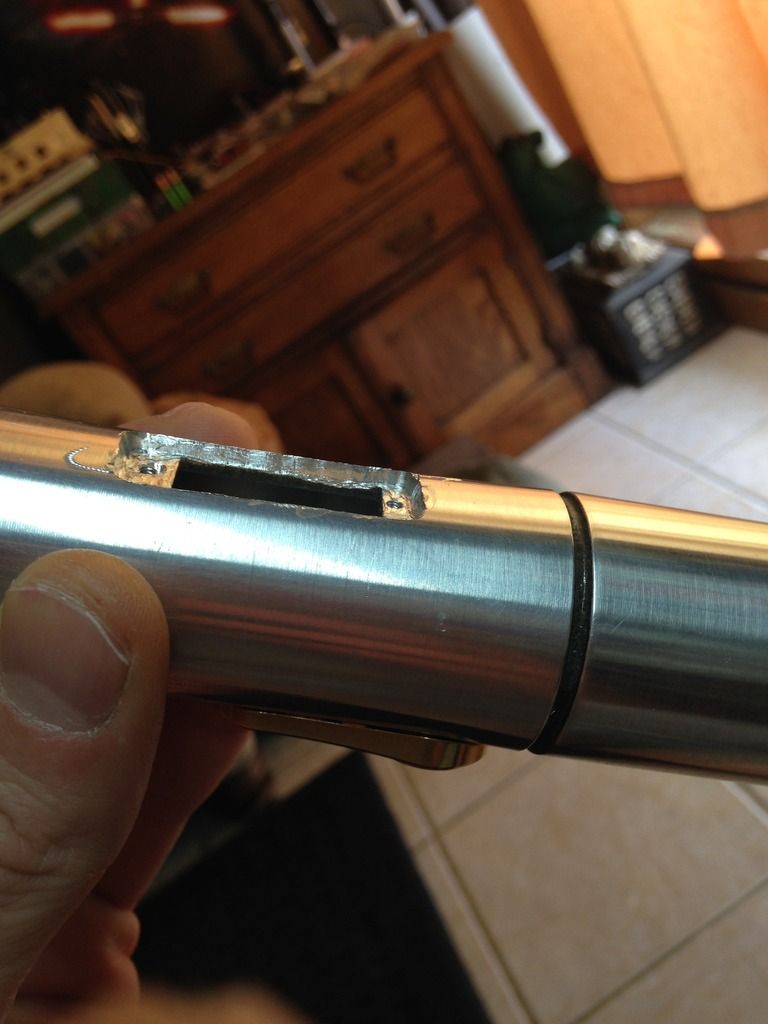
Ok moving on for now- so am I the first one to convert the grip section of the emperors hand to mhs, mill a chamber window in it, and pair it with the new quick release coupler for the coolest potential future reveal saber ever?!  I think I might be lol Wink.


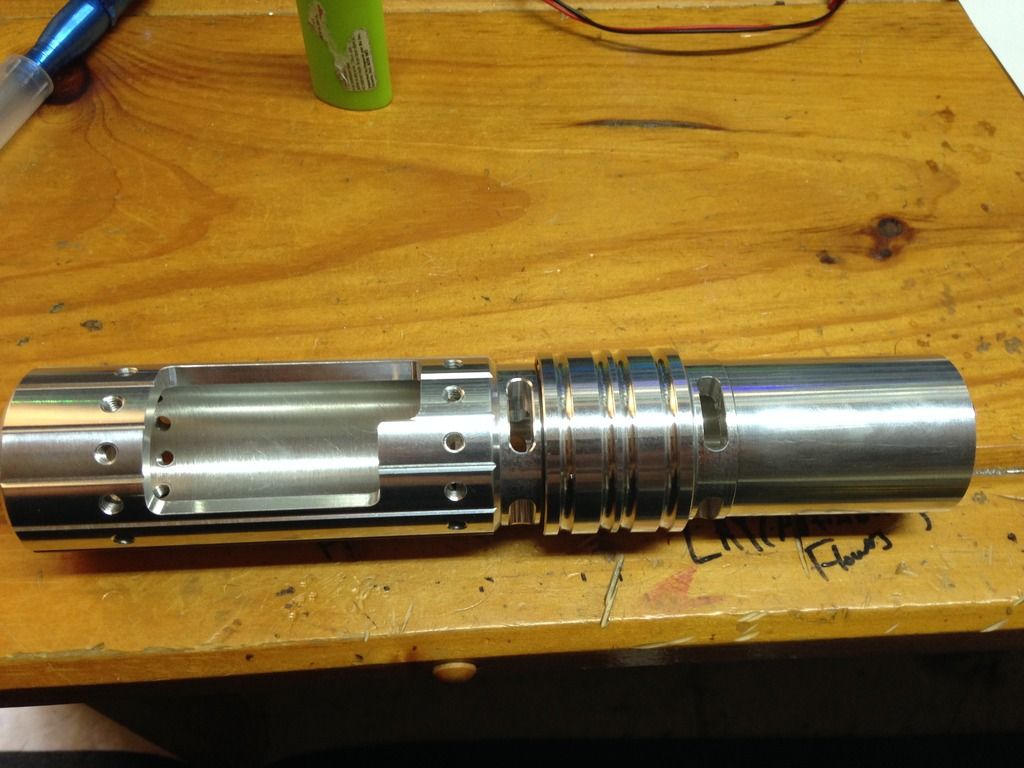
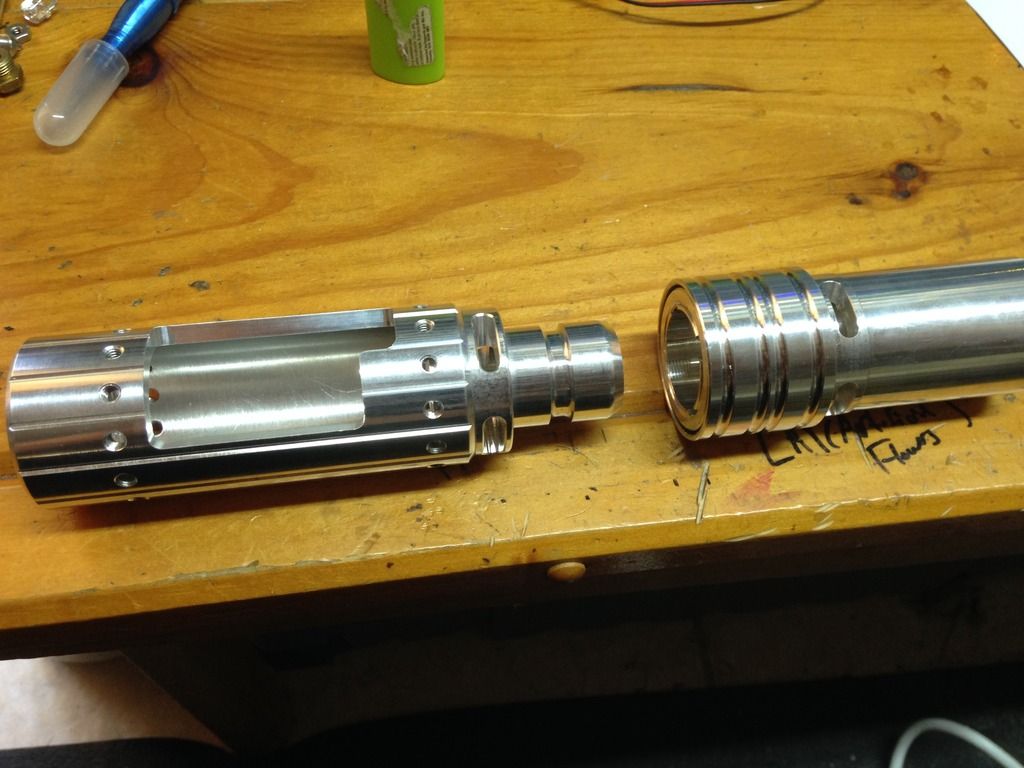
 Bwahaha!  Nah, nah, that's not what this is lol!!  It's just a couple other guys extensions with some custom mill work for an upcoming project- the cool part is the coupler functioning as the reveal mechanism.  Gonna build the core of the chassis down from the 'stem' of the quick coupler- will require some serious confined space work, and a detachable-on-the-fly speaker, but I think I've got it figured out. 

Ok time for one more- then I gotta feed the dog and get move'n.  Tons of obligatory crap to do today before I can get back to the etching experiment.  Plus I have a special project for a young boy going through chemo to start now that this chosen one is here Smiley

So I recently began a giny pig hilt to test out a bunch of ideas.  chose my silver LE Libby, aluminum blackened to be the yin to the dark Libby's yang, love this hilt.  Roughed in a pli, which in itself was something I wanted to try, which will get a brass cover plate with etched details for it. 


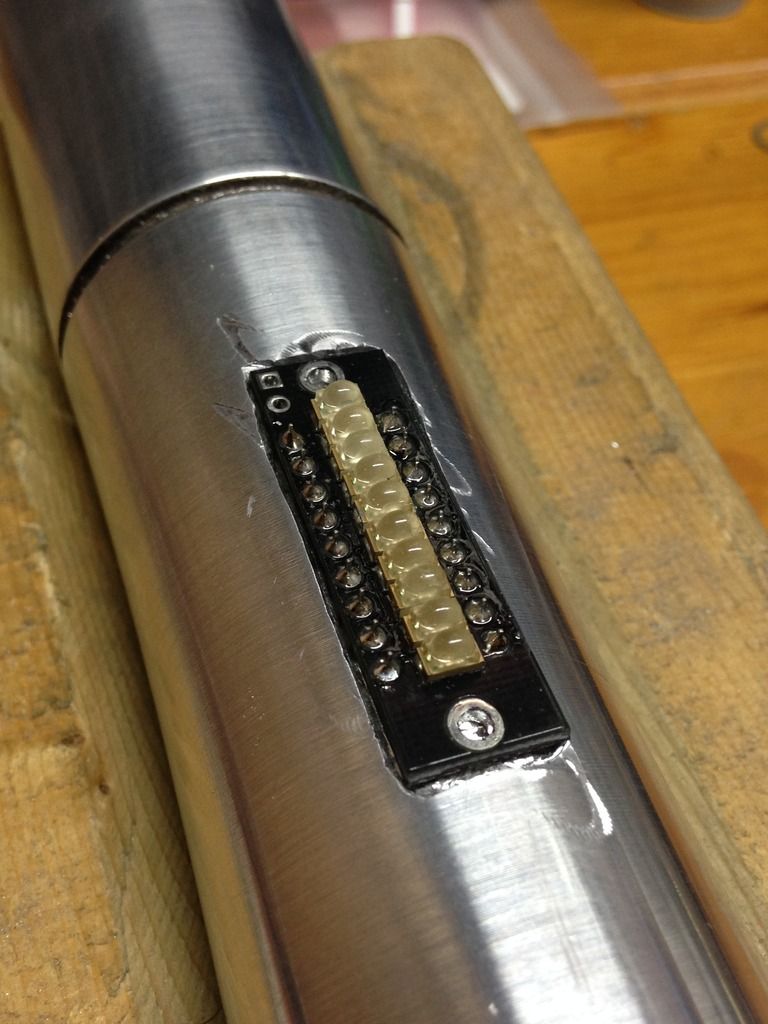
Basically just started hacking/ cutting/ filing away until I had it fit.  Didn't bother to tape off the area cause it's all going under the cover plate.  But then I realized I wanted a deeper, flusher fit- and I needed a bit of play for insulation etc, so I tweaked the fit some more.


Tapped with 2-56 screws to secure. 

Plenty of other things to ginny pig (guineau pig?  ginea pig? Pfff, who knows?!).  Like I wanna give the bottom section a subtle round off/ taper via a slightly slightly smaller od 3/4" extension and prophecy vented pommel, and I want to test a method of securing this in a way that it creates another groove at the bottom, which I'll blacken.

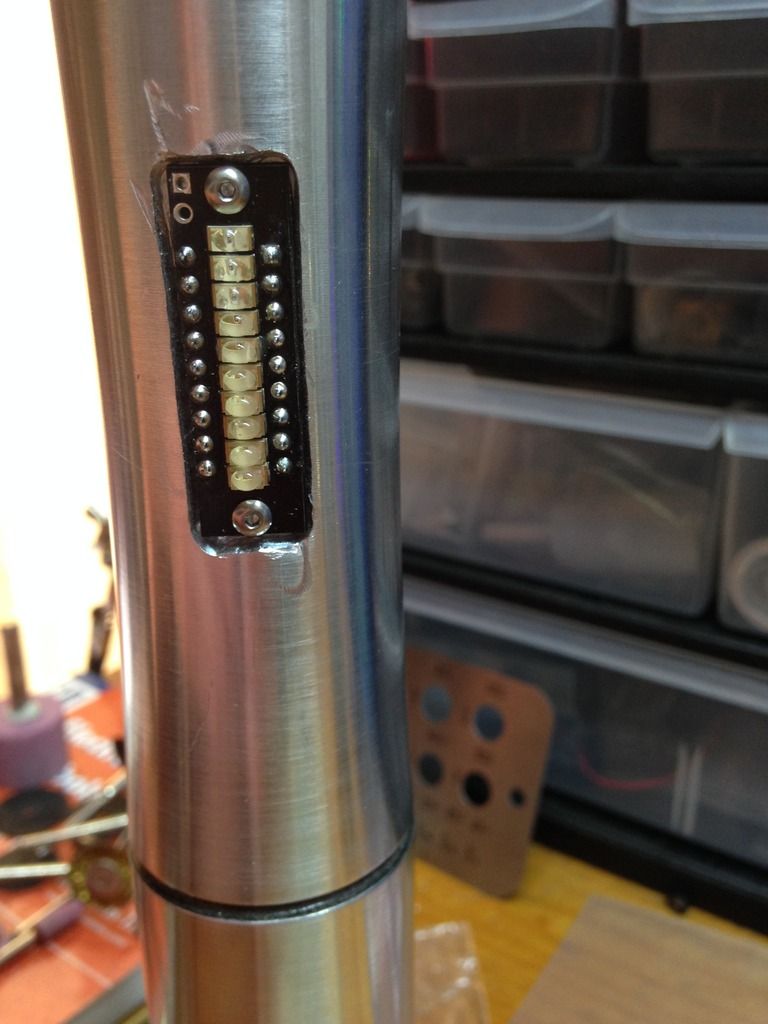
Putting in a brass act box with gold av lit red ring, and a port.

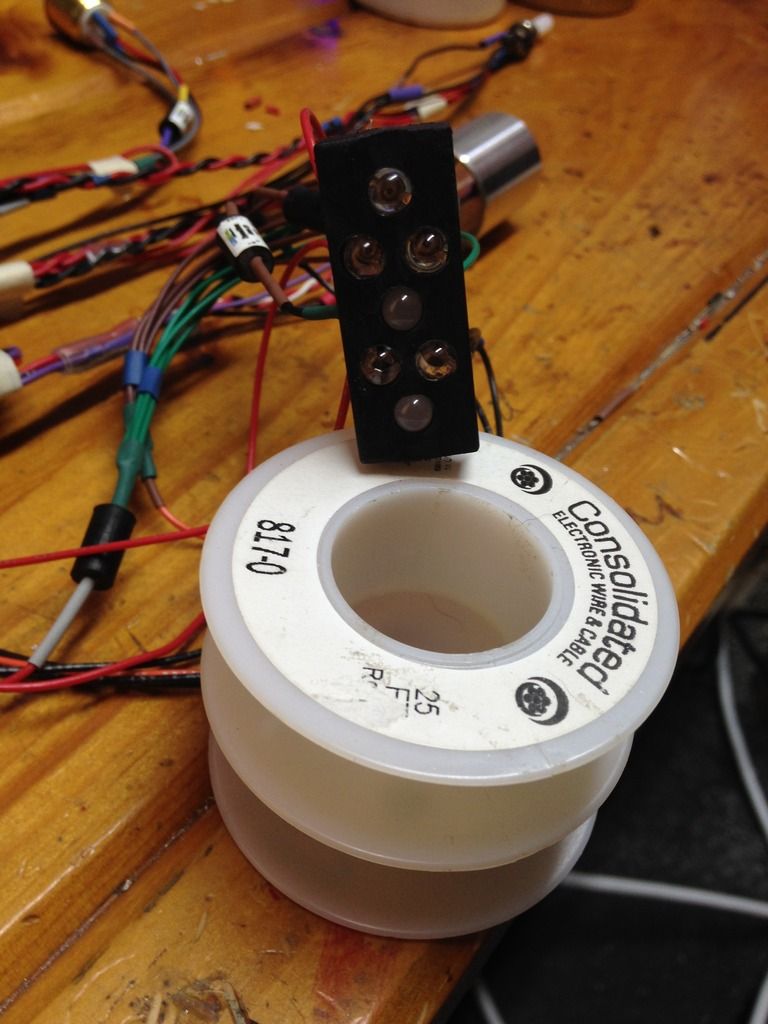
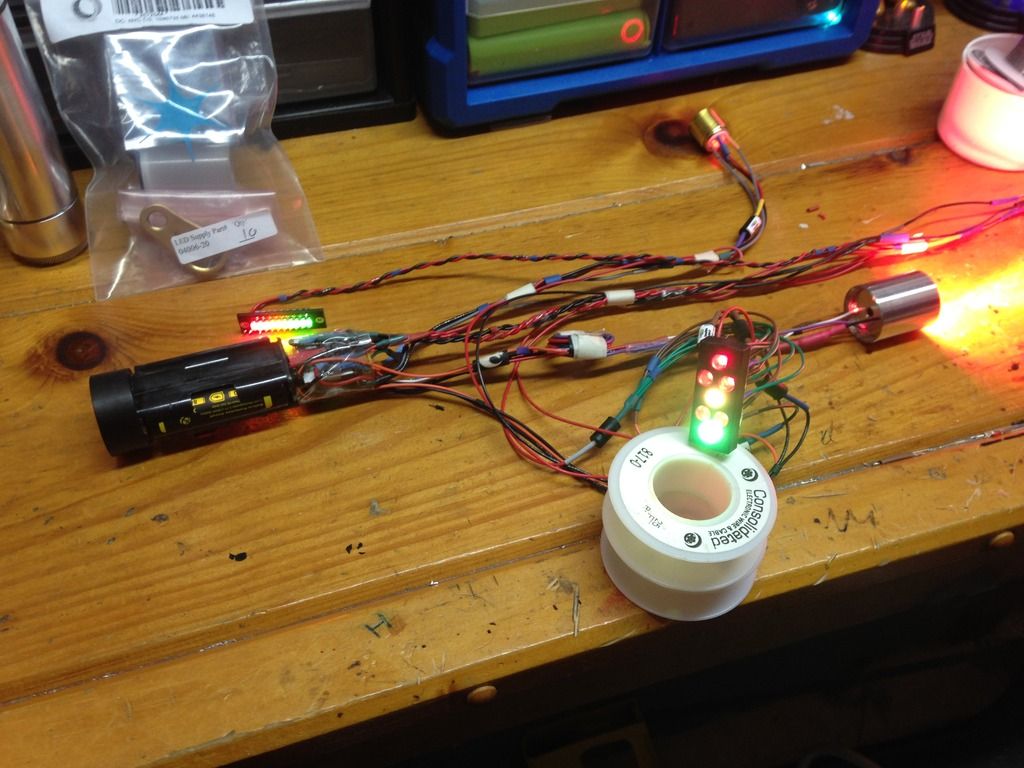
But one of the main reasons for this experiment hilt was for this- to go along with the 'pli', I wanted to make my own power/ drive meter- one that shows how much juice the saber is putting OUT.  Cause to me, the other guys should call that thing an 'eli', not just because it has a way better ring to it lol, but it just sounds more appropriate doesn't it?  To me an energy level indicator or a charge level indicator seems more accurate, and a power meter/ power level indicator sounds like it measures what's exerted- put out etc.  So that's what I'm making Smiley.  The two gauges will look/ work aweome in tandem- my power/ drive meter spikes as the saber works harder, where as the 'pli' registers a drop in voltage at those times.  Will really show what's going on in there together. 

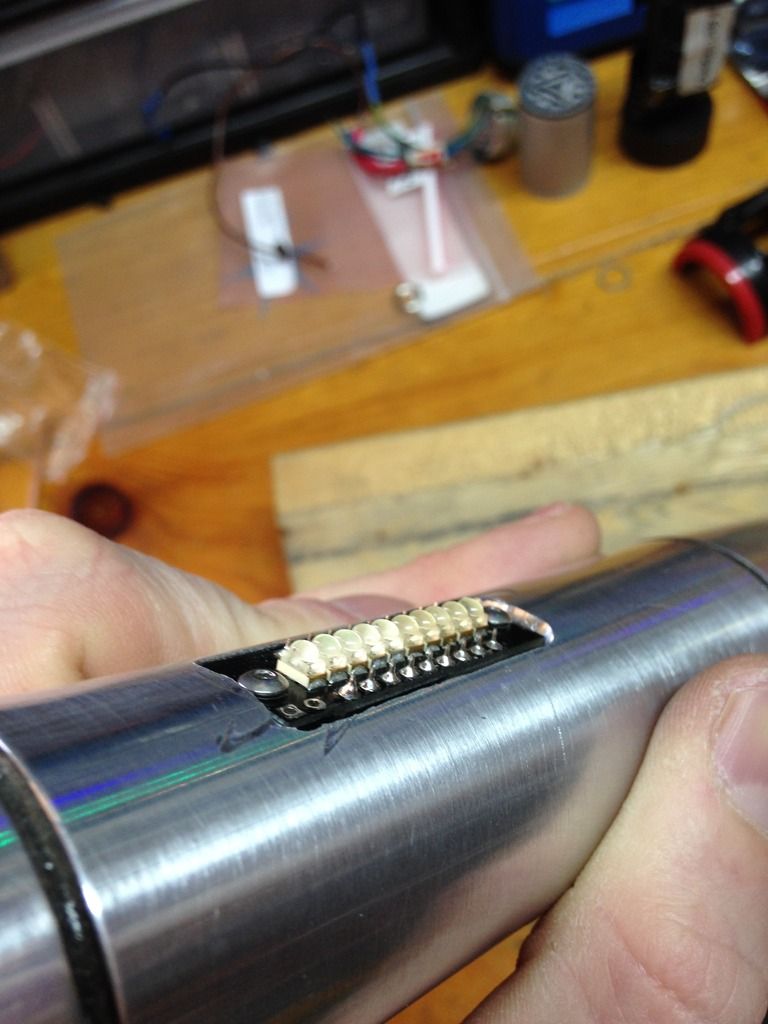
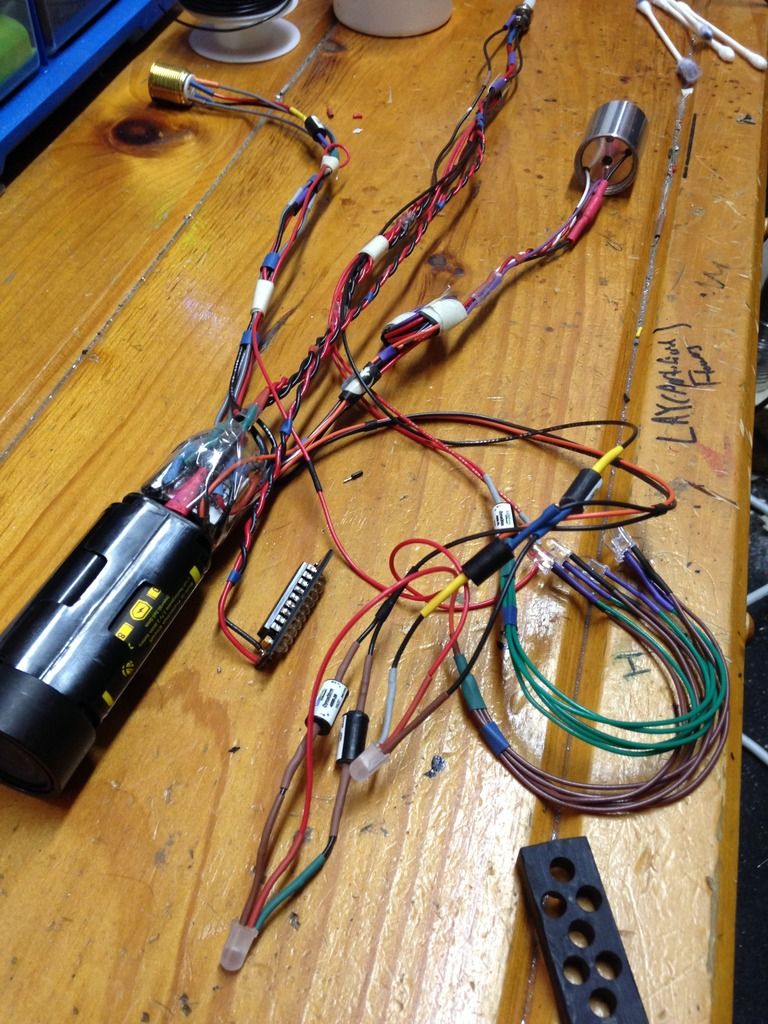
The whole thing is analog, and as simple as a bunch of accents and resistors spliced in at key positions.  In fact, this entire drive gauge is built using some wire, 5 resistors, 7 5mm's (2 diffused lens rgb's and 5 deep reds), and a modified block of lego lol.  Plus maybe some housing/ mounting after the fact and dressing up a bit etc.

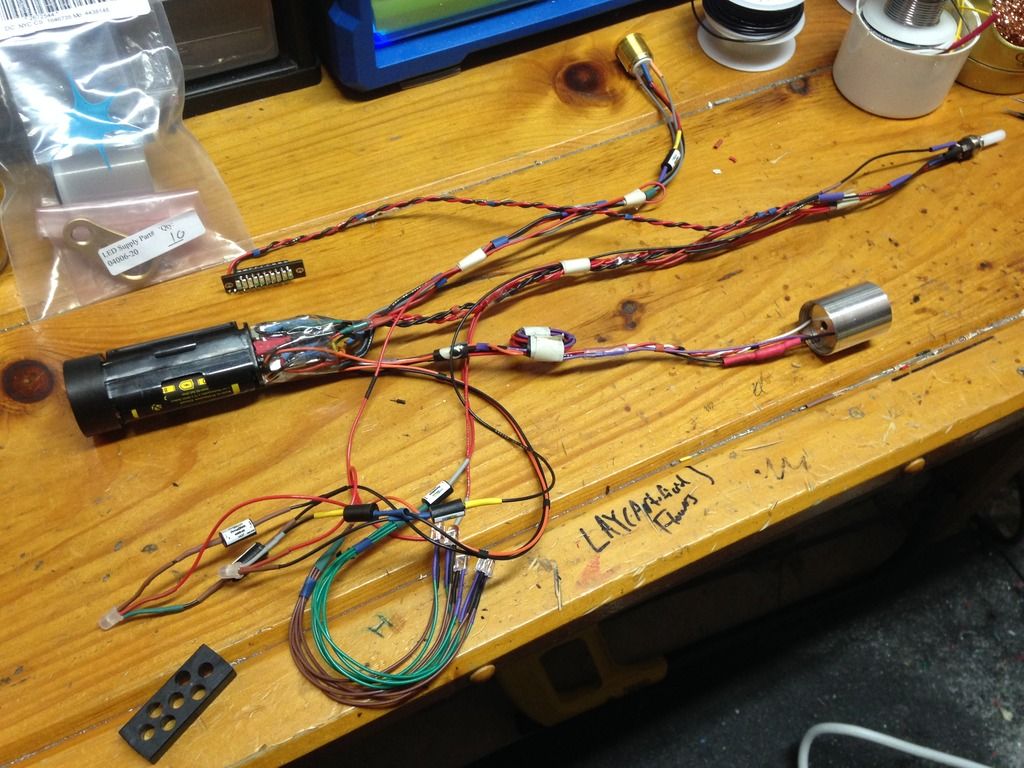
There's a lot of extra slack for install purposes, but otherwise you can see it's pretty well organized. 

I have the pli and drive meter wired direct- will likely give the pli a switch.


So here the idea:
Power meter registers one green bar when saber putting out low power/ in stand by.

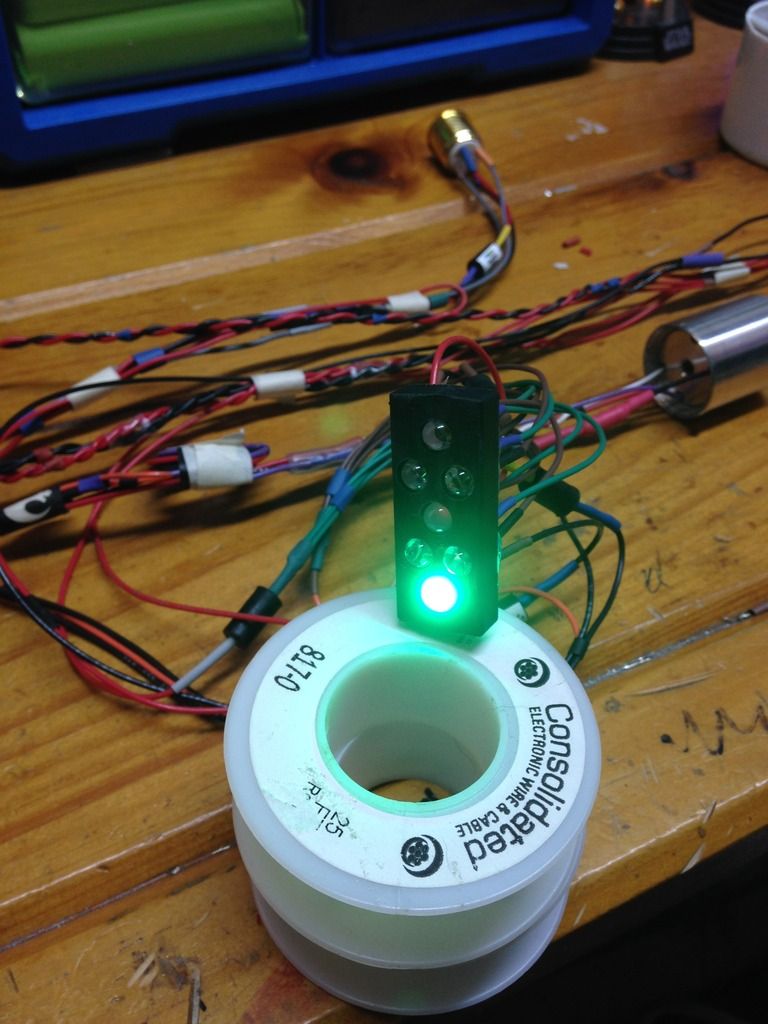
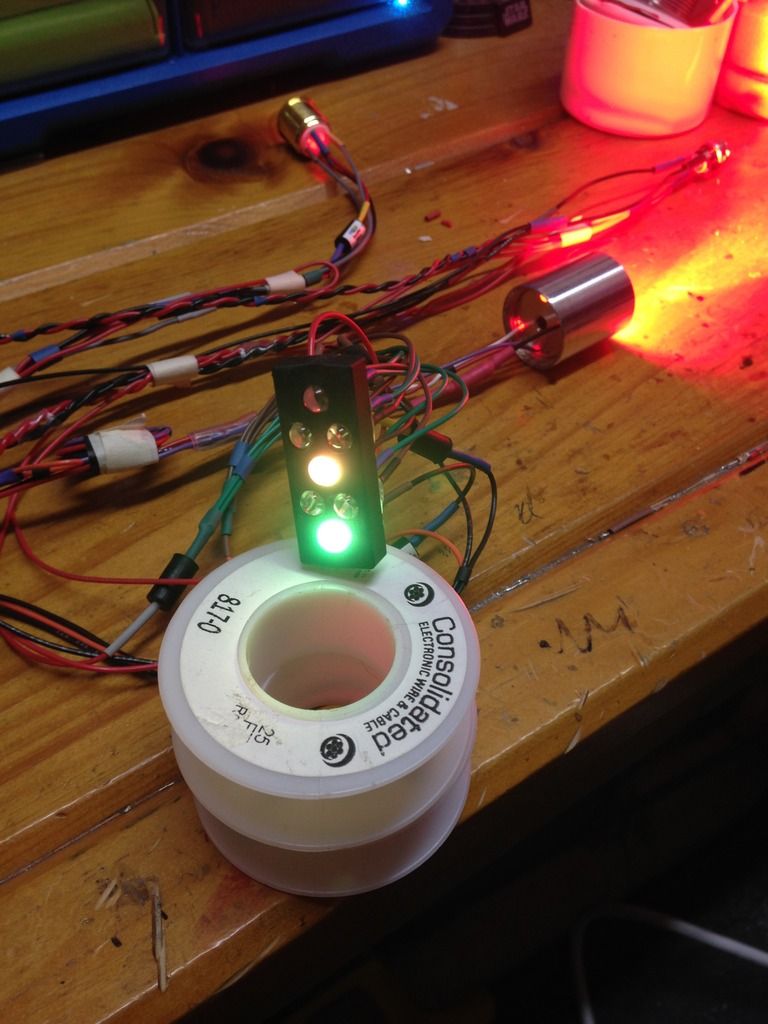
When you ignite it, it jumps to another 'bar', which is yellow, to indicate you're running max drive, and depending on how loud/ mean your sound font is that first bar will turn yellow as well- in this set up the speaker works like a potentiometer for the red die on the first rgb led (wired green), resulting in yellow flicker matching saber sound. 

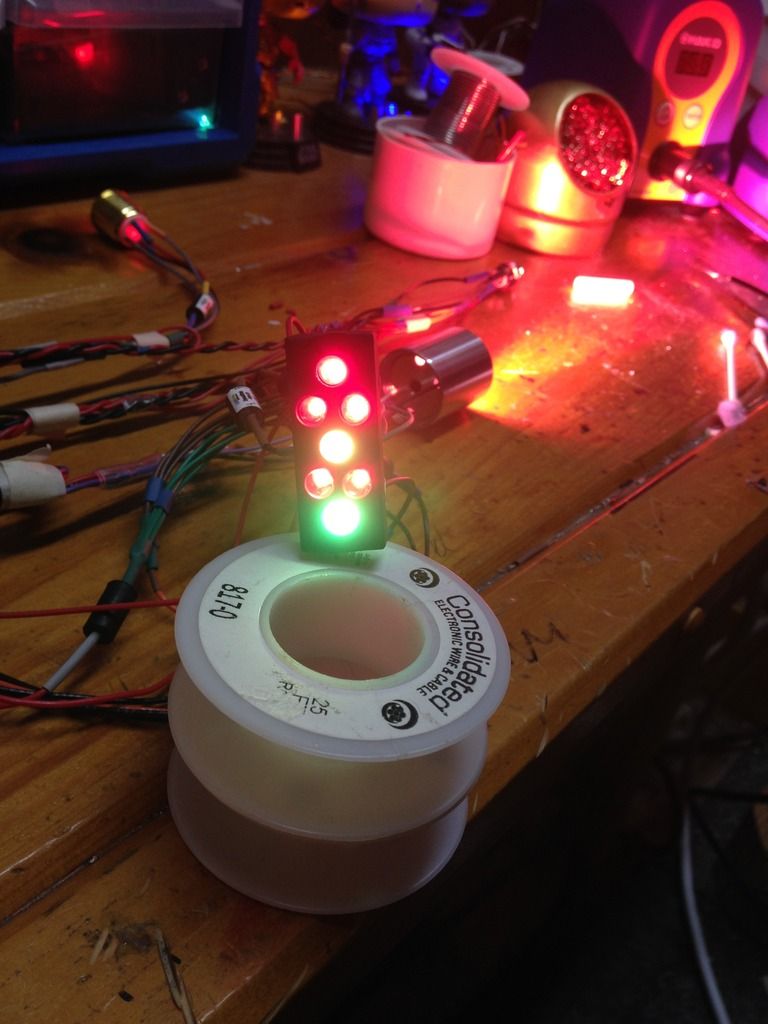
Then when you hit foc or lockup it spikes red, signifying overdrive.  I'll have a plate or etched legend of some kind to show this in the saber.  Something like 1 green lightning bolt, 2 yellow lightning bolts, and 3 red bolts with a warning symbol etc- the pli's (Eli's) cover plate will be marked with an inverse legend. 


Here's a couple really quick n dirty vids to show you the idea:

https://youtu.be/0YLBRTgXTRk

https://youtu.be/DAEnhu5byjs

Plenty more to come on all of this- keep you posted, MTFBWY Smiley
Logged

Jediseth
Knight Commander
*

Force Alignment: 828
Posts: 1551


"If I told you, you wouldn't like it." Han Solo


« Reply #1 on: February 18, 2017, 02:55:48 PM »

Oh sweet lab you got going on there.  I thought I saw your name floating around elsewhere.  Looks like a ton of fun!!
Logged

Guardian : GB, FOC Red, V4, 11-15                        Reaper: V4, BR, 4-17
Chosen One CE : Emerald, V4, 12-15
Consular: Emerald V4, 1-16
Manticore: BR, FOC Orange, QD, V4, 11-16
Monarch: Emerald, V4, 2016 Autumn Raffle -1st
Arbiter: V4, SD, Silver FOC, QD, 3-17
Archon V2.1, Diamond, 4-17

Hansrad
Knight Commander
*

Force Alignment: -670
Posts: 748


Jedi? Sith? I'm the one with the lightsaber.


« Reply #2 on: February 18, 2017, 03:12:28 PM »

Can't wait for all awesomeness that's going to appear here. I can never get over how much stuff and how organized it is that you've managed to fit in that amount of space. I know when I work on stuff I usually need lots of space, but then again I'm not usually very organized. I imagine it does make it easy to grab whatever you need quickly. The ELI is a really cool idea.
Logged

Own: Emerald Overlord, BHManticore, BR Renegade,FO Dominix LE V4 (stunt), CG Dominix LE V4 (stunt), GB Apprentice LE(stunt),BR Dark Initiate LE V4 (stunt), AS Apprentice LE V4 (stunt), CG Dominix V3 (stunt), SRD Darkish Liberator (stunt) Emerald Lost Grey.

Calculon
Knight Commander
*

Force Alignment: 435
Posts: 560


We Will Win!


WWW
« Reply #3 on: February 18, 2017, 05:11:31 PM »

Thanks for the vid Rev! I still got a ways to go before im carving out spots for a PLI... That LED set up is a great idea! Are you resisting for brightness or are you just gonna let those beam? ...Weird, my concerns having come this far lol; my kid says she has to either hide or move her saber because the flashing indicator lights of her switches wake or keep her up. Its like an airport landing strip in her room. I could use something other the the dynaohm but I told her to just hide it lol. My Bayard I have to keep the switch pommel side down because the LED shoots out a beam when it pulses. Also can be like a doorbell/phonecall indicator for the blind.

Standing by. Plusages all day, Great stuff as always!
Logged

The Wolfpack Lives!

Taegin Roan
Knight Commander
*

Force Alignment: 2066
Posts: 6252


Lord of the Force


« Reply #4 on: February 18, 2017, 08:06:01 PM »

This is gonna be awesome. I always like following your customization threads.
Logged

"I am the Outcast's Shadow" - Taegin Roan
"Confronting fear is the Destiny of a Jedi" - Luke Skywalker
"So this is how liberty dies: with thunderous applause." - Padmé Amidala

RevanReborn
Technomancer of the Graflex Order
Knight Commander
*

Force Alignment: -1086
Posts: 1121


« Reply #5 on: February 18, 2017, 11:27:56 PM »

Thanks very much guys!!  I'm beyond glad that you'll be along for the ride Smiley.  So many times everyone's input/ convos/ ideas have helped me improve so much.  We're gonna have some fun in here he he. 

Yup, Calculon, def need to tweak resistors still, it's like you read my mind Smiley.  The reds are washing out a pinch too much, leaving the first bar/ rgb favouring green a bit too much- the sensible, classy thing to do would be exactly what you're describing- dial them all down just a bit, reds less tho.  Better for battery life that way too, and 5mm's really only need a handful of mA to run well enough- like even erv only provided 18mA on his pads.  Of course, I'd be lying if I said a part of me doesn't want to just crank up the juice on the reds till they reach the right potency in the mix lol... I bet that'd be pretty distracting for an opponent actually lol, hilt just screaming lights everywhere lol. 

Yeah Hansrad, super organizing helps me defy the laws of physics and actually almost fit all the stuff I need in here lol!  BUT, there are limits lol, sometimes you totally just need more space, no way around it.  I'm quickly getting there.  Thanks for the kind words man Smiley

Thanks to everyone!
Logged

Seano
Knight Templar
*

Force Alignment: -229
Posts: 343


« Reply #6 on: February 19, 2017, 08:07:31 AM »

Wow, lots going on there, can't wait to see what you do with the Emperors Hand!
Oh, and your guard dog, he looks soooooooo scawy!
Logged

Ramse Moade the Grey

Current Sabres - Graflex SE in GB & Obsidian V3, Shock in TRI BR (QD's) & Obsidian V3, Customised Dorinian with Diamond Controller, Dark Catalyst in Adegan Silver with Arctic Blue FOC and Obsidian V3 (Customisation WIP)

Corwyn VonBeck
Knight Commander
*

Force Alignment: -340
Posts: 1071


Grey Knight


« Reply #7 on: February 20, 2017, 02:57:31 PM »

You know, you would probably have more room if you finished one project before moving on........lmao... yeah, right, thats totally doable right? Cheesy ok, ok, how about limiting it to no more than half a dozen at once? still a stretch? Wink

lmao @ Arlo... such a chill dog!
Logged

RevanReborn
Technomancer of the Graflex Order
Knight Commander
*

Force Alignment: -1086
Posts: 1121


« Reply #8 on: February 20, 2017, 10:52:37 PM »

Thanks everyone!

O believe me, I know CVB lol!  I can't even keep up to my pm's/ emails ATM, it's crazy- all I wanna do is clear up some space in here. 

Ok return to etching:

There's the solution you make, the swab you dip and attach power source to make etching tool, there's my battery rig (SEE MY SAFETY NOTES IN THE VID AT THE END), and you can see I've just taped off the piece and used knife to cut out edge connecter type pattern for the test. 

+ hooked to piece

- on soaked swab


Near tip but not in danger of shorting
Results after about 35 mins


All in all I'm really impressed with this simple spot etching technique so far.  This short vid describes/ shows it way better, and has a word on safety.  Great results compare to manually engraving- WAY easier.  Way easy, no mess, pretty safe compared to more rigorous electro etching or acid etching- draw back is, takes WAY more time than other methods, and would require INSANE patience to get a deep etch across a whole hilt type pattern. 

https://youtu.be/EK8lNpS2iIE

Keep you posted, MTFBWY Smiley
Logged

Corwyn VonBeck
Knight Commander
*

Force Alignment: -340
Posts: 1071


Grey Knight


« Reply #9 on: February 21, 2017, 04:10:39 AM »

That is rather spectacular! such a simple process, with great looking results. My ham-fisted self would be too scared to try it for fear of shorting things Smiley

Btw... nice to see the aluminum missile put to good use Cheesy
Logged

Rapine
Honoured Recipient of the Warlord Order
SaberForum.Com Moderator
Knight Commander
*****

Force Alignment: -3020
Posts: 7792


Always scanning the horizon...


« Reply #10 on: February 21, 2017, 10:48:25 AM »

Just seeing this now...

Great idea Rev. Smiley  Your own space, as it were. 

I am aware of a number of your present projects, but evidently not all of them.   Shocked Shocked

Big things come in small packages. Wink

-1 for awesome - again. Smiley
Logged

"The thing that always drives me hazy, is wondering whether it's them or me who's crazy." ~ A. Einstein

RevanReborn
Technomancer of the Graflex Order
Knight Commander
*

Force Alignment: -1086
Posts: 1121


« Reply #11 on: April 13, 2017, 12:44:07 AM »

old hard drives are gold mines of Crystal Chamber parts.  They're usually pretty easy to take apart- though to get the crown jewel (IMO), it can be a bit of work if you want to preserve it's ability to spin so well. 


The two peculiar radiator fin looking pieces on the right are SUPER magnetized lol.  That huge disc, i'm not entirely sure what its made of, but if i can sand it i'm thinking radiator fin.  then there's that needle/ arm, with the coil at the top- that thing's wicked.  i'll def use that for something. 

but the main thing to me is the hub.  PERFECT crystal mounting... with the added bonus, it spins like greased lightning lol.  so fluidly/ easily.  and it already has those 3 holes milled in tripod config- what more could you ask for but three miniature copper rods lol?! 

i could just take a punch and pop that centre piece out from the back here, which would dislodge the hub on the front i think- but i want to preserve the spin- so i'm just taking the whole thing.  i'll simply reshape that after and dress it all up etc. 


now, i want to drill out the centre of the hub... but i didn't realize that centre plug is adamantium. 

so i ended up having to take a punch to it anyways and dislodge it lol.  then with the adamantium plug out of the back piece, i could drill out the middle of the top piece to match.  and while i was at it, i drilled 1/16" holes through the tabs of remaining material on the bottom half of hub, and corresponding holes in a blank chassis disc. 

those two pieces of the hub go back together- they're held in place by CRAZY residual magnetism, what gives it such a nice spinning action. 

Then I took a blue anodized aluminum piece from a small coupling and prepped it as an insert for a gigantic hole i dremel'd into the centre of the chassis disc- that took forever lol!


 I was able to get the fit nice enough that i just drove those two pieces together with a hammer, and now they're press fit- probably never coming apart again lol. 
 
that provides the cavity to house the lights for the rgb crystal- plus i'm doing this chamber where you're going to be able to see down deeper, underneath the spot where the crystal is mounted, like you'll be able to see just a bit lower into the 'internals'.  best part of this set up is that the spinning of the crystal won't affect any wires or anything- totally isolated.


next the bottom end of a small led torch.  get some 1/16" holes in the surface area of the edge, which, yikes!, in and of itself, and then throw in getting them aligned somewhat decently and it's a party lol!

here's the idea- the brass nipple/ coupler piece comes down through the opening, with a small axle to drive the spinning- the matching hub that enables this will get trimmed to a propeller shape i hope.
i switched to copper rods, but they're getting tubes built up over them to create a taper and those will be brass/ copper/ aluminum.  plus they're getting shortened a ton.


keep you posted Smiley.

i just needed a little R n R after the crazy blitz of work and finishing Ethan's saber- so i've mostly just been taking it easy and getting the chores and stuff caught up- but i just wanted to do a couple quick things for fun- things i had been planning to get to for a while now.  this is one of them... i think i'll start a new thread for the other.
Logged

Corwyn VonBeck
Knight Commander
*

Force Alignment: -340
Posts: 1071


Grey Knight


« Reply #12 on: April 13, 2017, 02:01:58 AM »

Aww man, you shoulda hit me up before I left Oklahoma... coulda supplied you with drive parts till you were burried in them! all different sizes too!
I have a crapload of platters and magnets I stripped from drives, which will eventually become a mirror collage thingy... one of these days!

The bearings in there are incredible, but then they do have to spin at at least 5200rpm with zero friction/wobble. Precision engineering!

Love how this is turning out with your custom pieces... makes my chamber look like a childs...
Logged

Jediseth
Knight Commander
*

Force Alignment: 828
Posts: 1551


"If I told you, you wouldn't like it." Han Solo


« Reply #13 on: April 13, 2017, 02:31:40 AM »

Awesome! Awesome!  I actually took apart a laptop the other day and took out the stator coil trying to see if I could use that in a chamber. Other than gluing it in I can find no other way. I don't like using glue. Looking awesome Rev!  Just what I wanted to see.
Logged

Guardian : GB, FOC Red, V4, 11-15                        Reaper: V4, BR, 4-17
Chosen One CE : Emerald, V4, 12-15
Consular: Emerald V4, 1-16
Manticore: BR, FOC Orange, QD, V4, 11-16
Monarch: Emerald, V4, 2016 Autumn Raffle -1st
Arbiter: V4, SD, Silver FOC, QD, 3-17
Archon V2.1, Diamond, 4-17

Hansrad
Knight Commander
*

Force Alignment: -670
Posts: 748


Jedi? Sith? I'm the one with the lightsaber.


« Reply #14 on: April 13, 2017, 02:47:09 AM »

Sweet crystal chamber start. Yeah those hard drive parts are all sorts of handy for projects. I've got a pretty good stash of them in my organizers for when ever I need them. Can't wait to see how this turns out.
Logged

Own: Emerald Overlord, BHManticore, BR Renegade,FO Dominix LE V4 (stunt), CG Dominix LE V4 (stunt), GB Apprentice LE(stunt),BR Dark Initiate LE V4 (stunt), AS Apprentice LE V4 (stunt), CG Dominix V3 (stunt), SRD Darkish Liberator (stunt) Emerald Lost Grey.

Pages: [1] 2   Go Up
Send this topic | Print
Jump to: