RevanReborn
Technomancer of the Graflex Order
Knight Commander

Force Alignment: -1086
Posts: 1121
|
 |
« Reply #15 on: February 27, 2017, 05:34:05 PM » |
|
Thanks SO much everyone, I really appreciate the support! So does Ethan's father (who's watching this log)- when I spoke with him he said it was moving to see such support/ well wishes etc for this in the community, and he was most impressed  . I hope this isn't weird to say, but I'm proud of this community lol. Thanks so much for the kind words, everybody . D7, great to see you! Thanks for popping in! Etched the knurl for the kill key today- lesson learned lol- make sure the resist you use to mark off your pattern is up to the task. I cut the imperial cog out of a tiny sticker, the laminating felt plenty strong enough to hold up, but it began getting soggy and disintegrating- so I was forced to a compromise of sorts lol. See, in the beginning it was turning out IMMACULATE- perfectly crisp edges and great shape- but the more I continued, the soggier and pulpier the sticker-template got, and the more I risked wrecking the whole etch (if it bled through anywhere there goes the shape). I didn't want to stop right away tho because I wasn't deep enough yet- it would have been a perfect cog but only a black stain lol- I wanted this cut right in, so I pushed it absolutely as far as I could without wrecking the shape too much- reaching a compromise between a good shape and a deep enough etch. The shape did suffer a tiny bit, but I feel it was worth it for the depth. Happy with this, once I clean it up it'll look quite sharp- there's still crud on it here and it needs a caress from a sanding sponge badly lol. But this will clean up nicely . Sorry there's like 5.3 million angles to try and show you what I mean about the results of the shape vs. depth negotiating lol. 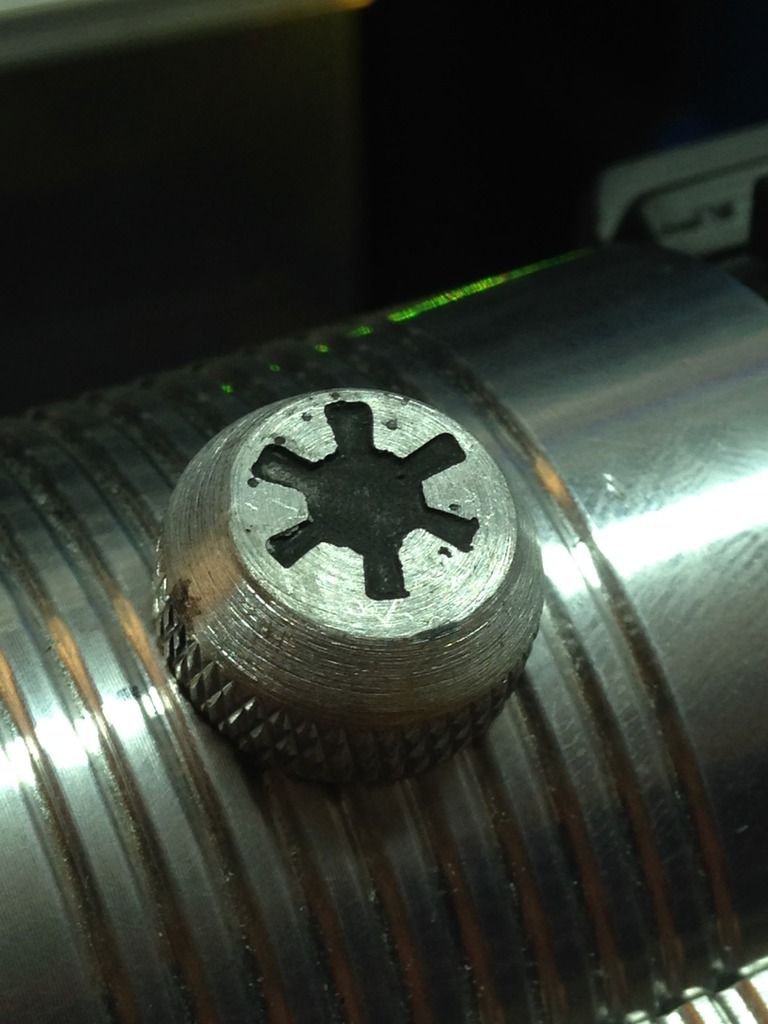 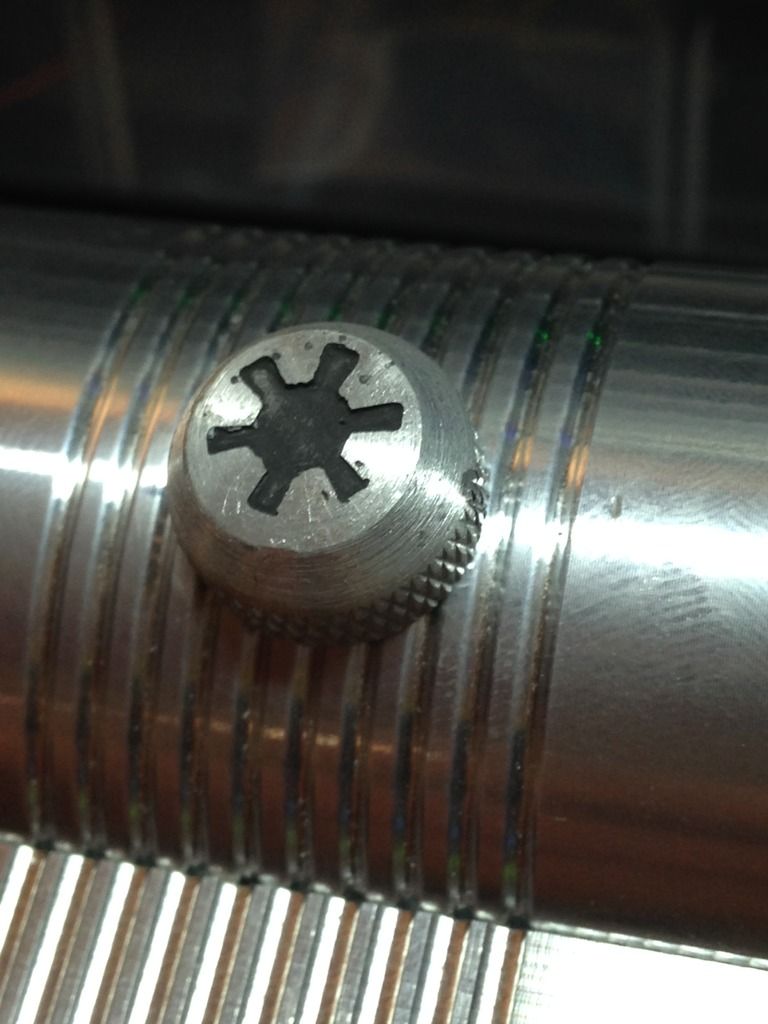    Like I said, all of this is only being roughed in ATM- tlc to come after. Keep you posted . |
|
|
|
|
 Logged
|
|
|
|
|
Jediseth
Knight Commander
Force Alignment: 828
Posts: 1551
"If I told you, you wouldn't like it." Han Solo
|
|
« Reply #16 on: February 27, 2017, 05:36:54 PM » |
|
Looks great is that the Salt/battery etch method?
|
|
|
|
|
Logged
|
Guardian : GB, FOC Red, V4, 11-15 Reaper: V4, BR, 4-17 Chosen One CE : Emerald, V4, 12-15 Consular: Emerald V4, 1-16 Manticore: BR, FOC Orange, QD, V4, 11-16 Monarch: Emerald, V4, 2016 Autumn Raffle -1st Arbiter: V4, SD, Silver FOC, QD, 3-17 Archon V2.1, Diamond, 4-17  |
|
|
|
James Casey
Forum Watchman
Knight Commander
Force Alignment: 1510
Posts: 5981
|
|
« Reply #17 on: February 27, 2017, 07:34:32 PM » |
|
Looking good, and I'm looking forward to following your latest project!
I'm sure he'll love it; Sounds like he has had a rough time of it, but Ultrasabers make everything better!
|
|
|
|
|
Logged
|
 "I'll split this world open and tear down the sky before I let him come to even the slightest harm." |
|
|
|
Taegin Roan
Knight Commander
Force Alignment: 2066
Posts: 6252
Lord of the Force
|
|
« Reply #18 on: February 28, 2017, 12:05:34 AM » |
|
That kill switch looks killer. Great job.
|
|
|
|
|
Logged
|
"I am the Outcast's Shadow" - Taegin Roan
"Confronting fear is the Destiny of a Jedi" - Luke Skywalker
"So this is how liberty dies: with thunderous applause." - Padmé Amidala
|
|
|
|
Ginsu117
Knight Templar

Force Alignment: -67
Posts: 304
(Jacen) The End Justify the Means
|
|
« Reply #19 on: February 28, 2017, 12:06:43 AM » |
|
 That Kill Switch is so hot right now... |
|
|
|
|
Logged
|
DARK SIDE POINTS PLEASE
Ultrasabers owned:
-Scorpion with Obsidian v3 soundboard and Sunriders Destiny color
-Converted Anakin Episode III Lightsaber with Red color
-Archon v3.1 Emerald and Obsidian v4 Soundboard
-Consular with green color obsidian v3
-Fulcrum with green color
-Prophecy V3 White color with standard sound
-Sentinel V4 Blue color with Obsidian V3
|
|
|
|
URNOTSOBOSS
Knight Lance Corporal

Force Alignment: 17
Posts: 45
I am Sentinel.
|
|
« Reply #20 on: February 28, 2017, 01:23:56 AM » |
|
I WANT ONE!! Hi Ethan's dad!! Again can we please get the -1000 point bomb? |
|
|
|
|
Logged
|
 Sentinel- A soldier or guard whose job is to stand and keep watch. *Sabers I own: Aeon V4 stunt In CG {Seren Arien} Dark Arbiter Obsidian V4 in BR (Mystery Box) Sentinel V4 in GB Sentinel V4 in AB (Mystery box) *Wishlist: Shock |
|
|
|
RevanReborn
Technomancer of the Graflex Order
Knight Commander
Force Alignment: -1086
Posts: 1121
|
|
« Reply #21 on: February 28, 2017, 03:56:48 AM » |
|
Thanks guys!! Ya Jediseth that's the method- just used a bit of salt dissolved into some vinegar and some batteries . HAHAHA, Ginsu! I'm dying laughing ATM lol, just got to work, I needed that lol. Thanks man! Keep u posted . |
|
|
|
|
Logged
|
|
|
|
|
RevanReborn
Technomancer of the Graflex Order
Knight Commander
Force Alignment: -1086
Posts: 1121
|
|
« Reply #22 on: March 07, 2017, 02:29:50 PM » |
|
Hey everyone Sorry, I got blindsided by a wicked flu and sinus thing- totally rocked me. Was outta commission all week. But I'm back lol! Not a ton of time today but I managed to get some housekeeping/ prep done. I'll need the module totally secured- it can't move at all because I'm gonna be running a handful of wires up past it for a wicked status indicator I'm putting in. I know a way I can keep them out of the blade socket. So the chosen one is cool- on top of just being gorgeous, it turns out it comes standard with a module retention screw. The only thing I noticed about this one tho, is that due to the shape of the US mhs module (with the lip), the screw tends to lock it in place at an odd angle. 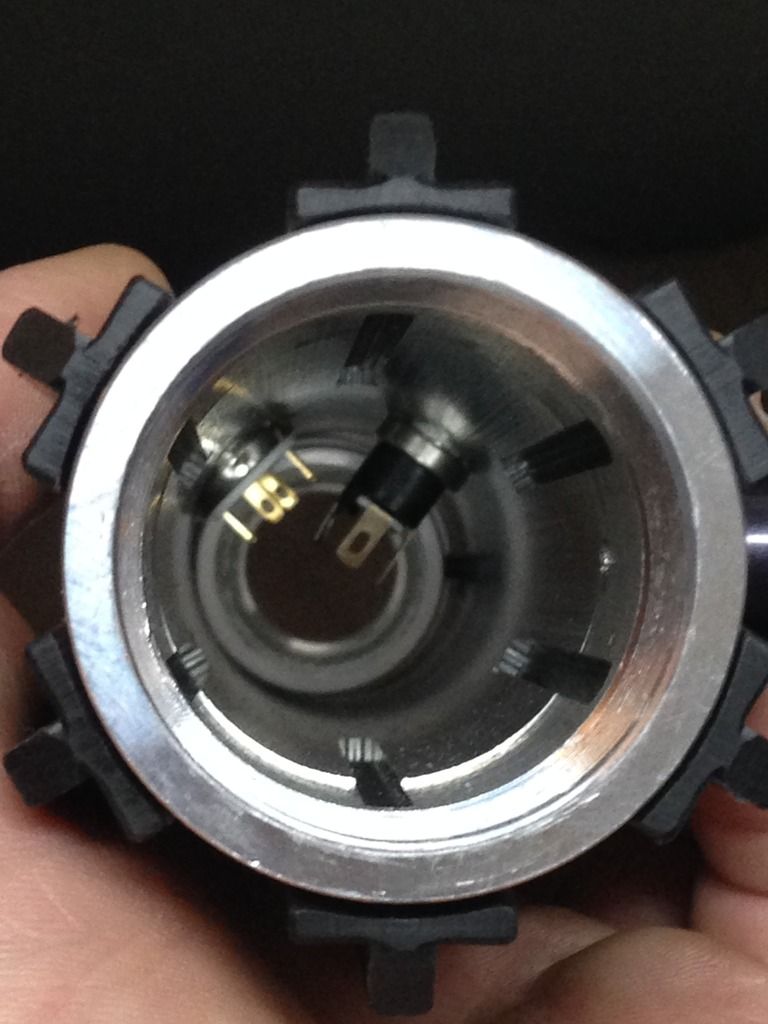 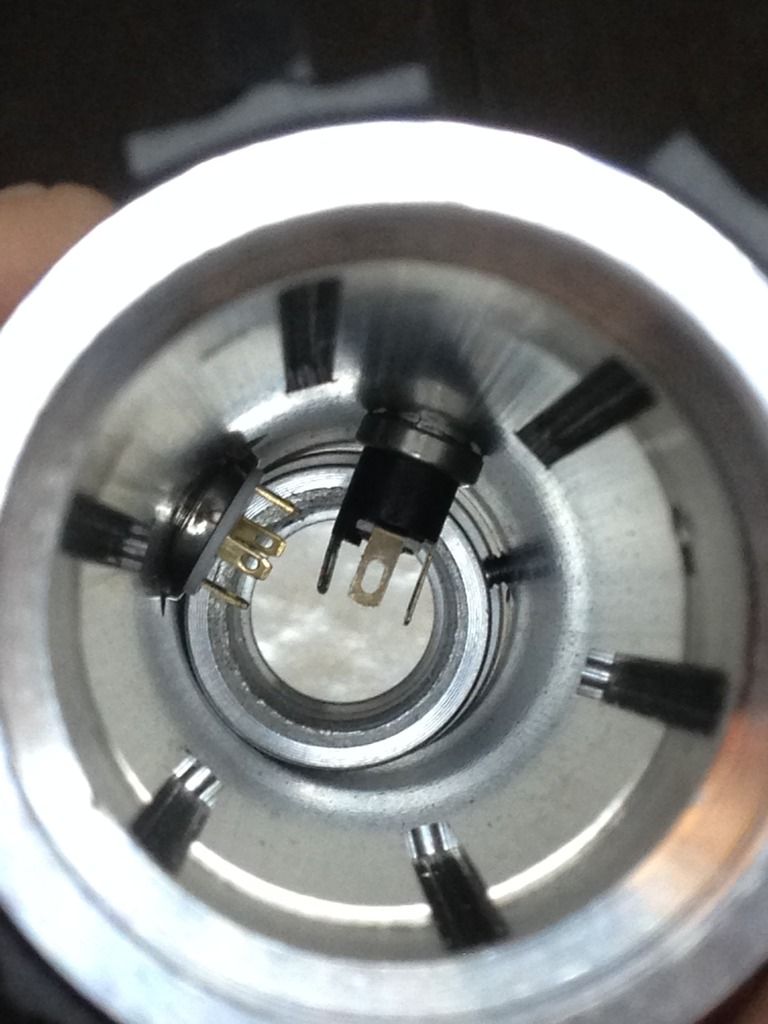 This probably doesn't matter at all lol. But the more I looked at it the annoying little jiminy cricket voice was wondering if the blade might turn out a little more evenly lit if i had it sitting in there straight lol. So first thing I thought was to tap a longer screw clean through the module (trimmed to not protrude inside it obviously) so that the retention screw continued right inside the module rather than pressing against it, and as it did it would draw the module back to centre. 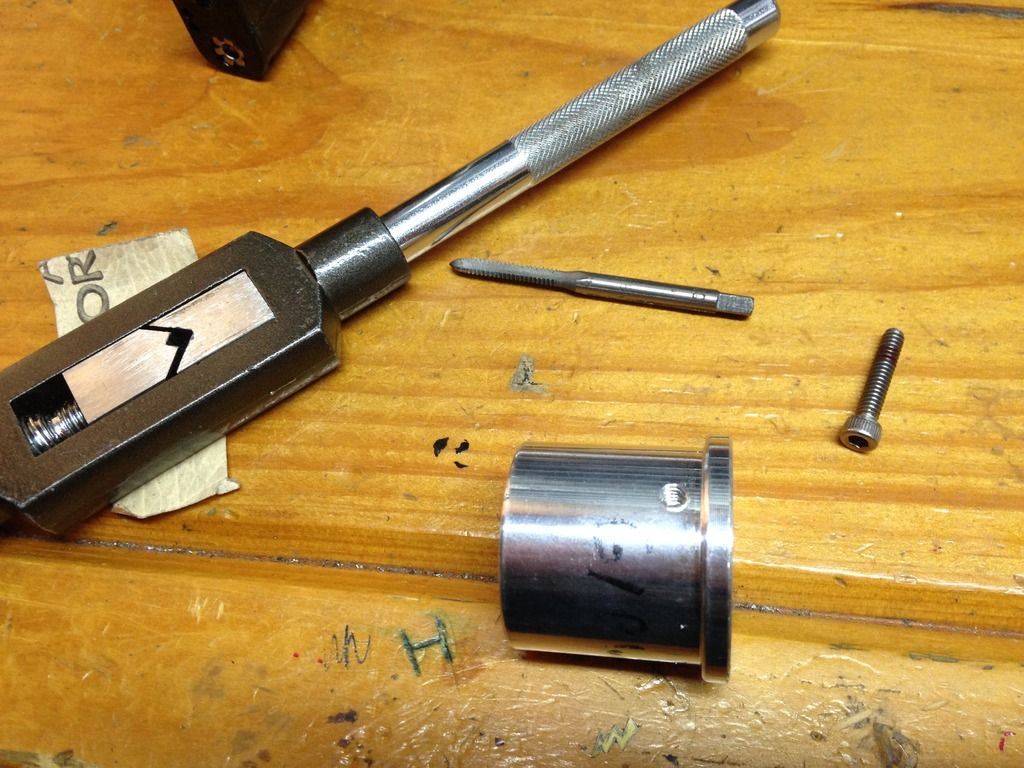 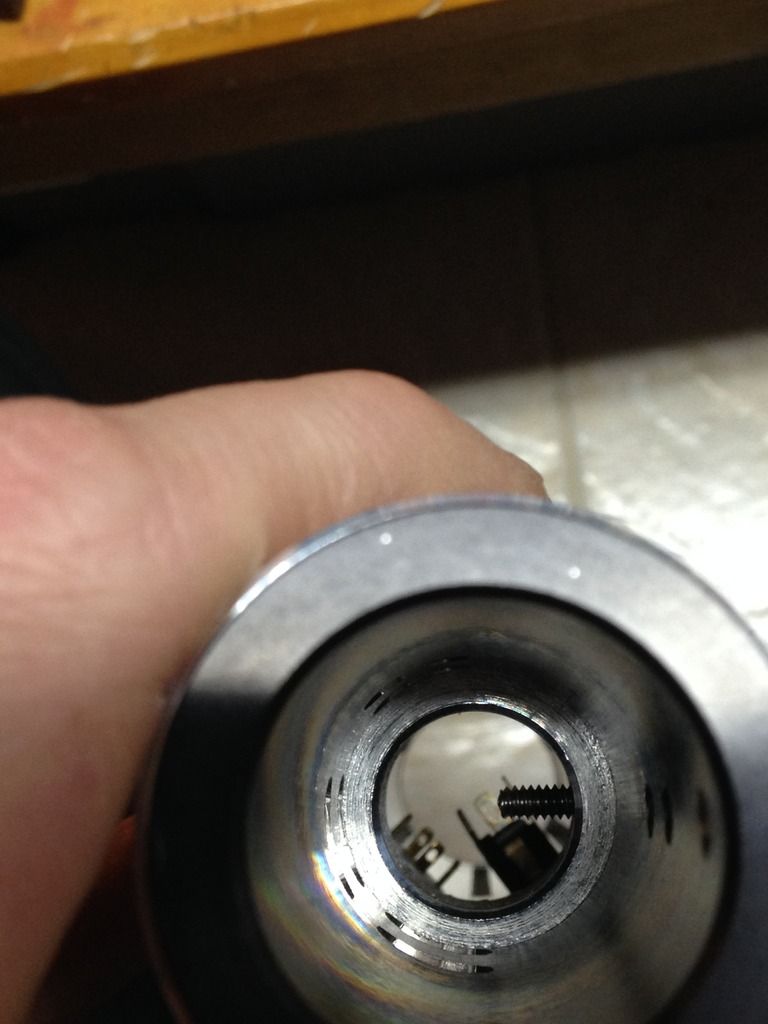 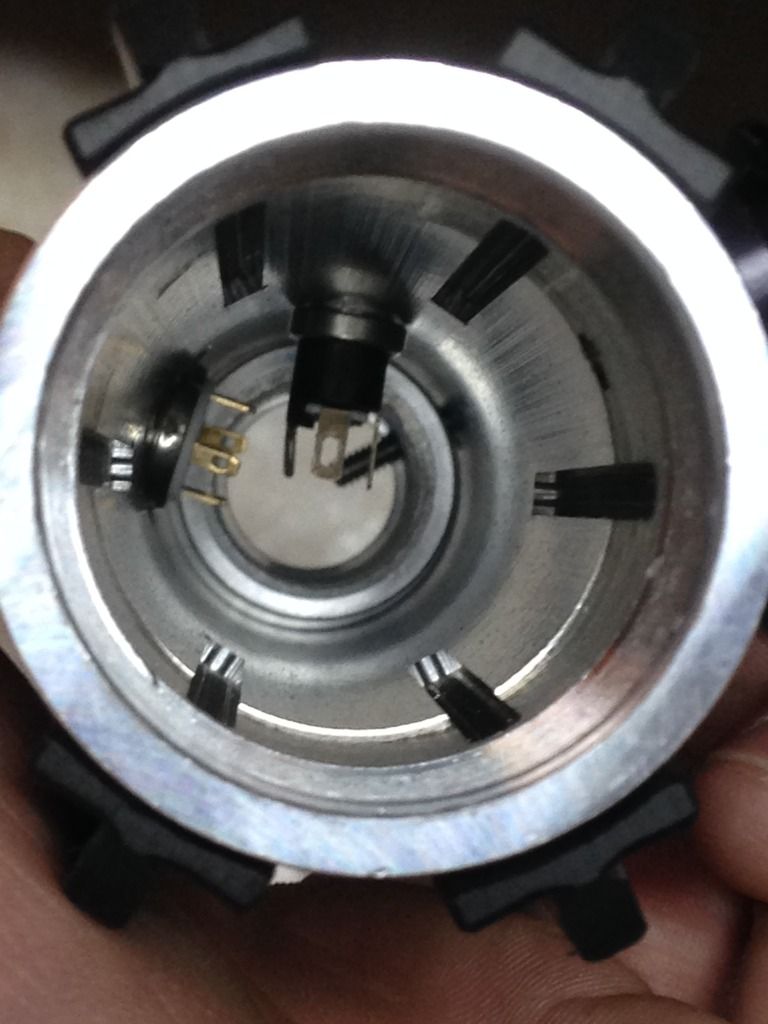 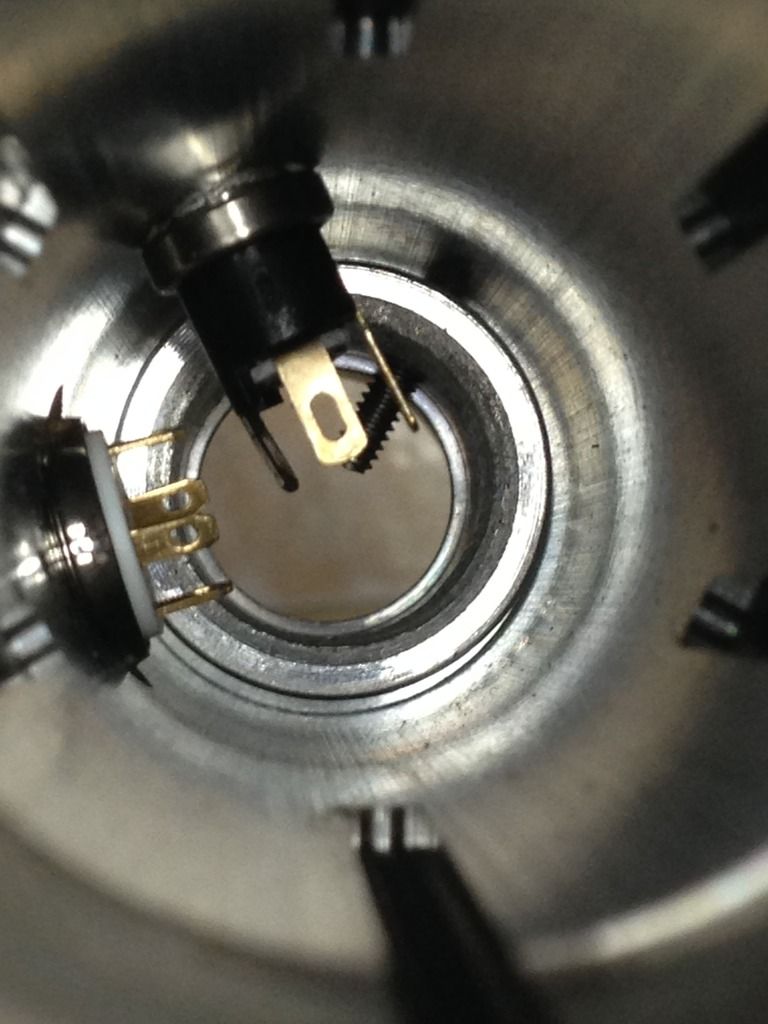 Worked like a charm- or so i first thought lol. Problem was there's a tiny gap between the top surface of this module where it sits in hilt, and the blade holder that slides down onto it- that's the thing it doesn't quite sit onto the module, there's a slight space between the two- and because of the direction of the threading and the motion of screwing or unscrewing in that retention screw, that module can still wiggle around in that gap a surprising amount. So too much rattle for my tastes, and a wiggly module simply won't do here. Was all set to go back to drawing board, but then I realized I had already done all the work for the perfect solution- it's somehting I've done before elsewhere. All i had to do was flip the module around to face the other way, and fit a much shorter set screw into the hole I tapped, which acts as an adjustable spacer. So all I had to do was adjust the screw until it was the perfect height to shore up the empty space around the module/ the area under its upper lip, then use the original retention screw that comes with the chosen one to hold the module just like it did originally... only now with much better results . Epoxy the spacer set screw in place and trim anything protruding into module, easy peasy. 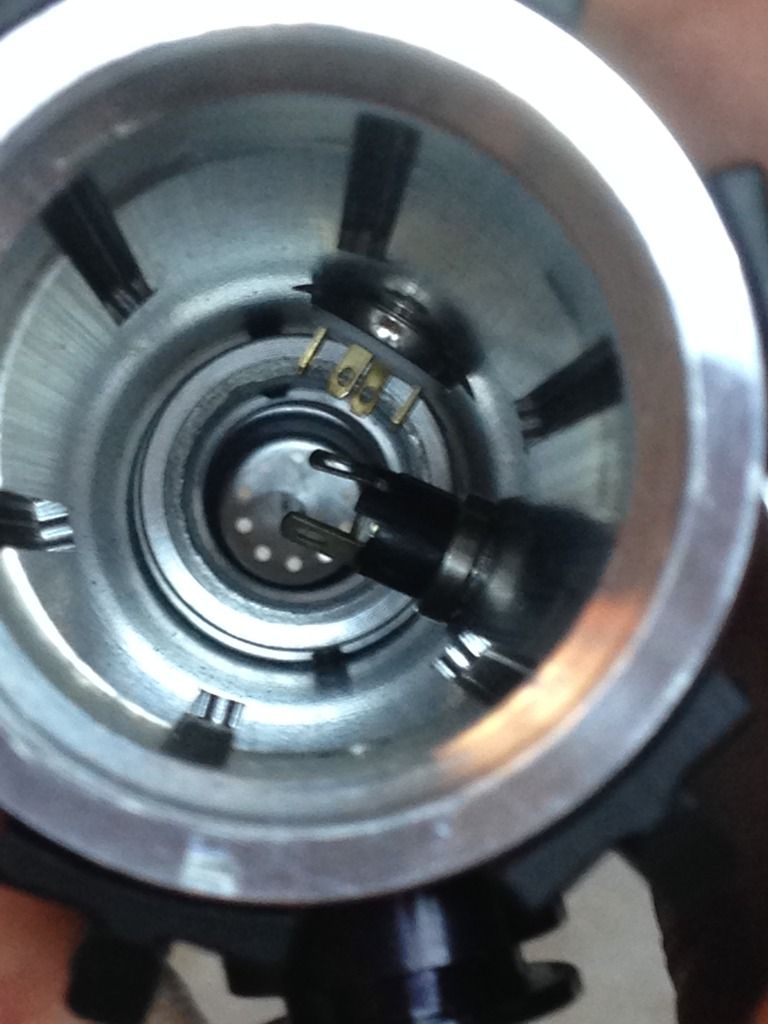 That's one secure module. Like I was saying that will be important for an accent feature I'm adding later. Another bit of playing around and deep thinking had me swapping the socketed 8-32 blade retention screw out for a long set screw. I do like the way the socketed screw looks on the bulb release accent, but it's a tricky thing- see the socket screw only looks good up until a certain height, once it's sticking up so high it starts to look bad. Sure you can trim the screw so that once you've tightened it against a blade, it sits very low to or even on the little bulb release box- but that leaves no room for the inevitable wearing that occurs along the blade/ screw over time, the loosening that occurs where you'd simply tighten the screw down a bit further... o wait- Ethan CAN'T tighten his retention screw down any further cause it's already butted up to the bulb release cause we wanted the socket screw sitting so low pro... see what I'm saying? So for this reason, in this particular situation, the long set screw is a much more dependable, smarter option. Looks a little better in there anyway IMO. I like it recessed. 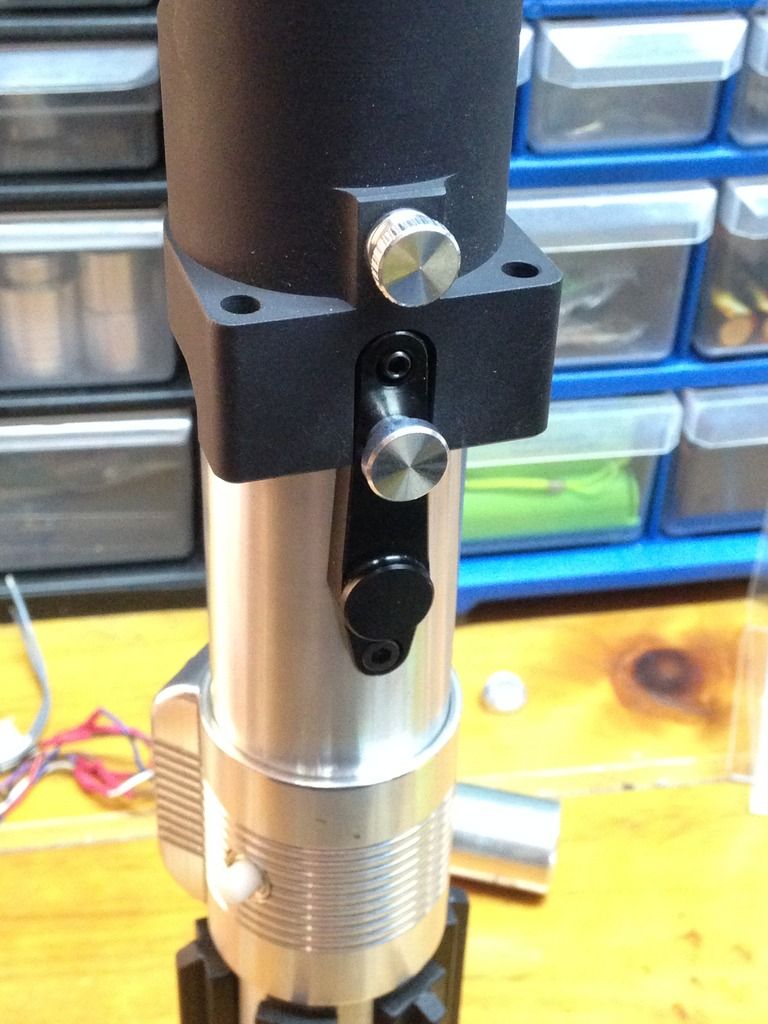 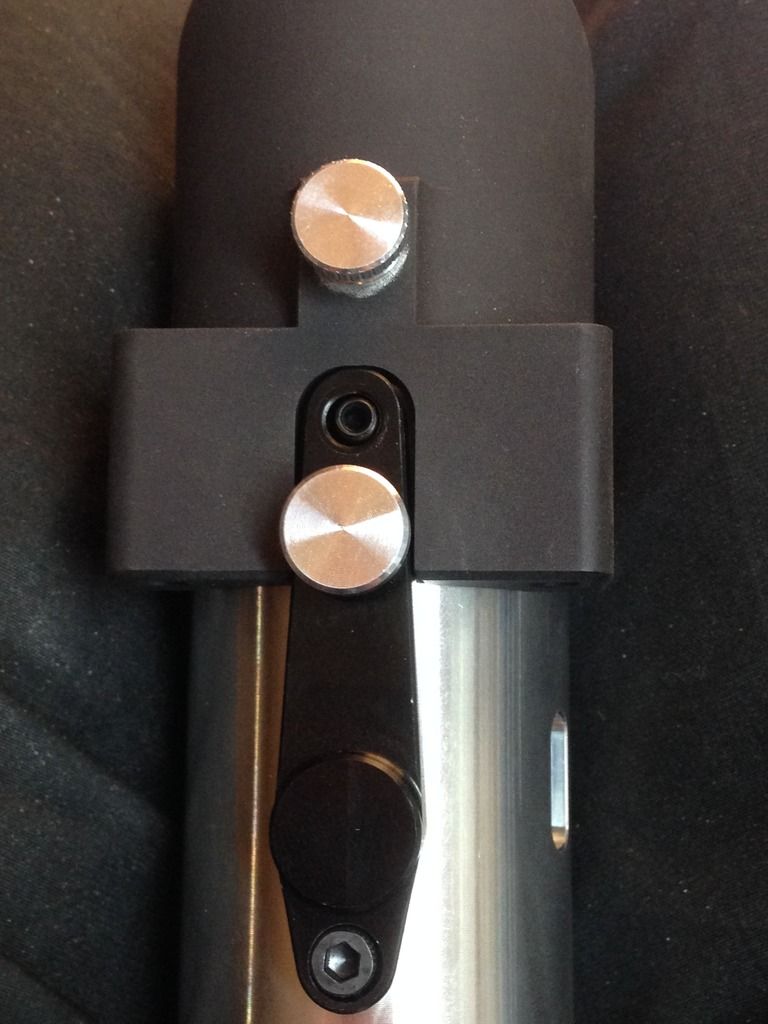 Ok, so that doesn't look like much- but those were practical issues that needed to be taken care of before I could move on to some flashier stuff lol. Now I can do the body work for the accent feature, and also get some etching done. Keep you posted . |
|
|
|
|
Logged
|
|
|
|
|
Rapine
Honoured Recipient of the Warlord Order
SaberForum.Com Moderator
Knight Commander

Force Alignment: -3020
Posts: 7792
Always scanning the horizon...
|
|
« Reply #23 on: March 07, 2017, 03:49:03 PM » |
|
Pretty innovative Rev. Nice job. I can't wait to see the end result. -1 |
|
|
|
|
Logged
|
"The thing that always drives me hazy, is wondering whether it's them or me who's crazy." ~ A. Einstein |
|
|
|
Corwyn VonBeck
Knight Commander
Force Alignment: -340
Posts: 1071
Grey Knight
|
|
« Reply #24 on: March 07, 2017, 04:10:26 PM » |
|
Its the attention to the tiny little details like this that make your mods so awesome. Enjoying seeing this come together!
|
|
|
|
|
Logged
|
|
|
|
|
Taegin Roan
Knight Commander
Force Alignment: 2066
Posts: 6252
Lord of the Force
|
|
« Reply #25 on: March 07, 2017, 09:01:43 PM » |
|
This looks like it's really starting to come along. Can't wait to see what it looks like when it's done.
Point to you
|
|
|
|
|
Logged
|
"I am the Outcast's Shadow" - Taegin Roan
"Confronting fear is the Destiny of a Jedi" - Luke Skywalker
"So this is how liberty dies: with thunderous applause." - Padmé Amidala
|
|
|
|
Ginsu117
Knight Templar
Force Alignment: -67
Posts: 304
(Jacen) The End Justify the Means
|
|
« Reply #26 on: March 08, 2017, 04:45:30 AM » |
|
Thanks guys!! Ya Jediseth that's the method- just used a bit of salt dissolved into some vinegar and some batteries . HAHAHA, Ginsu! I'm dying laughing ATM lol, just got to work, I needed that lol. Thanks man! Keep u posted . No problem man lmao, the detail looks too fine for a q-tip, what did you use to make the etch |
|
|
|
|
Logged
|
DARK SIDE POINTS PLEASE
Ultrasabers owned:
-Scorpion with Obsidian v3 soundboard and Sunriders Destiny color
-Converted Anakin Episode III Lightsaber with Red color
-Archon v3.1 Emerald and Obsidian v4 Soundboard
-Consular with green color obsidian v3
-Fulcrum with green color
-Prophecy V3 White color with standard sound
-Sentinel V4 Blue color with Obsidian V3
|
|
|
|
Kouri
Knight Commander
Force Alignment: 328
Posts: 579
Artisan
|
|
« Reply #27 on: March 08, 2017, 05:24:44 PM » |
|
Any thought of locking the black bar down with a shorter socket screw and instead replacing the silver detail with its own 8-32 thumbscrew?
|
|
|
|
|
Logged
|
|
|
|
|
RevanReborn
Technomancer of the Graflex Order
Knight Commander
Force Alignment: -1086
Posts: 1121
|
|
« Reply #28 on: March 09, 2017, 04:38:51 AM » |
|
Thanks everyone!! Ooo, Kouri I just got real intrigued real fast! You mean in the bulb release box or the act box with av switch? Actually Ginsu I totally did just use a q tip but you're right it was really tight, one dab in centre pretty much covered the whole pattern. I used a little cog sticker to make the symbol, just stuck it over the knurl, taped the edges to protect against the overflow, and cut it out with a tiny exacto. Next time I know to clear coat the sticker before cutting out shape tho, it got soggy and caused me to bail earlier than I wanted to on the etch to save the shape. Man, I was making good progress today and then the power went out  lol. I went to bed and when I got up to get ready for work it was still out lol! Jeez! It better be on by morning I have work to do. Ok so with the module secured now I can start doing the body work for the accent- a wicked status indicator light that displays three statuses and lights dynamically to the sound of the saber. So step one is mount the light, step 2 is pave the way for wires so they run outside blade socket and around module on their way down to board. So first goes the 13/64" hole to clear the narrow part of the 5mm rgb lens. 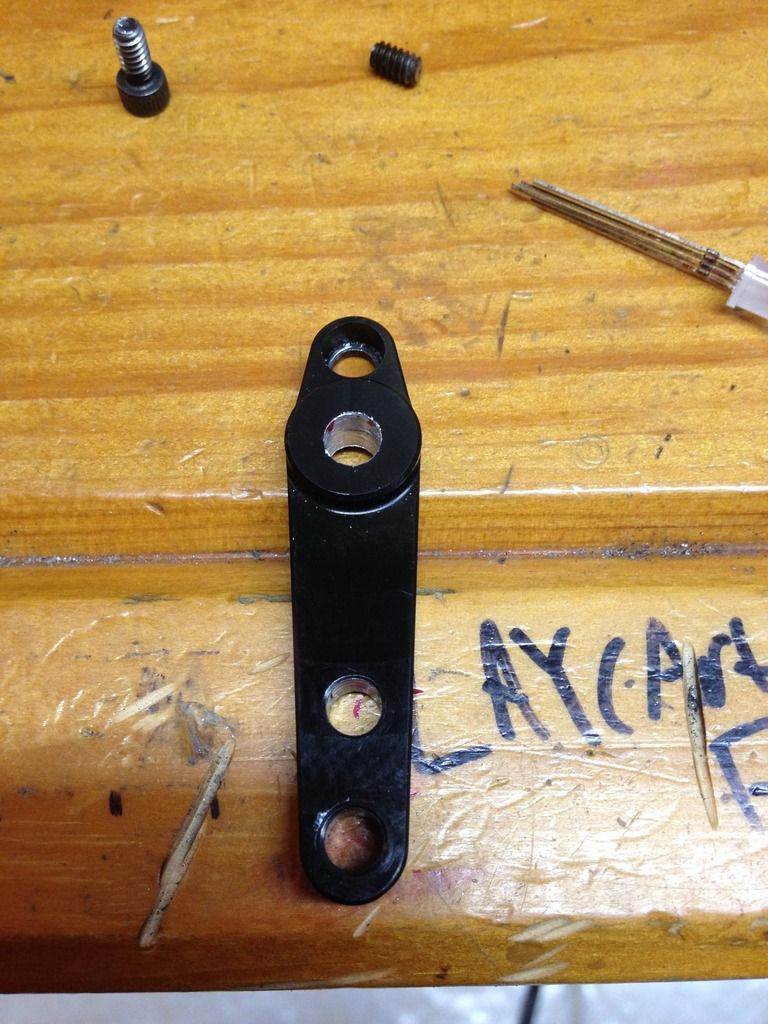 Then on the underside a slight 15/64" recess for the flange at the base of the lens- but only JUST enough so it sits up inside without affecting fit of the bulb release box on hilt- I don't want ANY extra room in there for accent, so the fit of box holds it super tight. 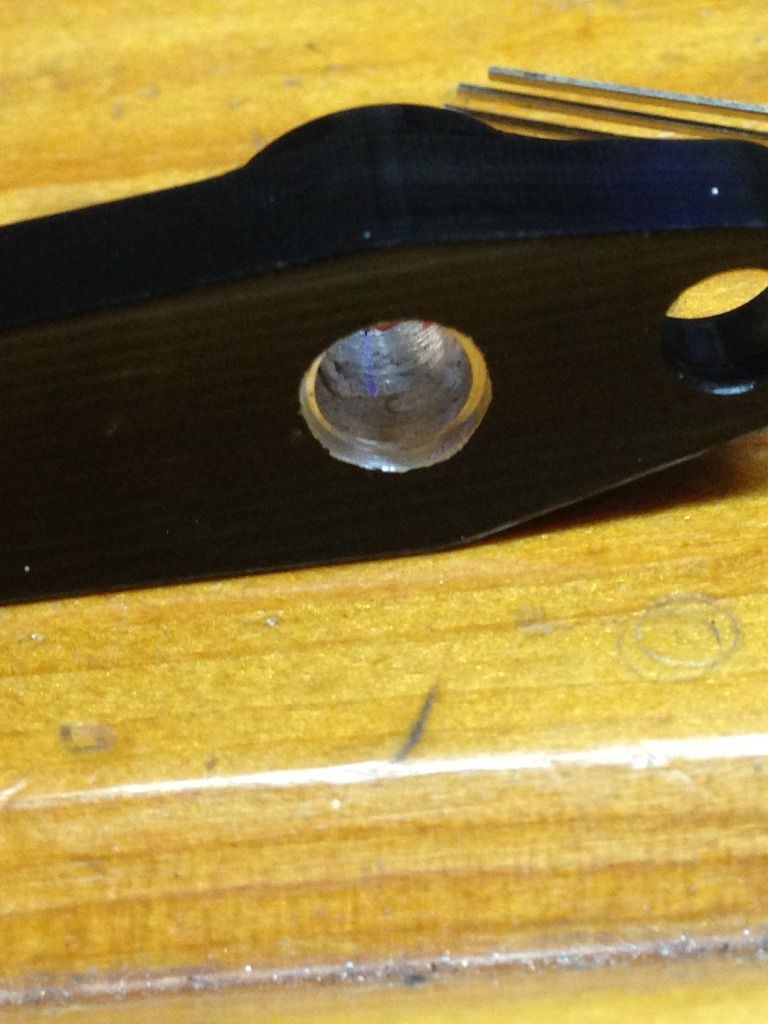 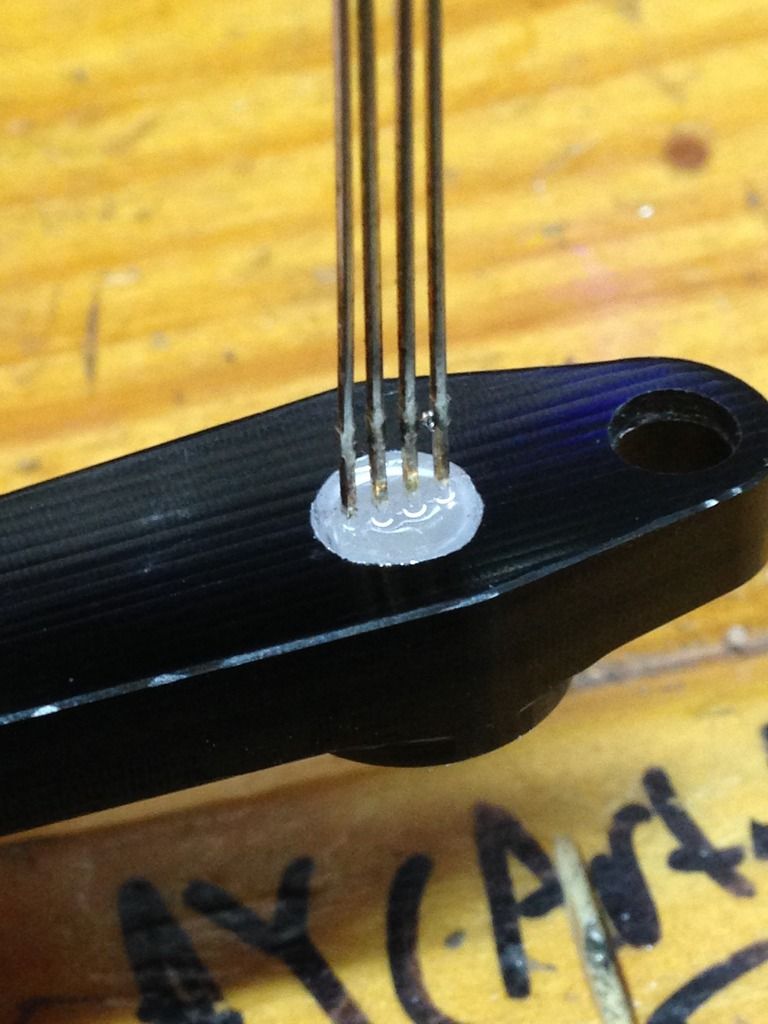 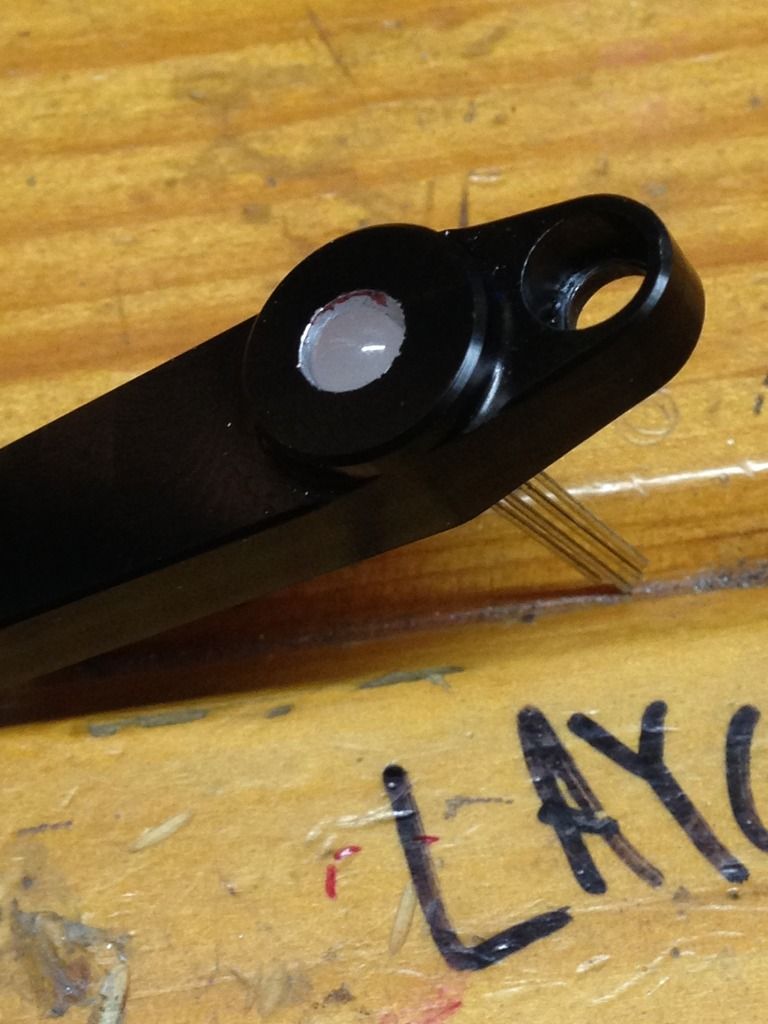 So now the accent will be mounted tightly by the fit of this box. But I need the 4 legs to pass through. 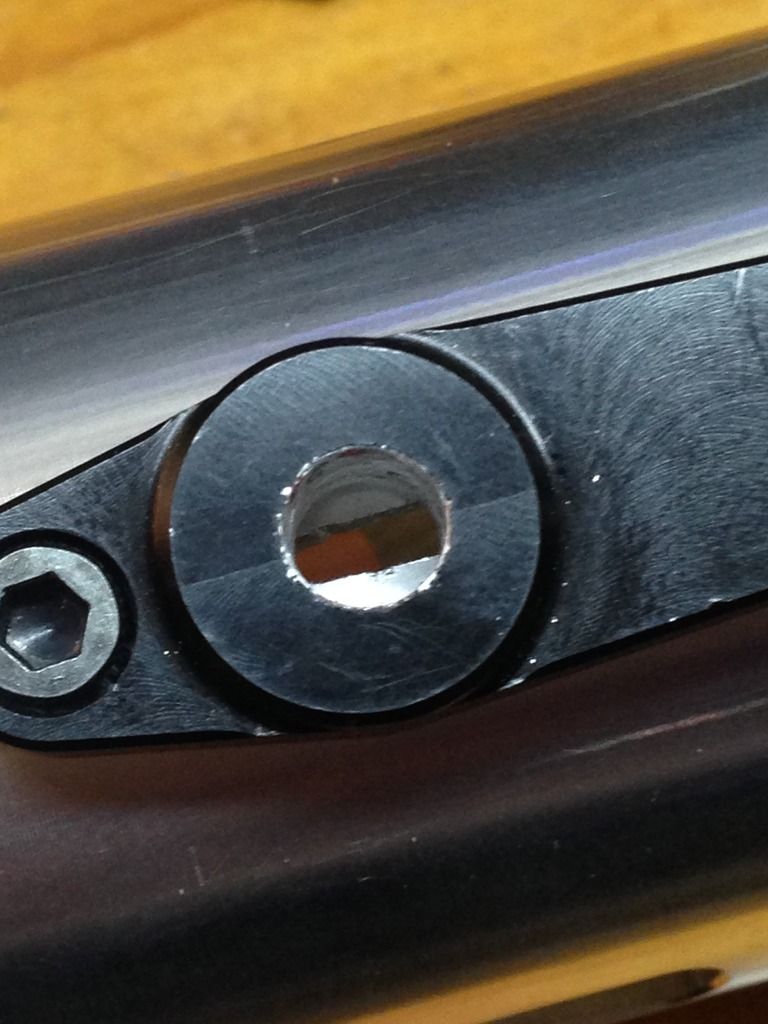 To do that I drilled a hole big enough to get a file started (I had smaller files that could have gone in smaller holes but this one actually had the narrowest footprint when turned sideways so I used it)- the hole is hidden by box completely. 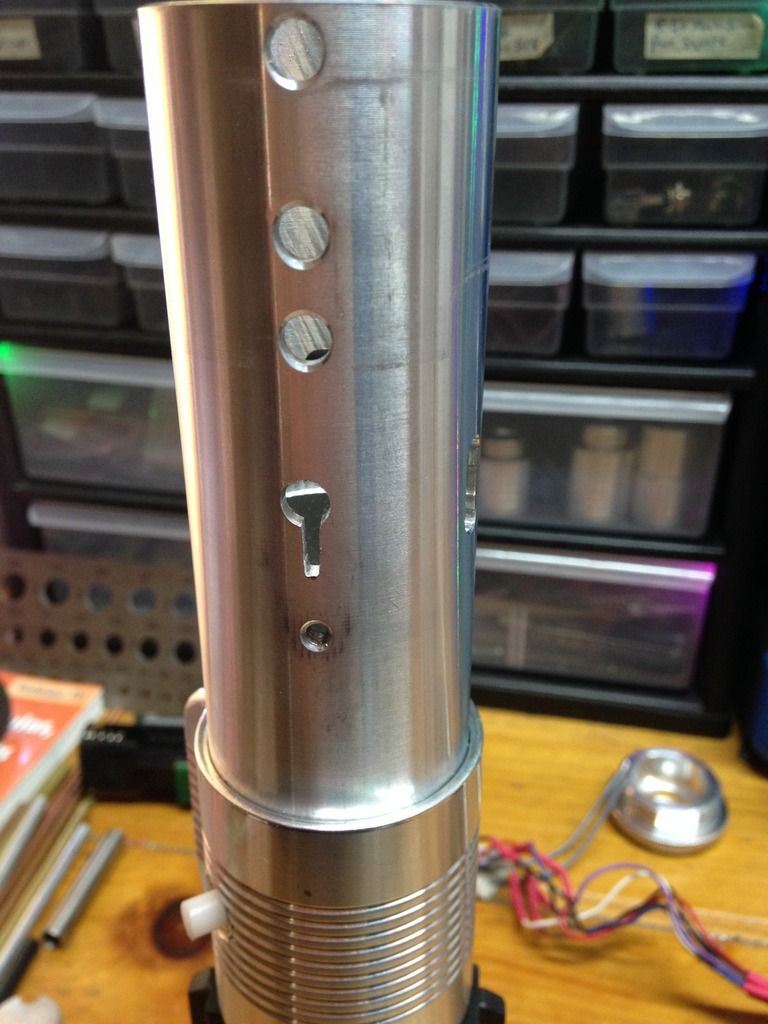 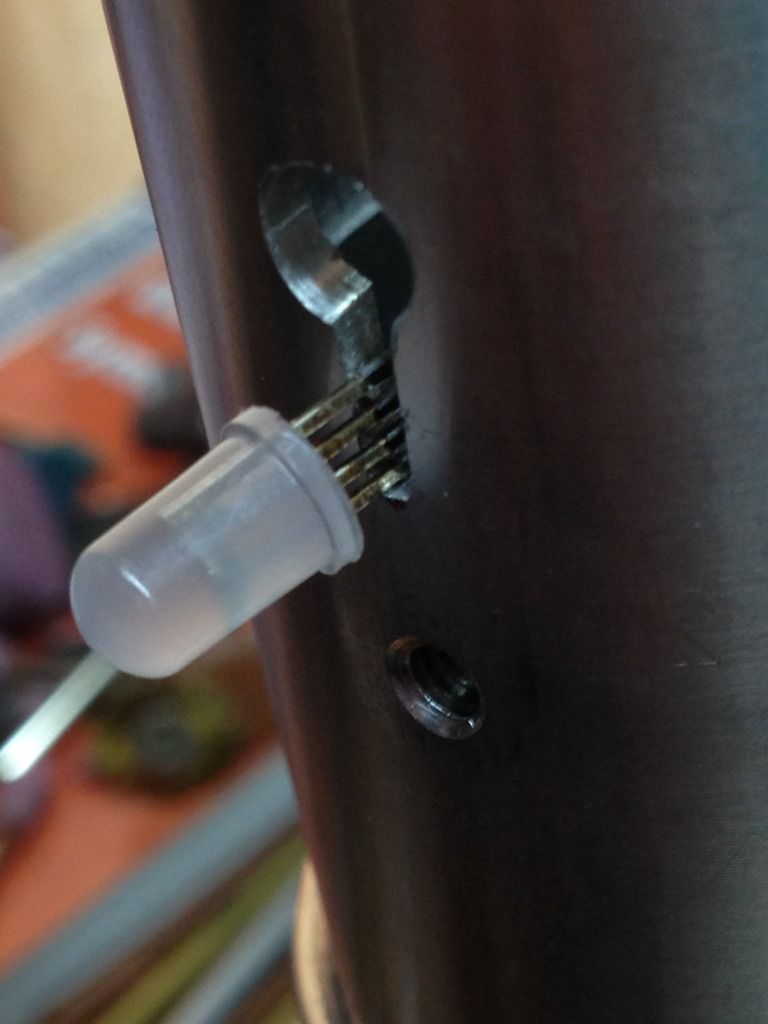 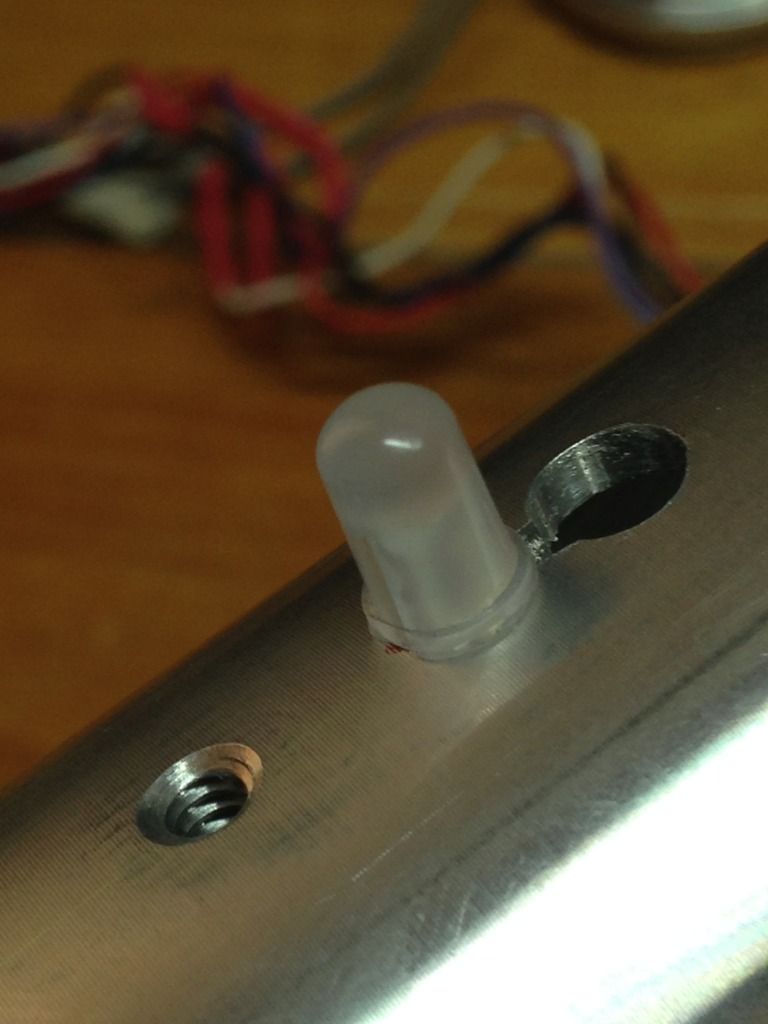 And there you have it- step one roughed in (tlc to come after).   Now I need to cut a path through the outside of blade holder and through outside of module. Hydro electric power providing, I'll keep you posted lol . |
|
|
|
|
Logged
|
|
|
|
|
Jediseth
Knight Commander
Force Alignment: 828
Posts: 1551
"If I told you, you wouldn't like it." Han Solo
|
|
« Reply #29 on: March 09, 2017, 04:54:53 AM » |
|
Is that accent led an RGB led? And how are you going to get all three colors to work?
|
|
|
|
|
Logged
|
Guardian : GB, FOC Red, V4, 11-15 Reaper: V4, BR, 4-17 Chosen One CE : Emerald, V4, 12-15 Consular: Emerald V4, 1-16 Manticore: BR, FOC Orange, QD, V4, 11-16 Monarch: Emerald, V4, 2016 Autumn Raffle -1st Arbiter: V4, SD, Silver FOC, QD, 3-17 Archon V2.1, Diamond, 4-17 |
|
|
|
|


