The other week I re-wired an Aeon v2 RGB and I learnt a lot . . .
http://www.saberforum.com/index.php?topic=25995.msg389663#msg389663 . . . I also quickly wired up and tested a small dip-switch with that wiring, and last night I changed my plans and did another . . .
This Dark Initiate LE v4 is my daughters birthday present . . . and I know she really loves the Gold colour we get from our RGBA saber, so to give her that I had to do some special LED wiring anyway, and just thought this would be cool . . . and its worked out great

I'll try not to waffle on too much, and . . . I may get be a bit technical here, lol, just a warning

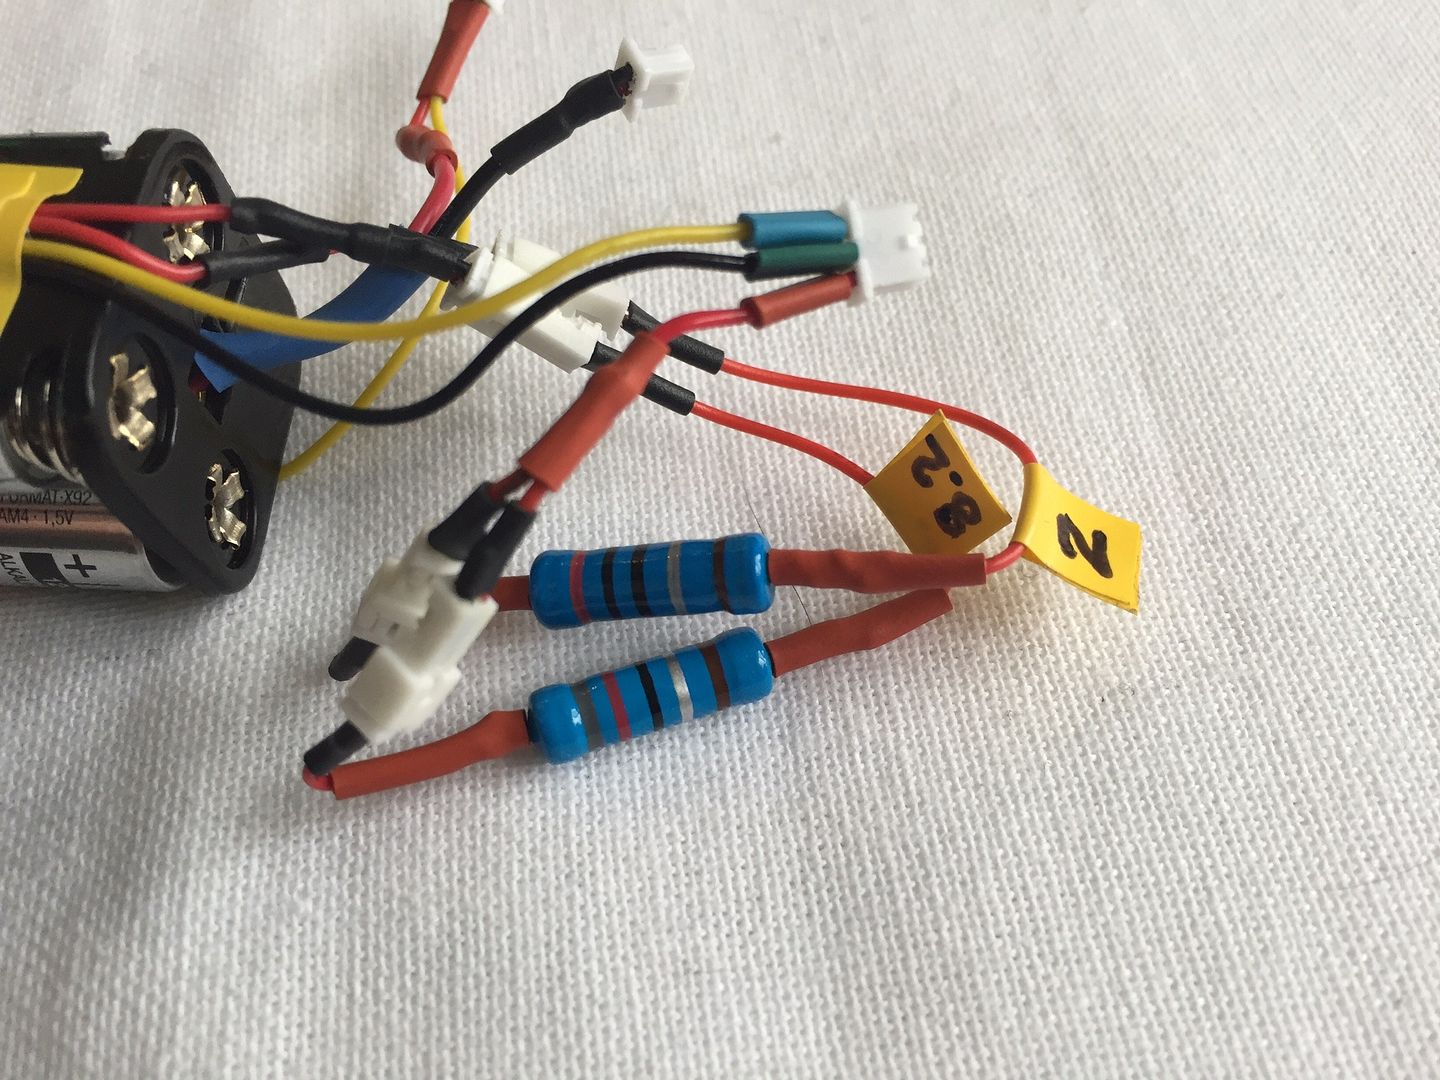
I've been playing around with LED's and resistors to create colours and match some Emerald only colours, and I've also been testing different switches . . . In my tests I found that I could have 2 channels (switches) for the same colour with different resistors in line that are both wired to that one colour, using channel 1 has one affect and channel 2 a different affect . . . I'll use red as an example . . . If red channel 1 has a 2ohm 2w resister and its mixed with blue the result will be magenta (similar to BH), if red channel 2 has a 8.2ohm 2w resister and that is mixed with blue the blade colour will be purple, similar to VA, but a little bit pink-er . . . and this is what I've wired up here . . .
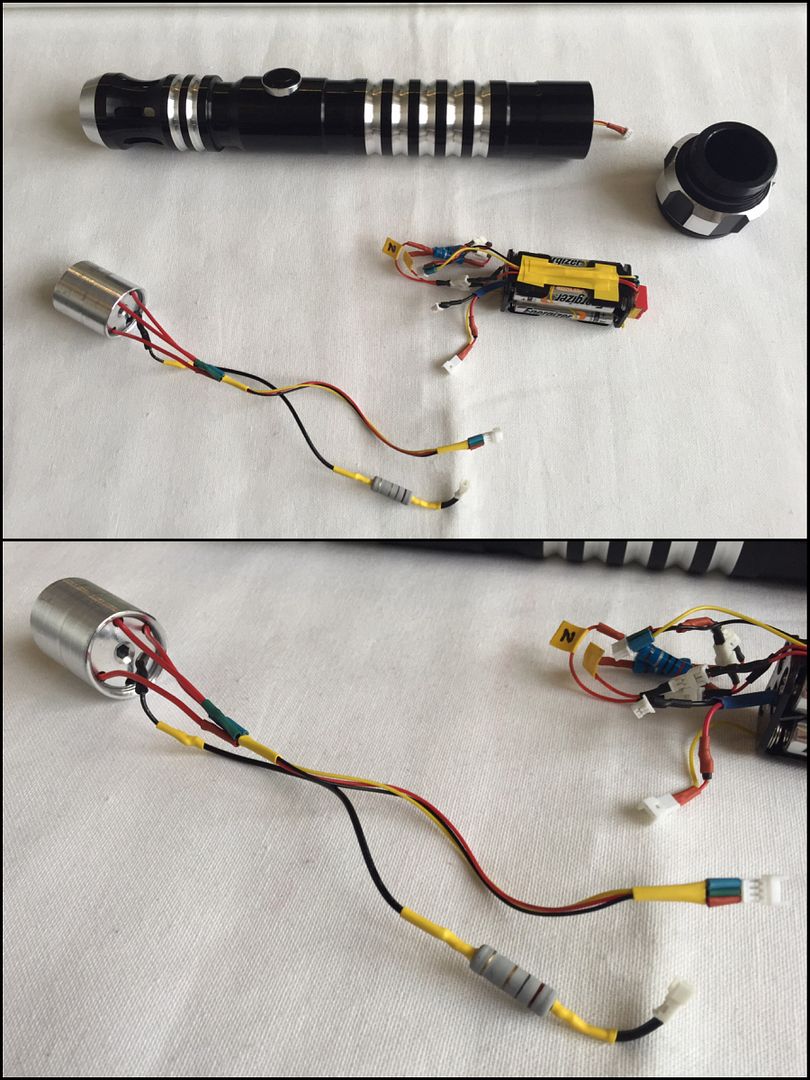
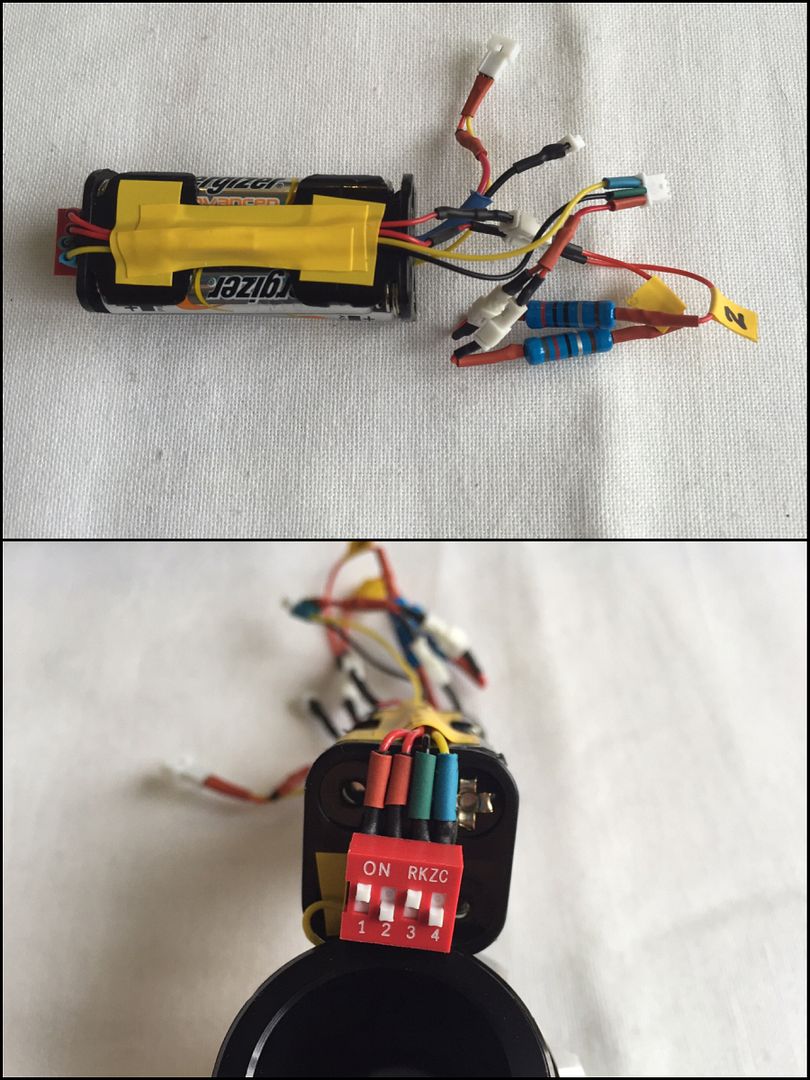
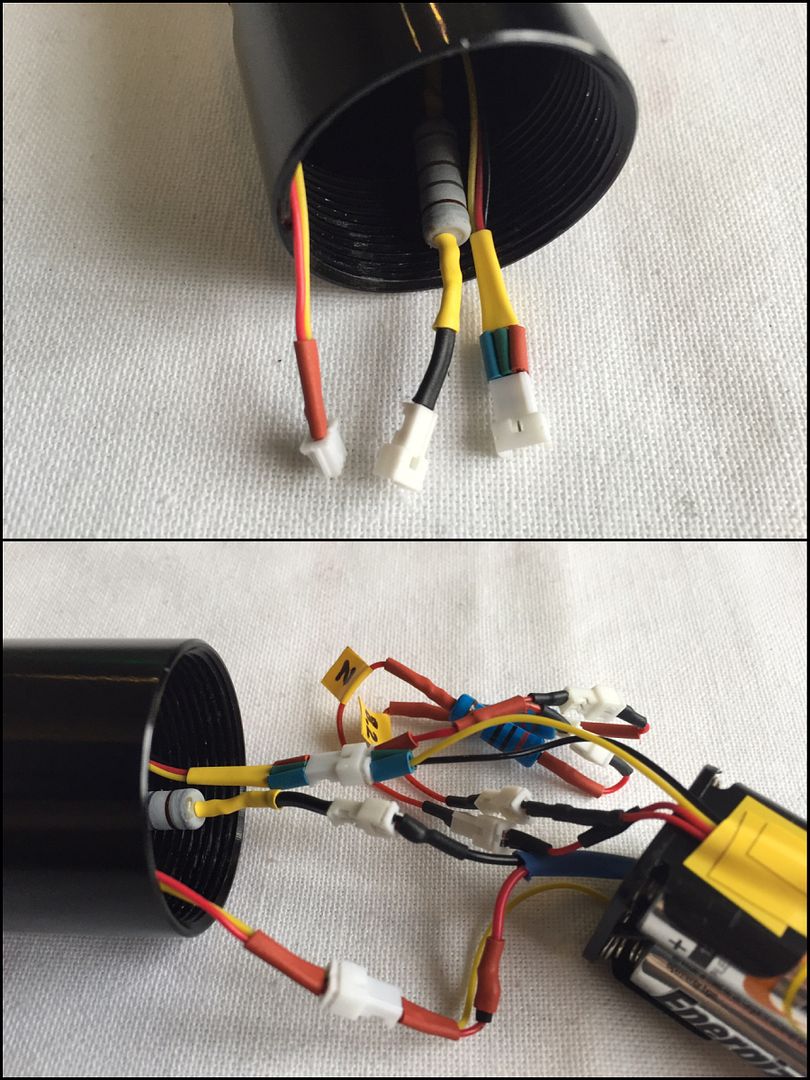
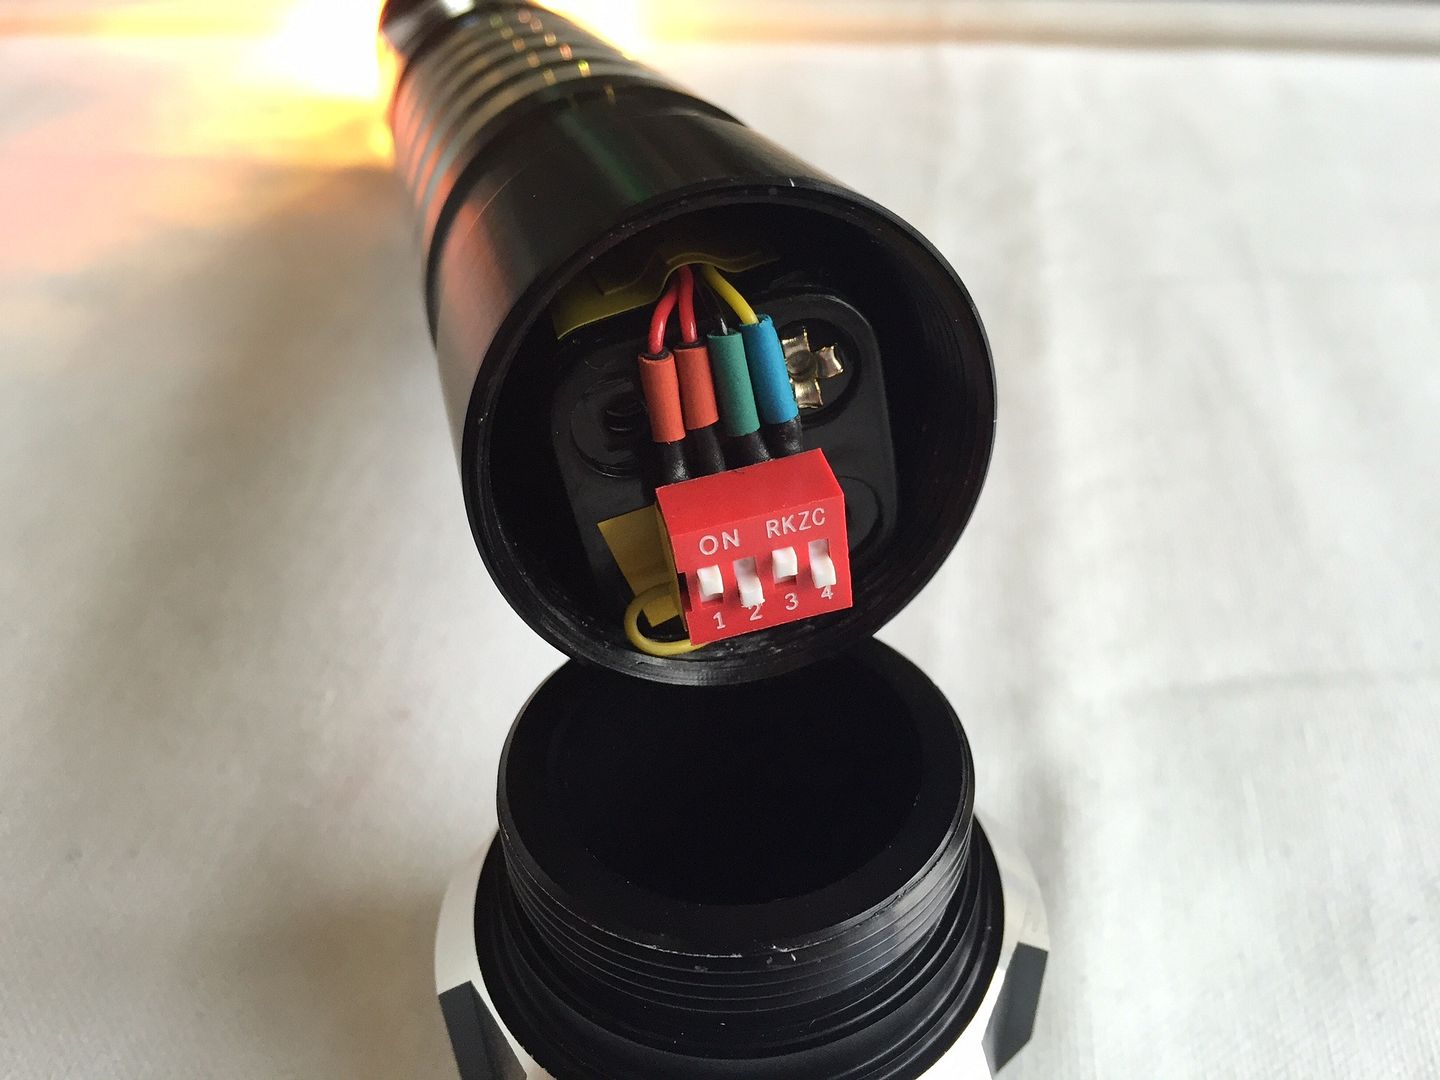
I've used a small 4way dip switch, 1 is red with 2ohm resistor, 2 is red with 8.2ohm resistor , 3 is green, and 4 is blue . . . This has a master switch for on / off, and I've used the same LED module that US use for AB (4 pad RGB with common negative)... I've used the micro JST connectors to save space, and I put connectors on these resistors because I found that the colours can change from testing to actual wire up and this way I can get some other resistors and swap them over without having to cut and re-solder, just make up a new resistor to plug in place, if i'm not happy with the results....
I've attached the 4way switch to the bottom of a AAA battery pack, so all my daughter has to do is unscrew the pommel, flick a few switches and she can change the colour whenever she wants.... The colours have so far worked out ok, of course, as the batteries drain the mixed colours can change, so we'll just have to wait and see how that turns out... I'm not completely happy with the purple colour, so I'll more than likely change that resistor to reduce the red in that mix a bit more....
Here's some pics
All wired up with connectors, because I like to make sure everything works before installing in the hilt . . . and the 4way switch attached to the battery pack
the 2 red channel in line resistors
Installed in hilt
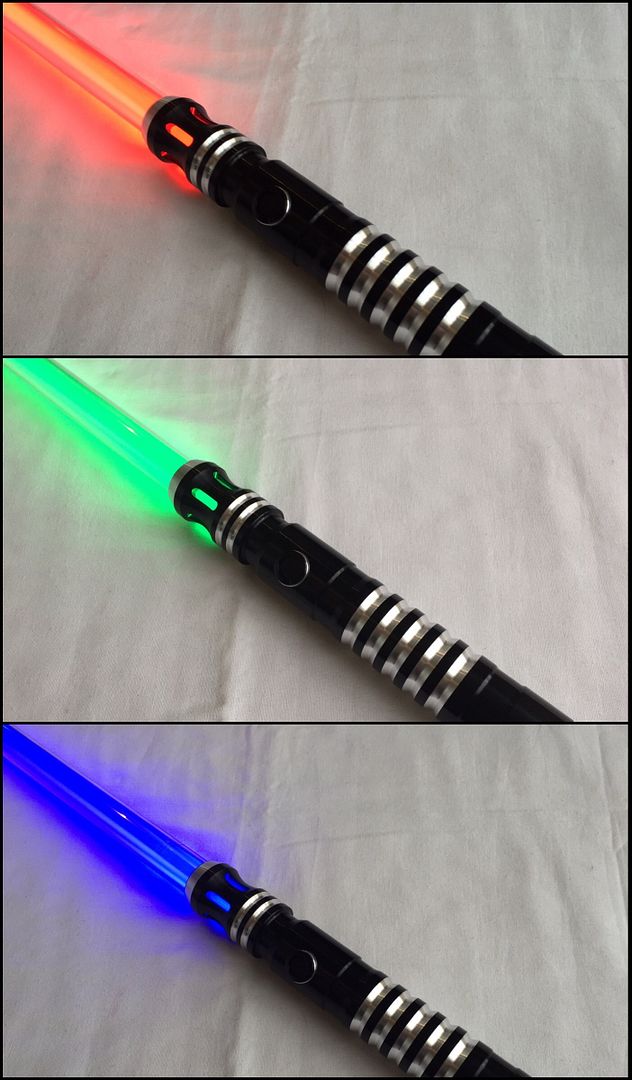
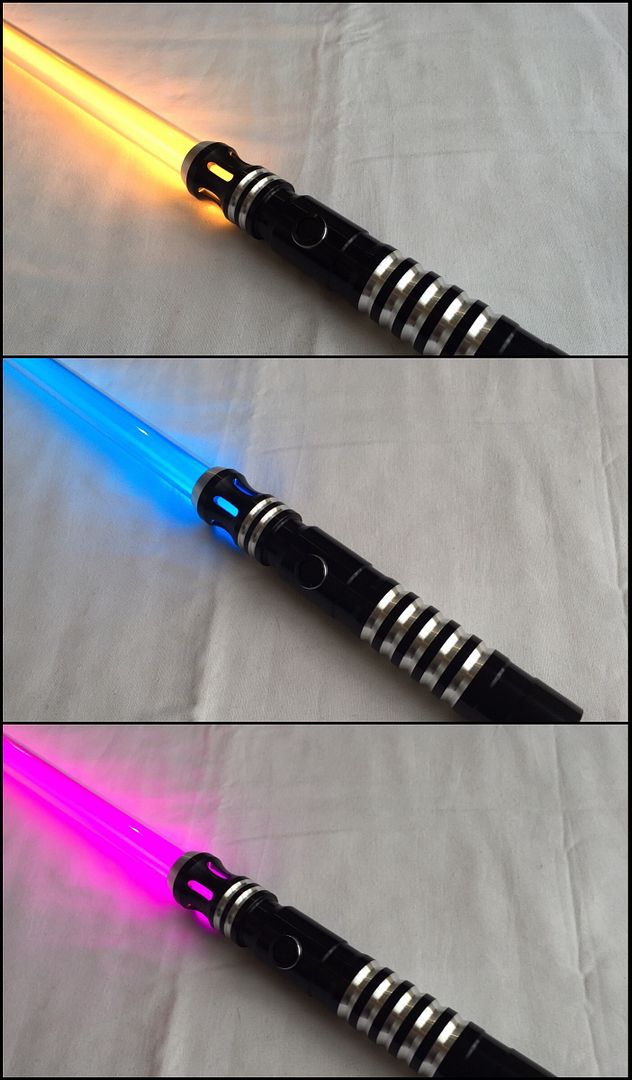
Now the colours
red (ch 1), green and blue... the green colour on this LED module is closer to EG rather than CG
red (ch 1) + green = yellow (very close to Gold with this setup)
green + blue = AB
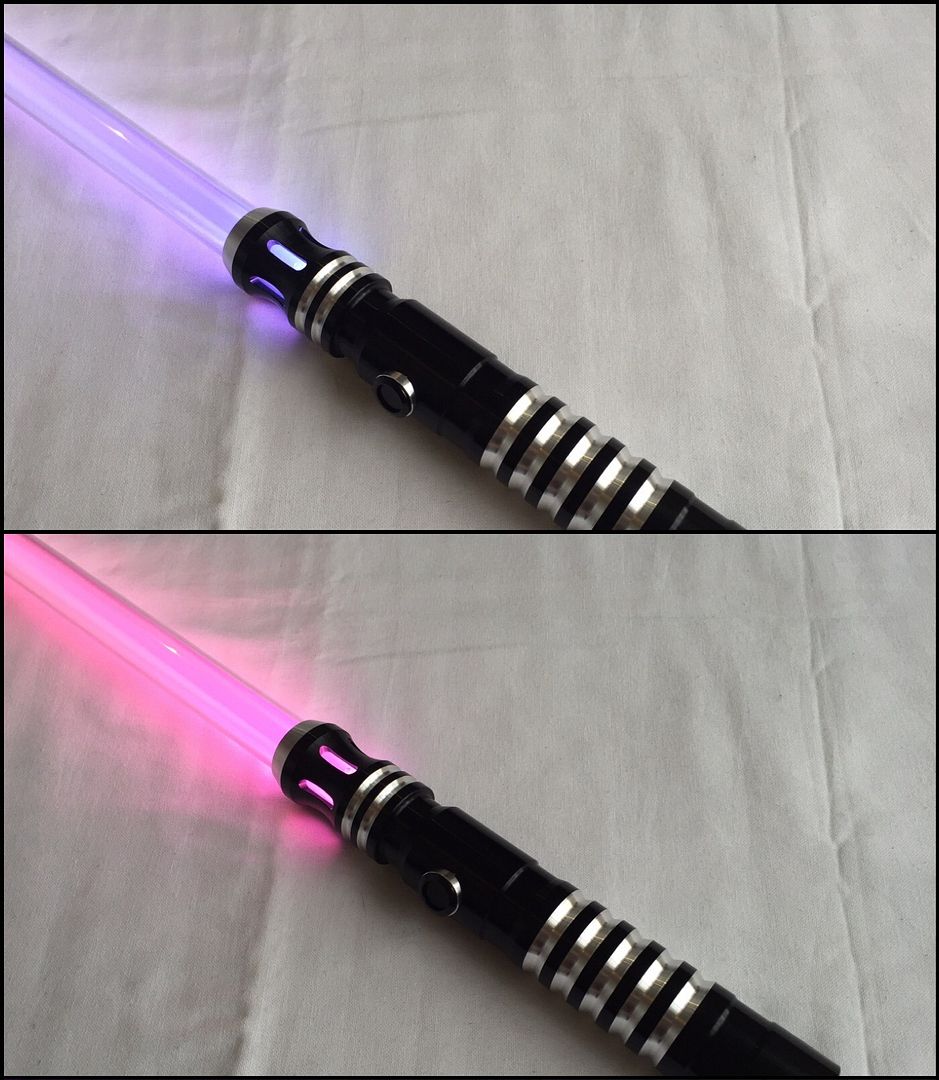
blue + red (ch 1) = magenta
red (ch 2) + green = lime (like a toxic green colour . . . I like it)
red (ch 1) + red (ch 2) + green = orange (very close to FO)
red (ch 2) + blue = purple (similar to VA to the eye, but a bit pink-er)
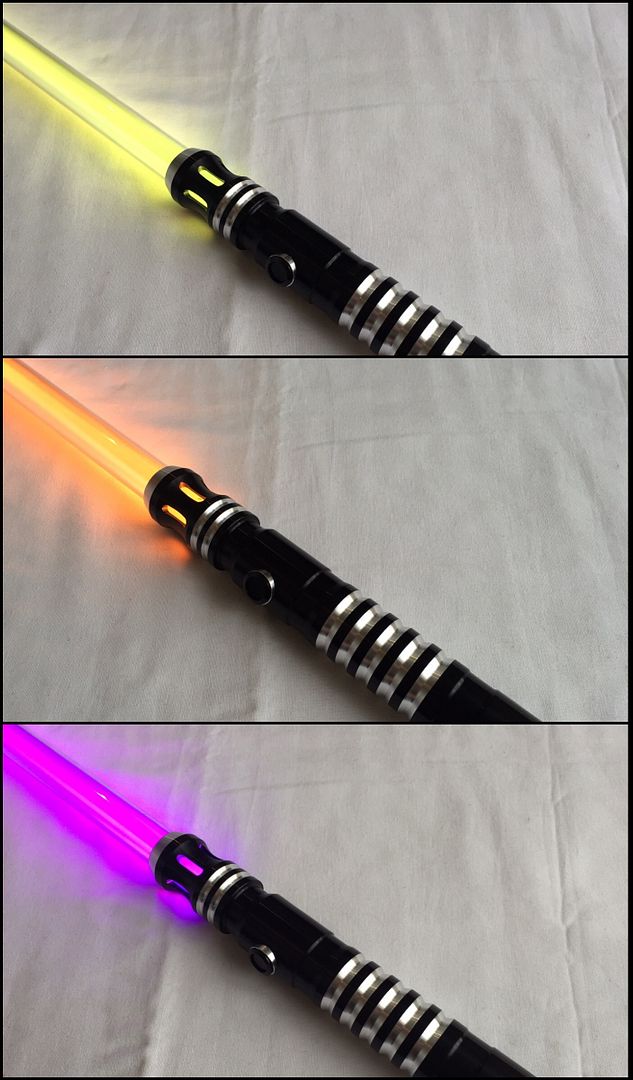
red (ch 2) + green + blue = pale purple
red (ch 1) + green + blue = pale pink
I've still got more plans for another . . . some time soon . . . cheers


