Bulvoy
Knight Commander

Force Alignment: 500
Posts: 547
~Sipra Gehaz~ Rebel Legion "Ghost Base"
|
 |
« Reply #150 on: June 07, 2016, 08:27:27 PM » |
|
Bravo.. Looks Fantastic. The pup is right by the by, lol
|
|
|
|
|
 Logged
|
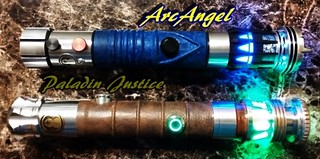 UltraSaber's UltraSaber's by bulvoy, on Flickr Menace - Emerald V4s- RavenSS pommel Manticore V4s-CG- S /FOC-Renegade small pommel Crimson Scorpion- V4s-BR- O/FOC Dominix V3s-SRD Initiate V4 Lite- VA "Im here to chew bubblegum & kick ass, and I'm all outta bubblegum"... |
|
|
|
GQtattooed
Knight Lance Corporal

Force Alignment: 34
Posts: 73
|
|
« Reply #151 on: June 08, 2016, 08:04:54 PM » |
|
Epic RevanReborn!
Sent from my iPhone using Tapatalk
|
|
|
|
|
Logged
|
|
|
|
|
RevanReborn
Technomancer of the Graflex Order
Knight Commander
Force Alignment: -1086
Posts: 1121
|
|
« Reply #152 on: June 12, 2016, 10:56:50 PM » |
|
Thanks GQ  . So I'm def gonna be able to recess the plug/ switch a bit . In these pics the switch itself is pushed out of plug a bit from the wire jammed up inside it but will be seated flush on the plug, which can actually be fit up inside, so a win there. If you look close you can see how switch came out a bit in pics. 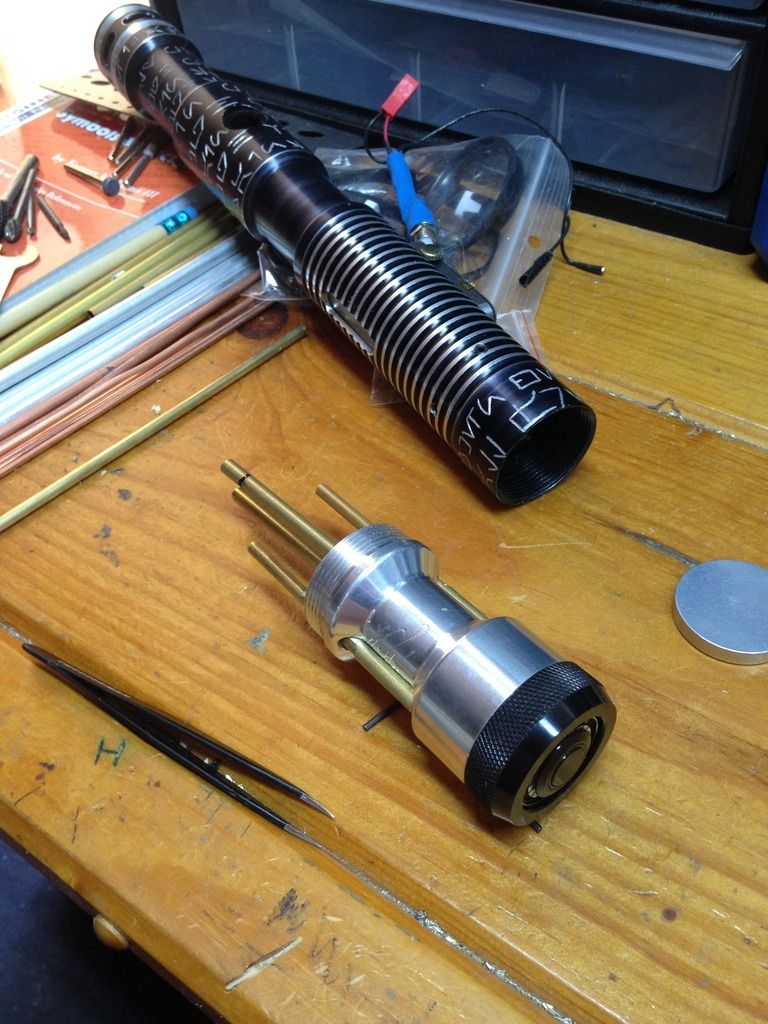 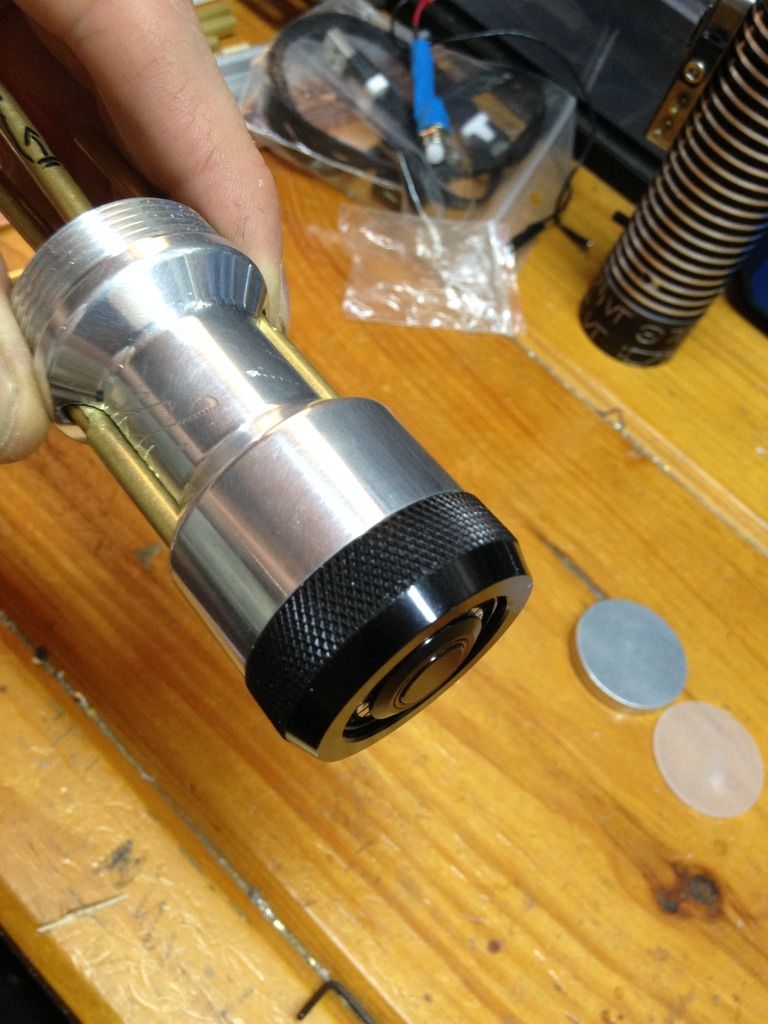 Here you can see what i mean about the wider/ sturdier base of support the chassis has now. Of course, a lot of the rods/ tubes that stick up past the threads of the choke will be removed, only about a 1/4" sticks up above. 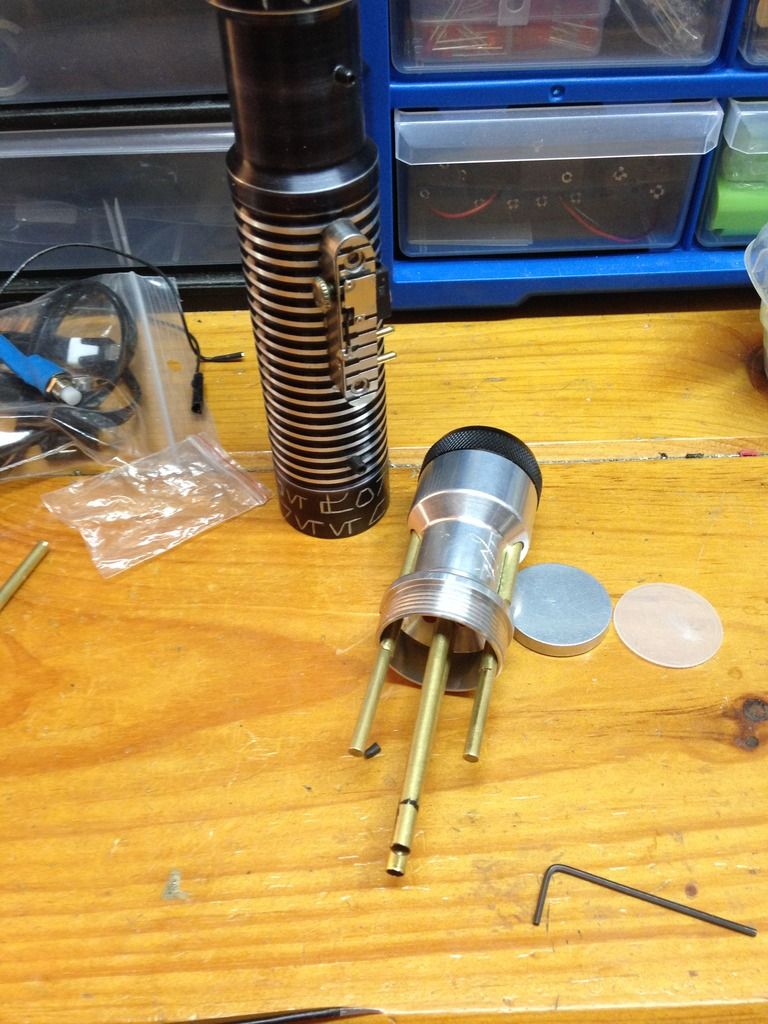 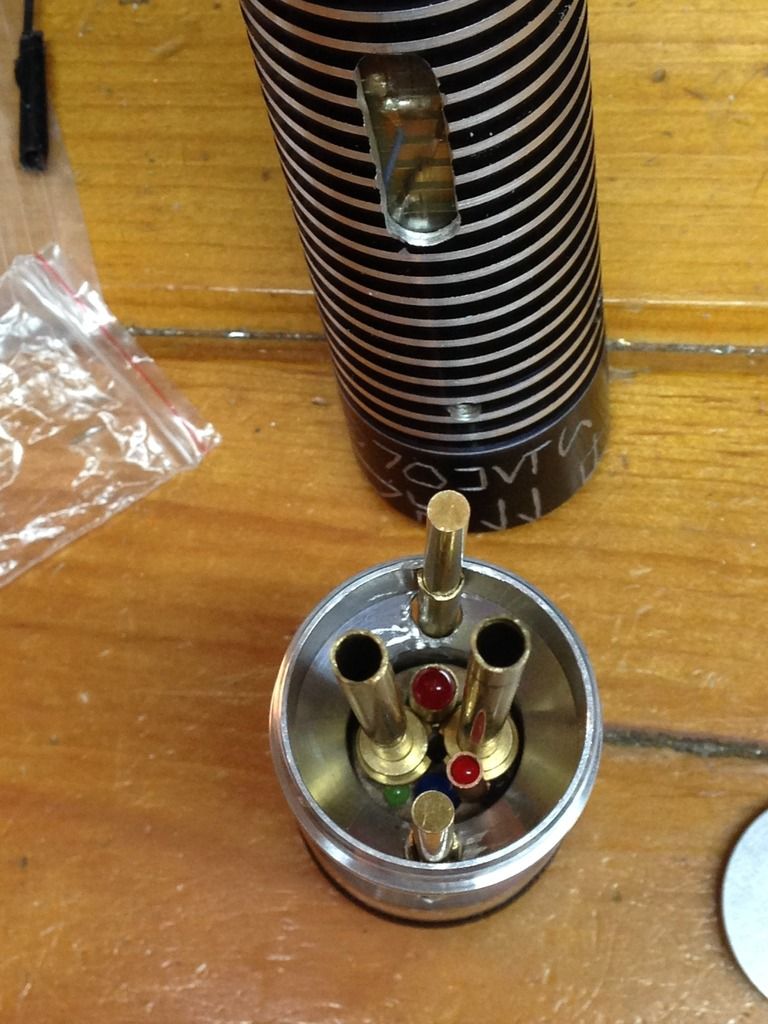 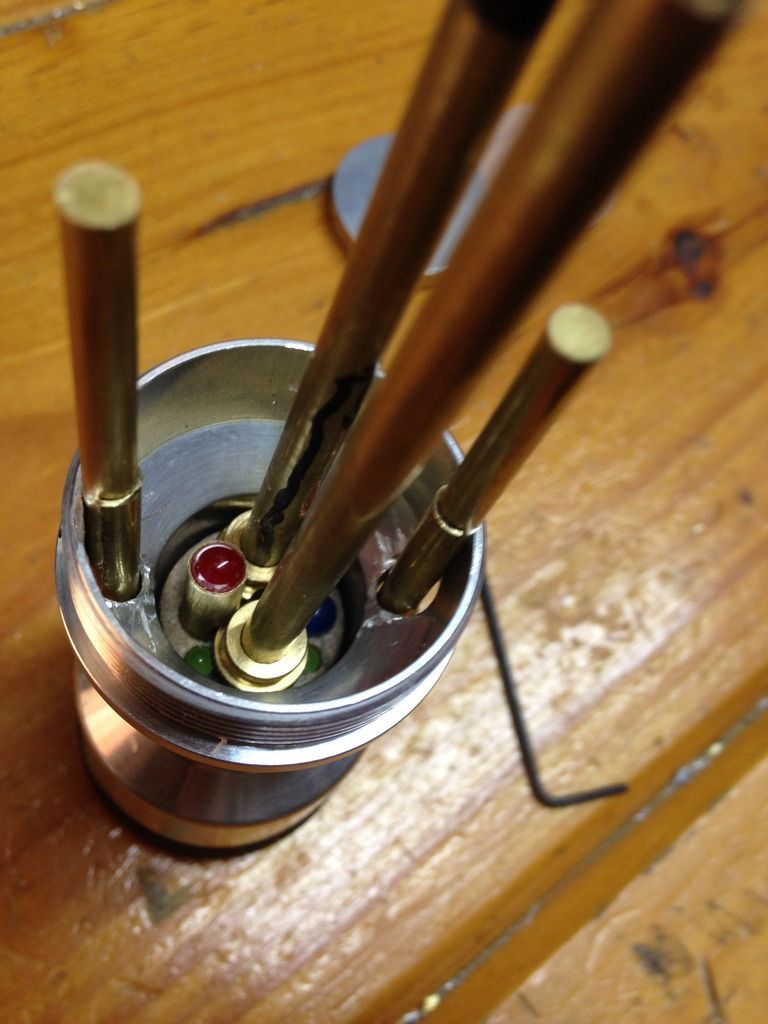 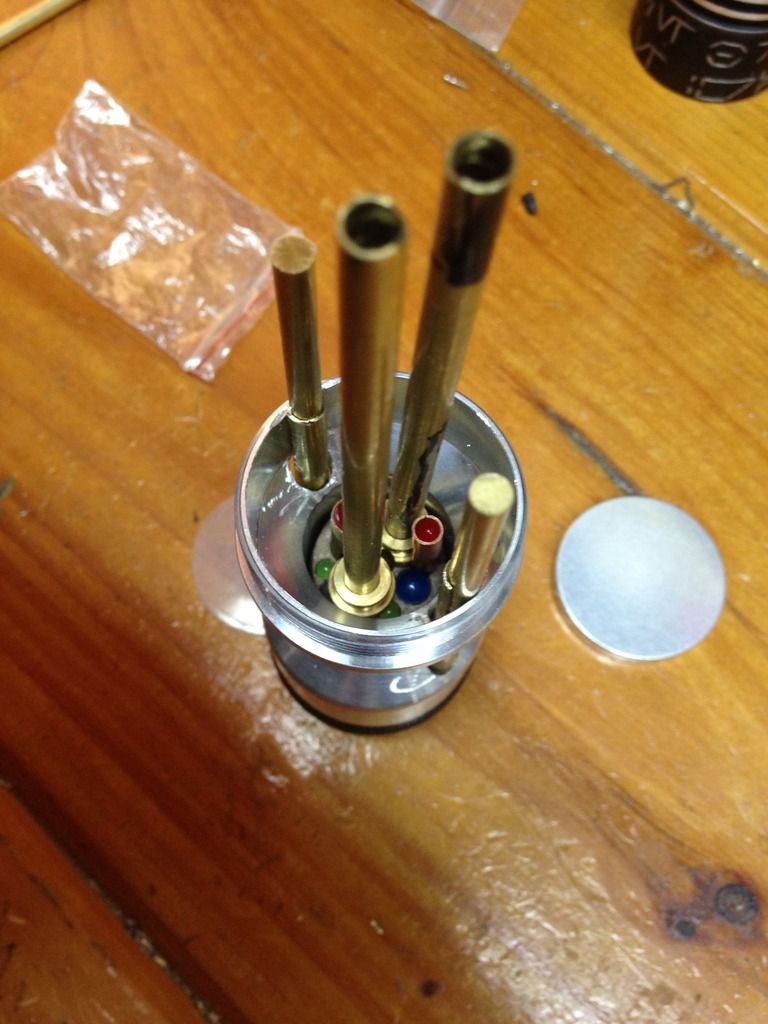 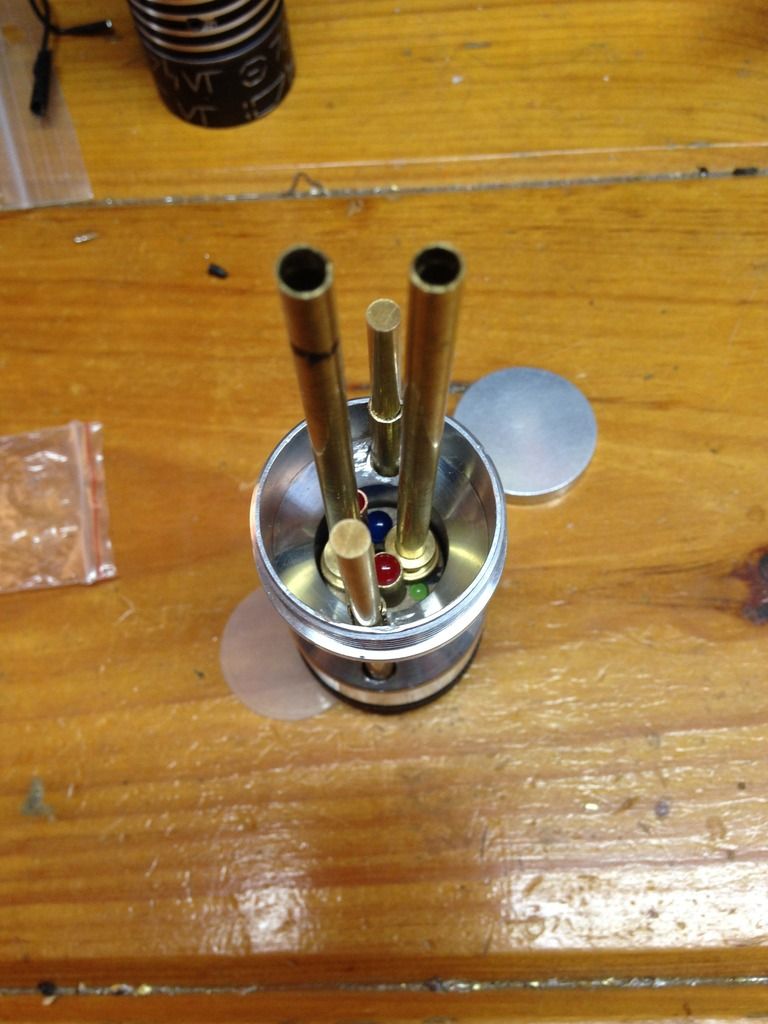 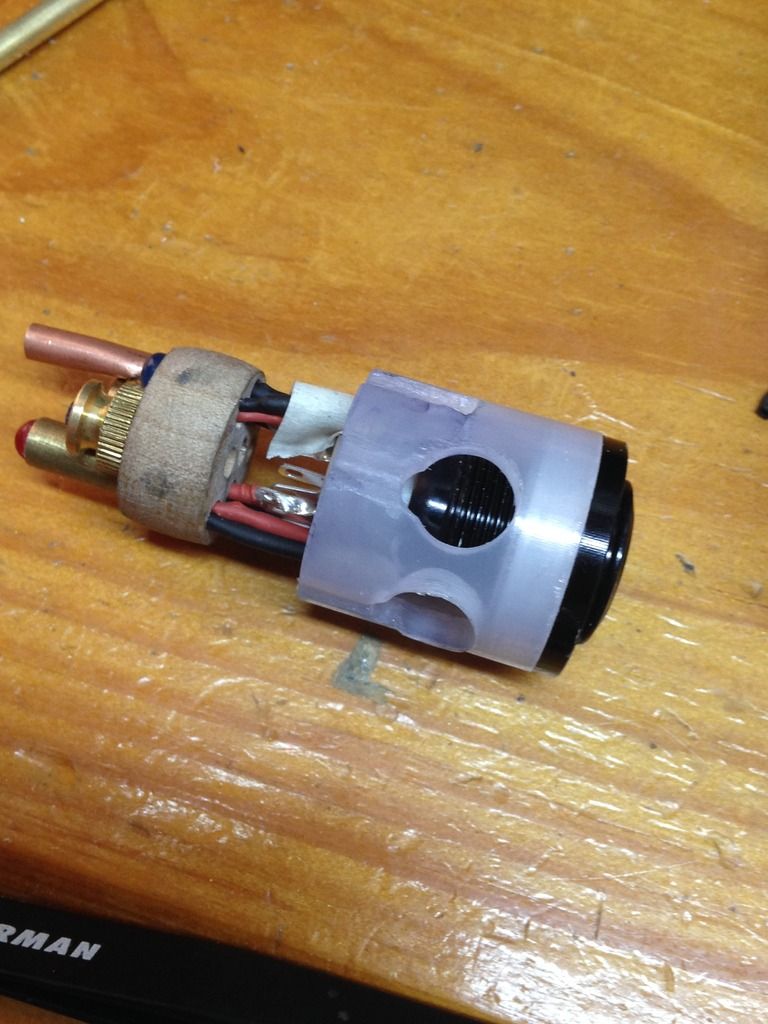 I still have to wait till further along to show you how it all fits together, but that gap lines up with where the threads for the choke and vented pommel come together. A piece of circuit board will lock into place between those parts with everything run to it. The plug is trimmed to length and now has more notches to help the accent legs fit in, and two deep channels cut into the other sides (can't really see here), to allow the rods to slide through the edges so the chassis can operate. You can just picture how they will look with the switch wires and all the 5mm led's and resistors all in that 1" space HAHAHAHA! It's like there won't even be air, just solid packed. Even with the circuit board trick, I'll likely have to carve some more contours into the inside of the plug for the resistors. Alignment 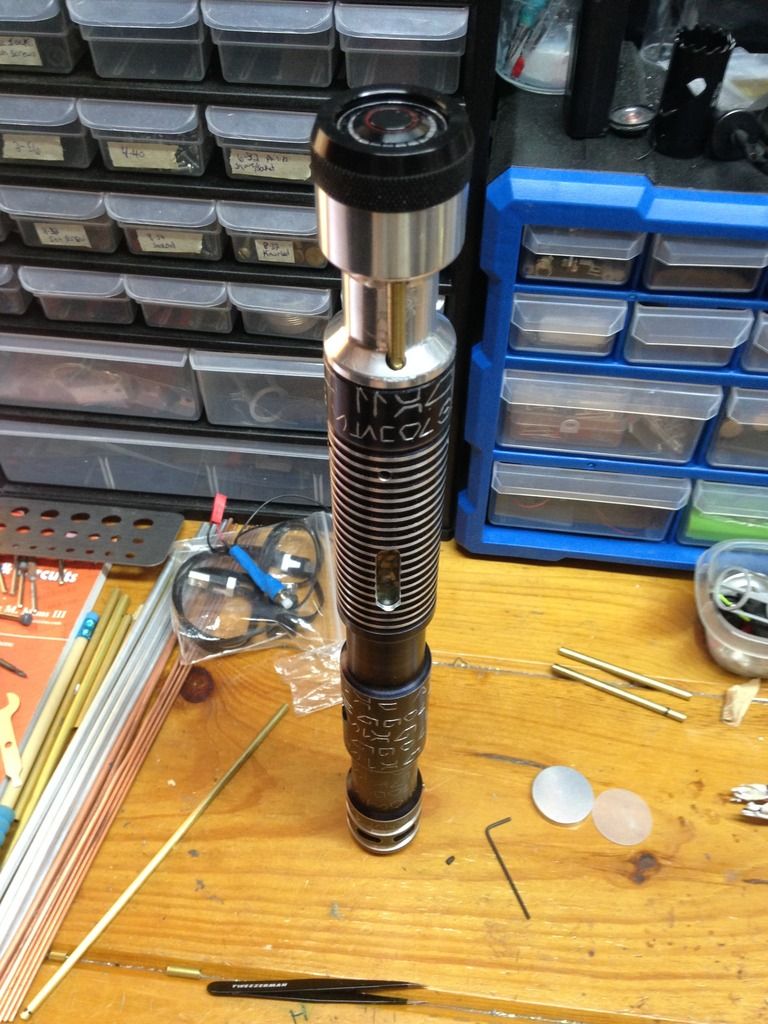 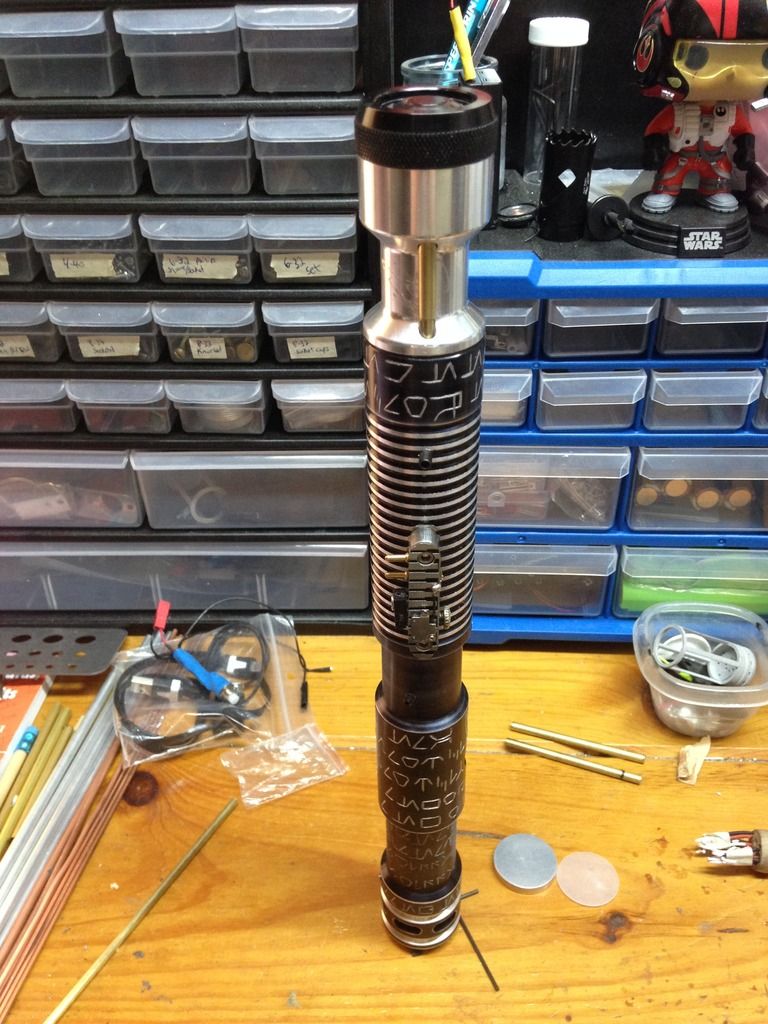  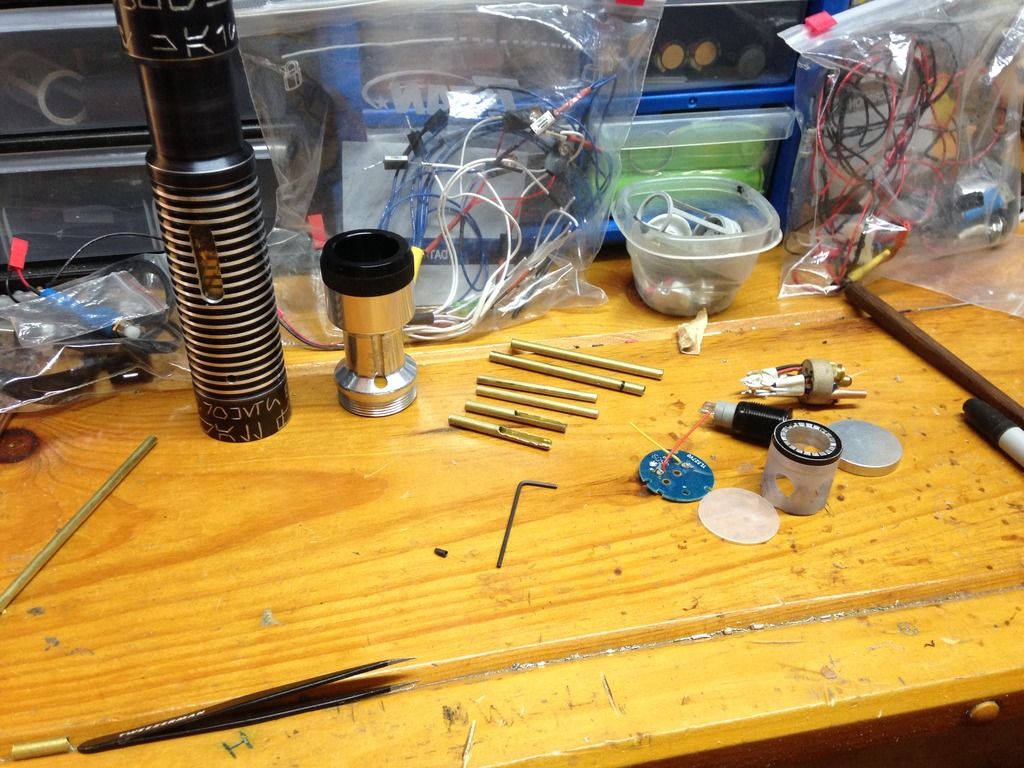 Keep you posted , MTFBWY. Thoughts are with everyone affected by the tragedy in Florida. |
|
|
|
|
Logged
|
|
|
|
|
RevanReborn
Technomancer of the Graflex Order
Knight Commander
Force Alignment: -1086
Posts: 1121
|
|
« Reply #153 on: June 14, 2016, 09:52:56 PM » |
|
More progress here than looks like lol. Since its just dropped in loose the chassis kept collapsing every time I'd set it up for pics, so I had to wrap a couple little pieces of tape around the spot where the tubes go into eachother just to hold it up to take photo. I haven't made the holes in the upper base for the outer most rods, so it won't quite close all the way, but you'll get the idea here. 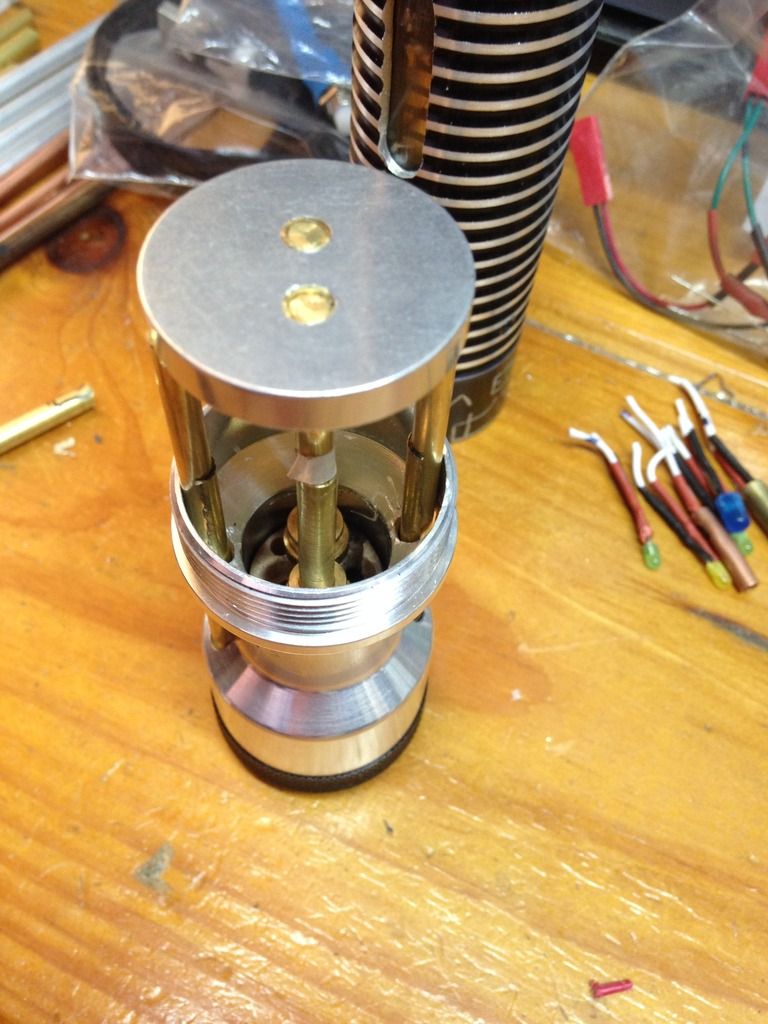 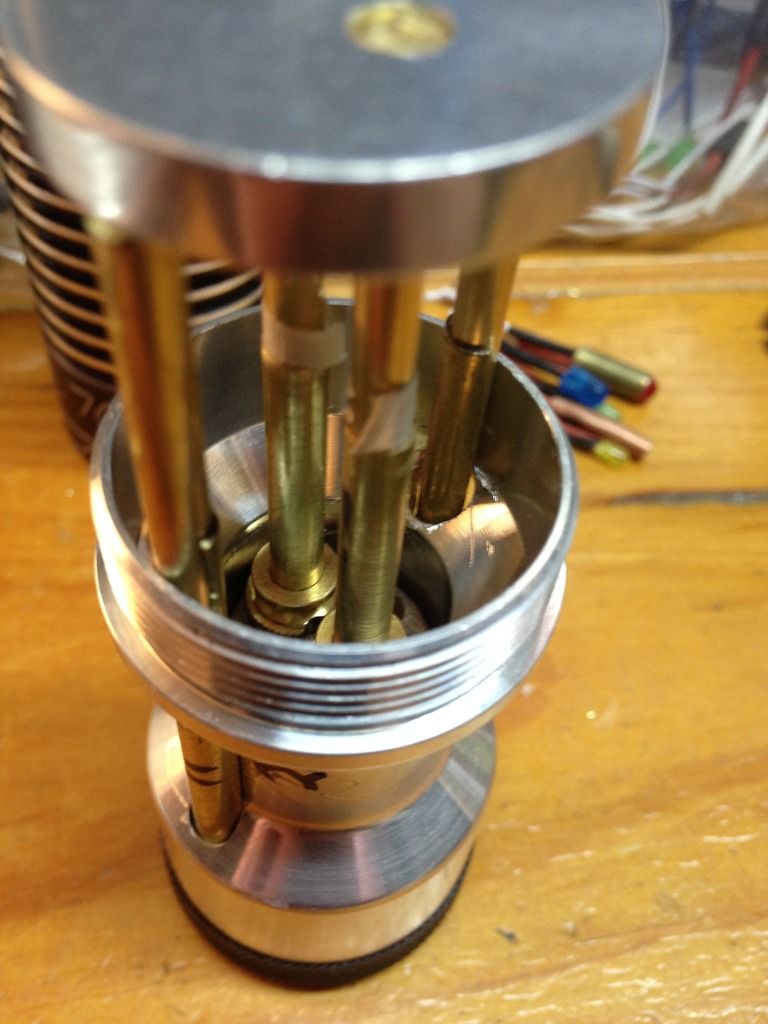 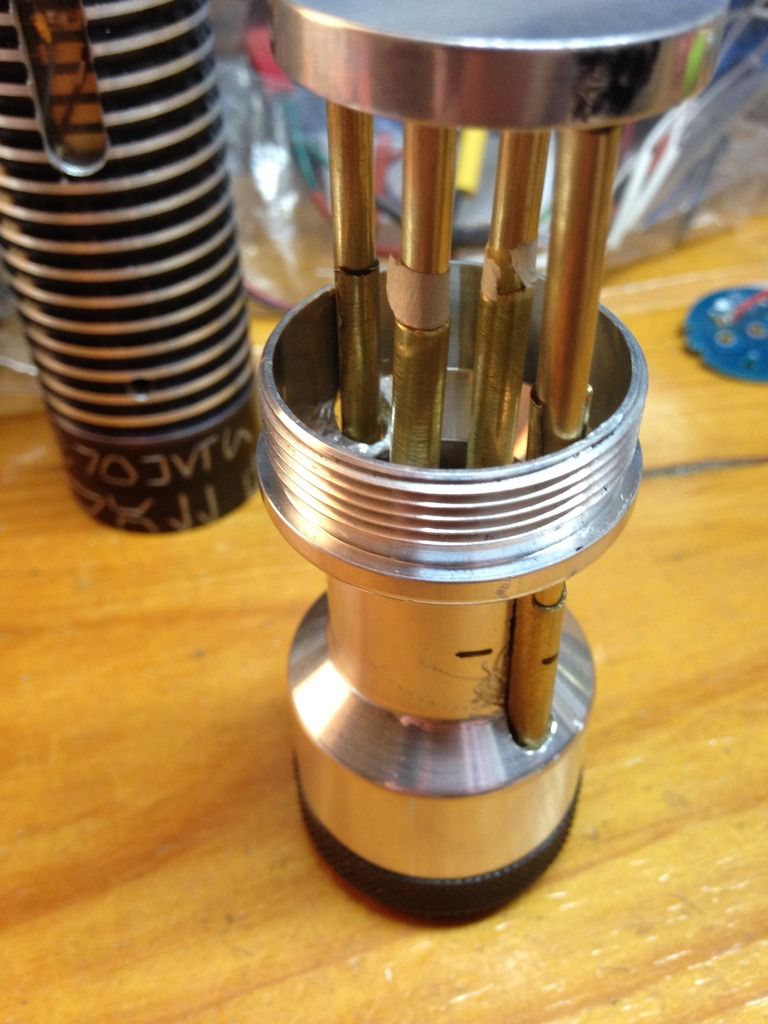 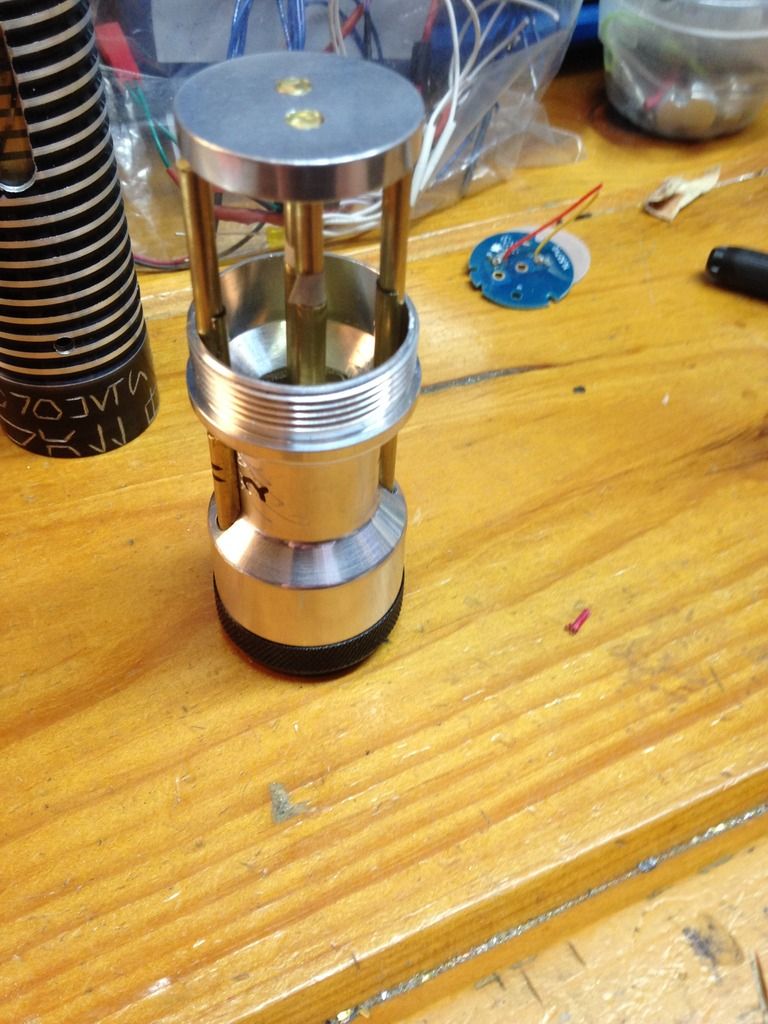 You won't see the upper base directly- this is just the mechanism that will allow everything (below the cut through the centre of the choke) to be slid down/ out. 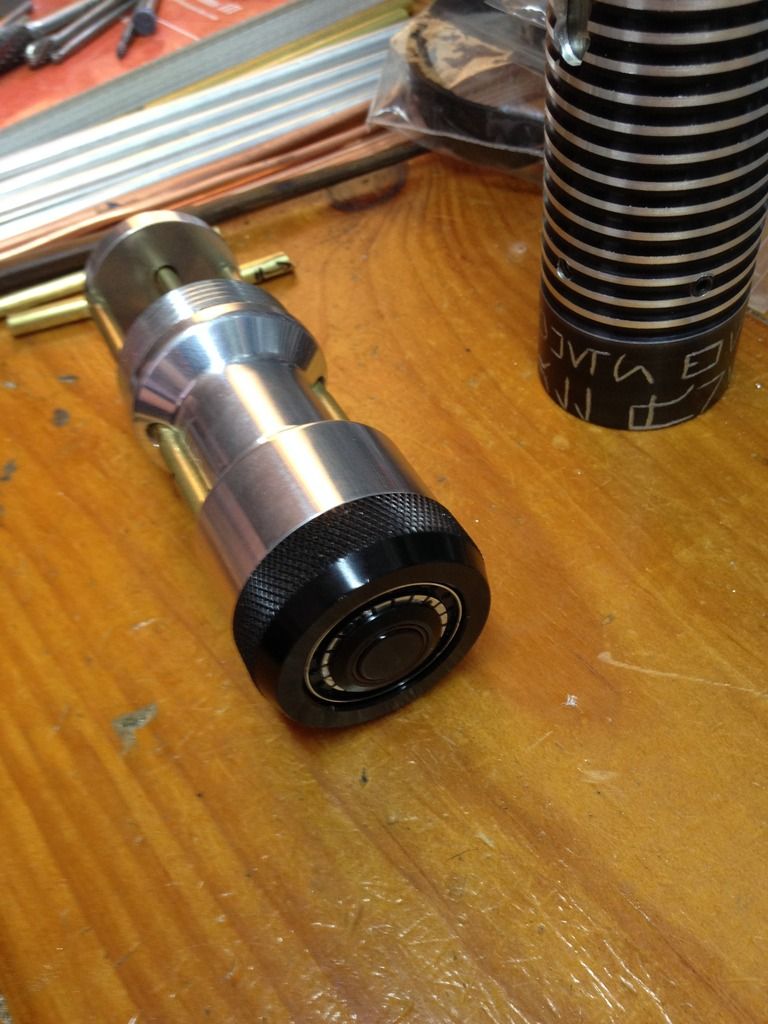 Can see now exactly how much I'll be able to recess switch... Not much lol- but there's just no more room- I'm keeping track of my space in 32nd's and 64th's in there lol. 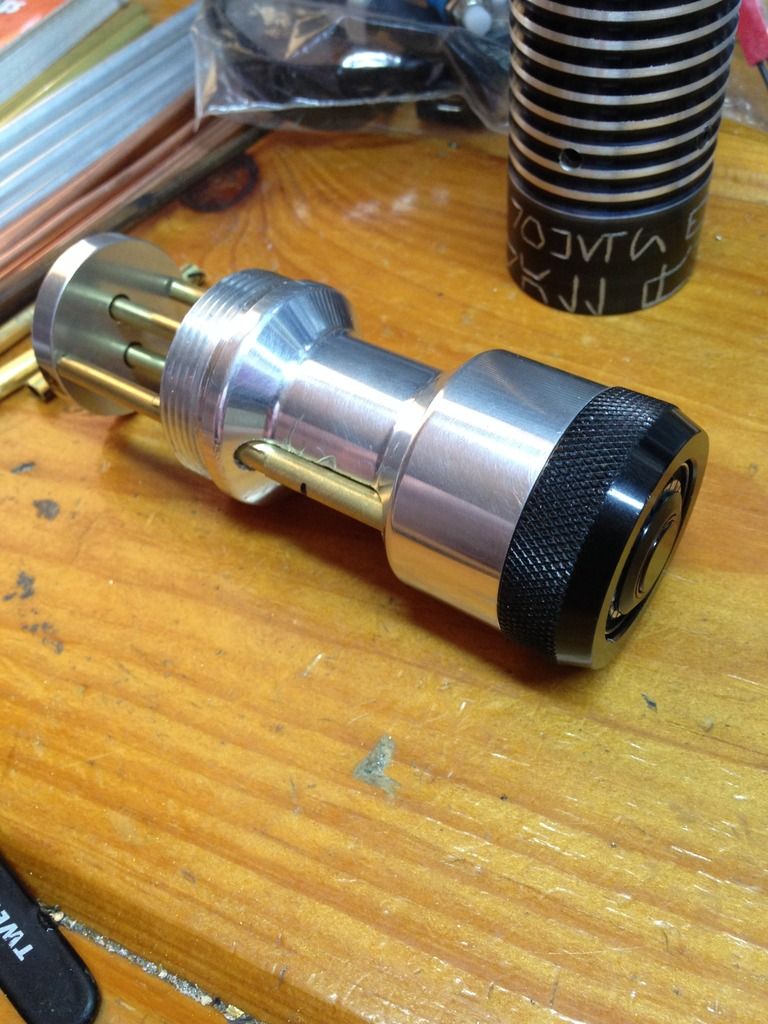 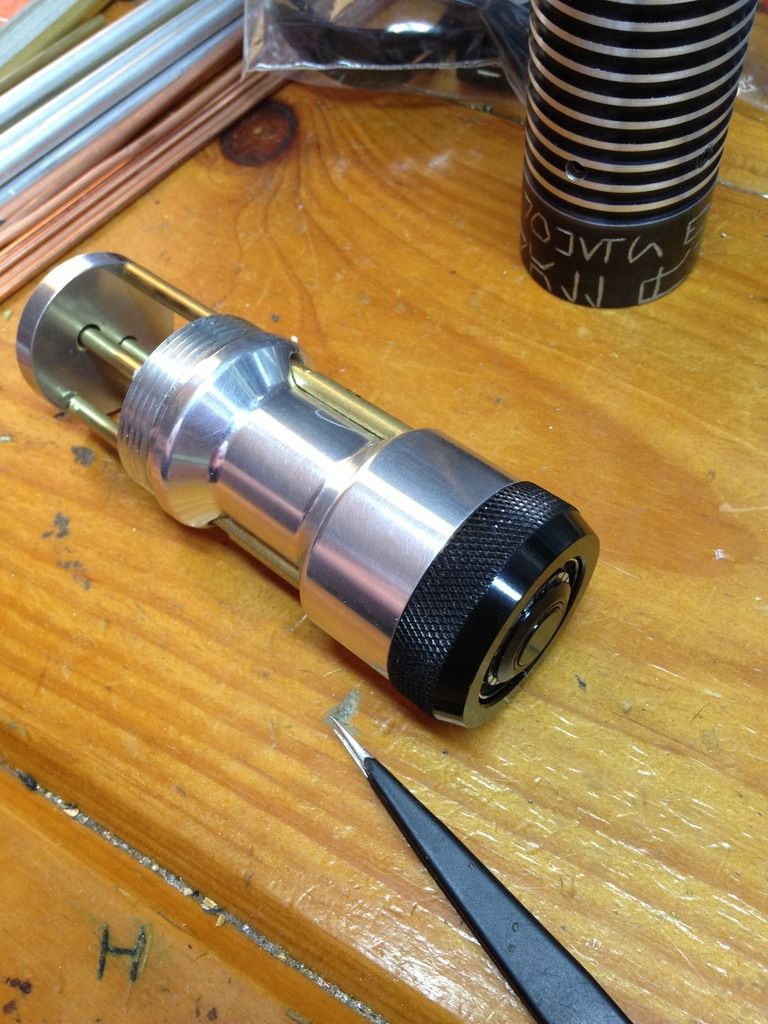 And this is how I plan to actually make this work hahaha! 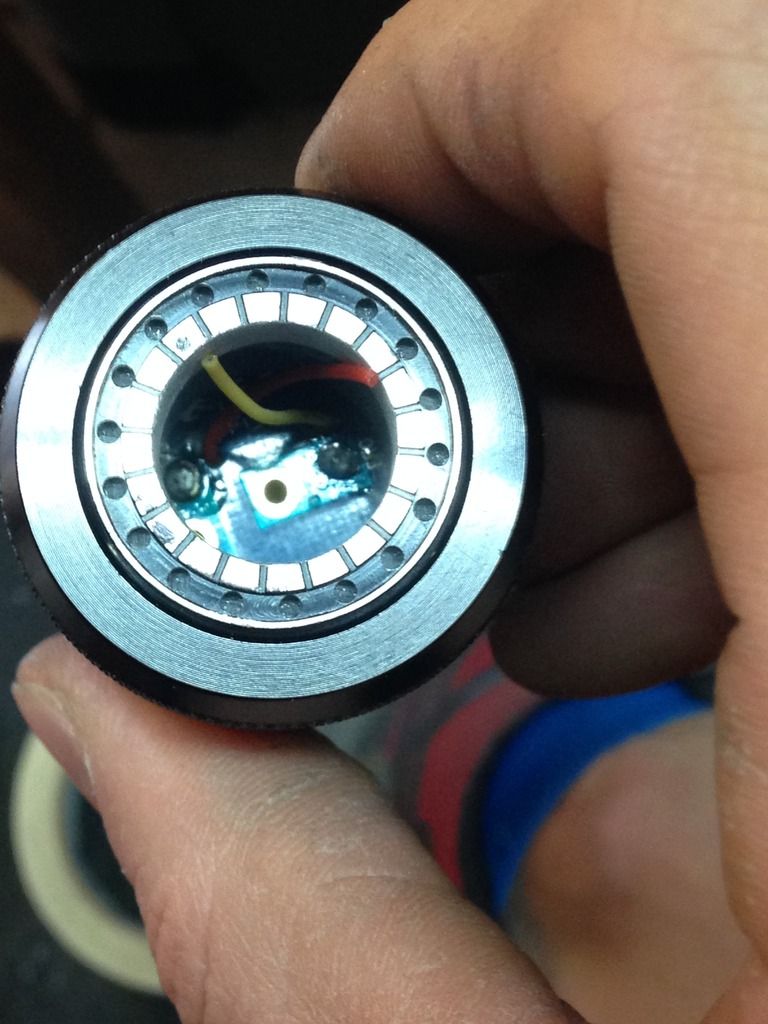 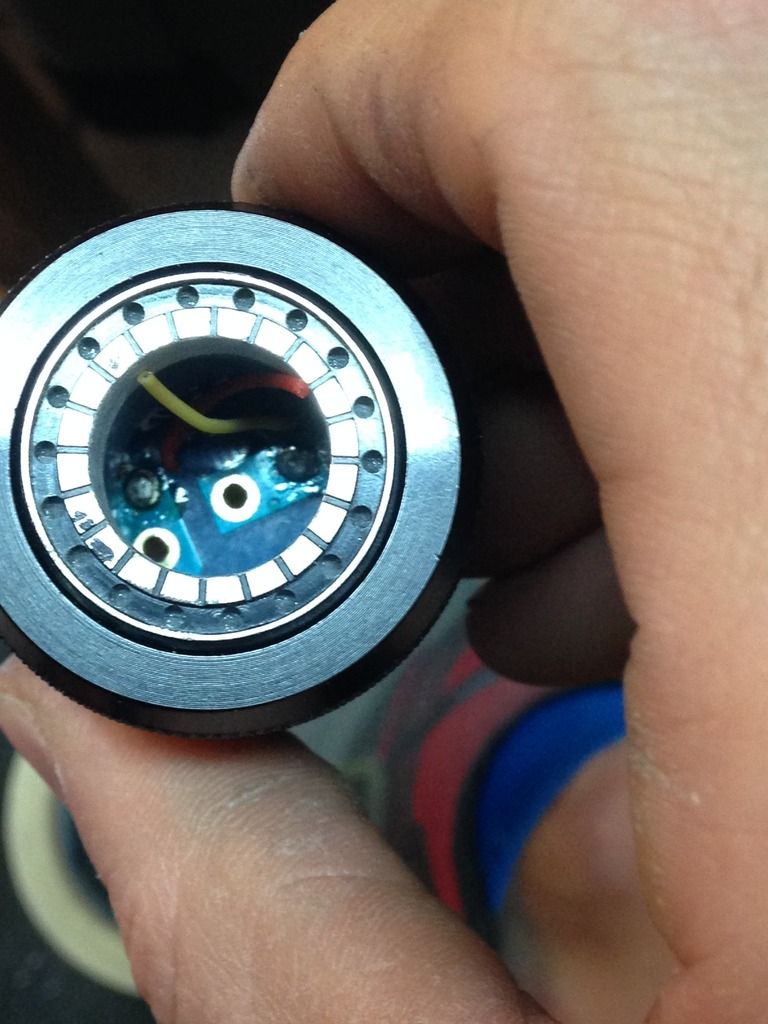 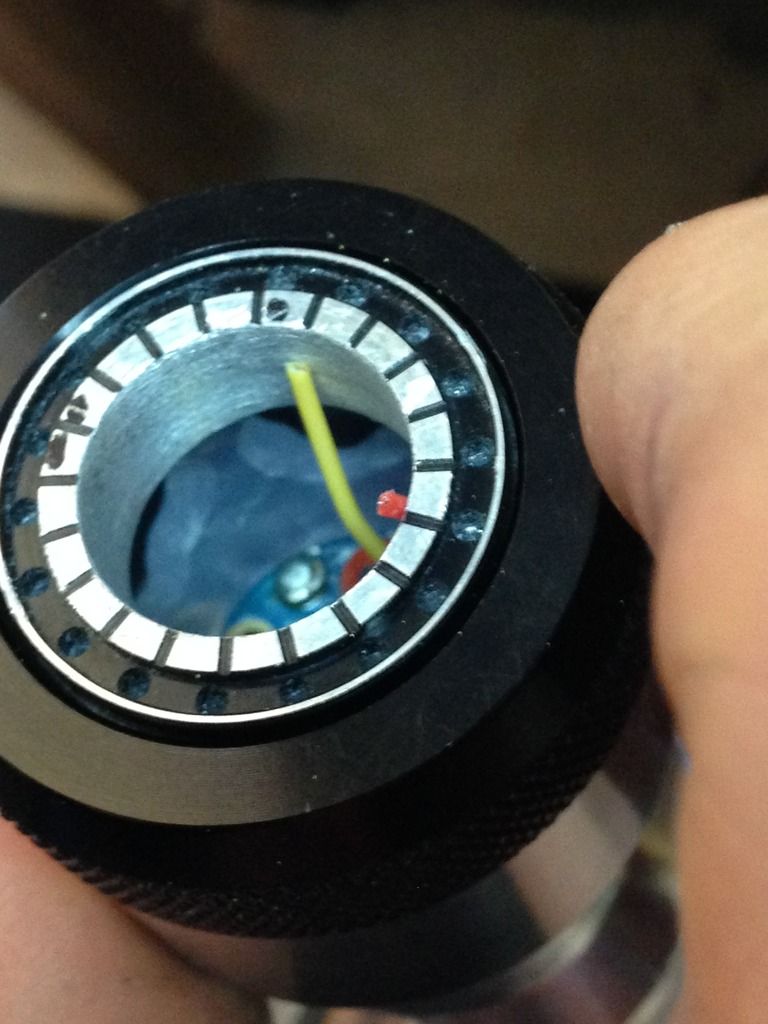 So, if you see how this stuff gets packed in, starting from the outside and working our way in, it goes- from the aluminum inner wall of hilt, to a little microscopic gap for the 5mm accent negative legs and their wire, then there's the layer of blade plug with the 5mm's in it, then there's a gap with the 5mm positive legs and their wire in it, then there's the AV core. All butted right up against the circuit board, with the bottom chassis base butted up against that on the other side- everything running to the two pads on the board with only the positive, negative, and the switch wires needing to run up and join the rest of the internals. 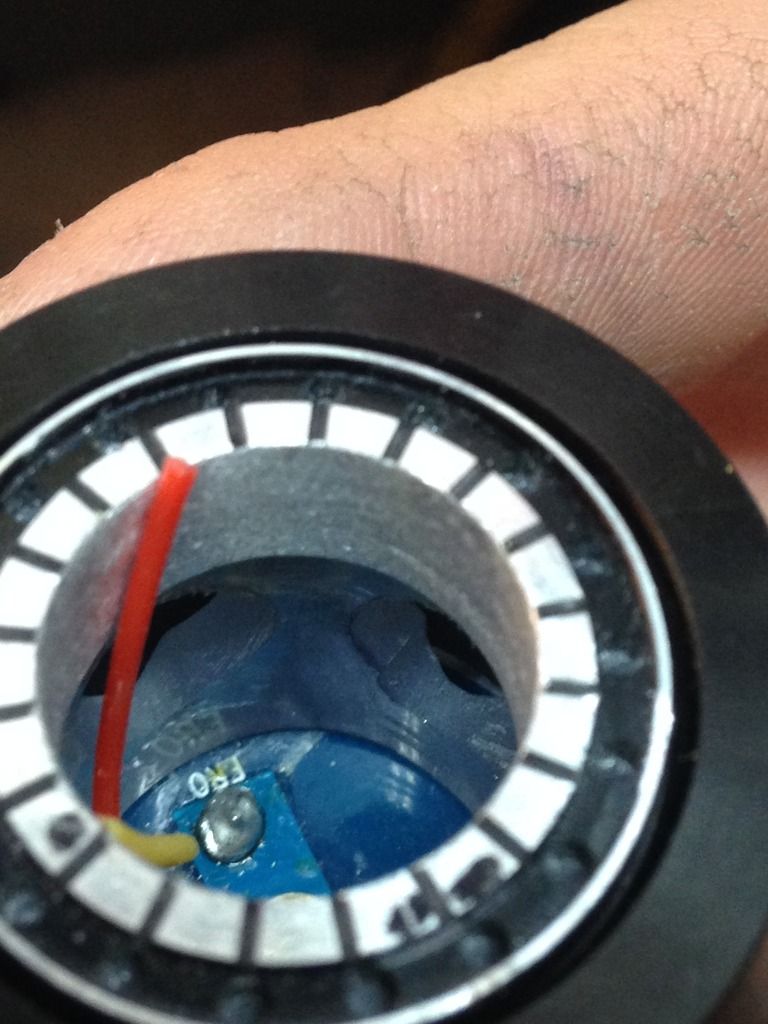 Won't actually seat all the way down until I make the holes for those outer rods. 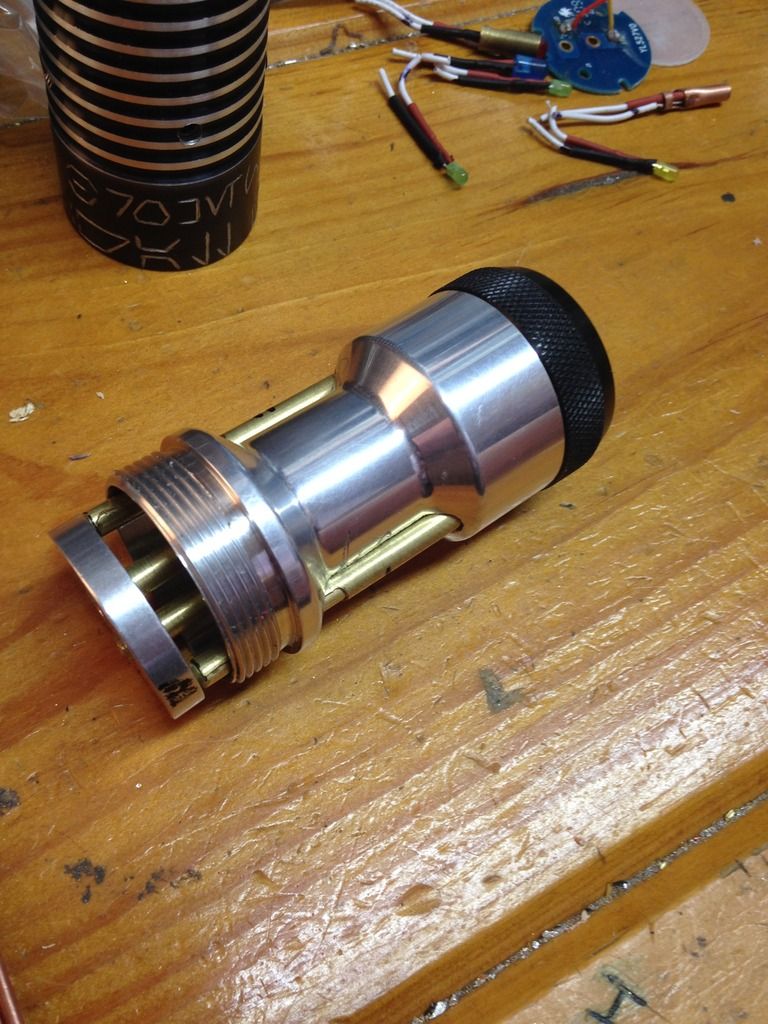 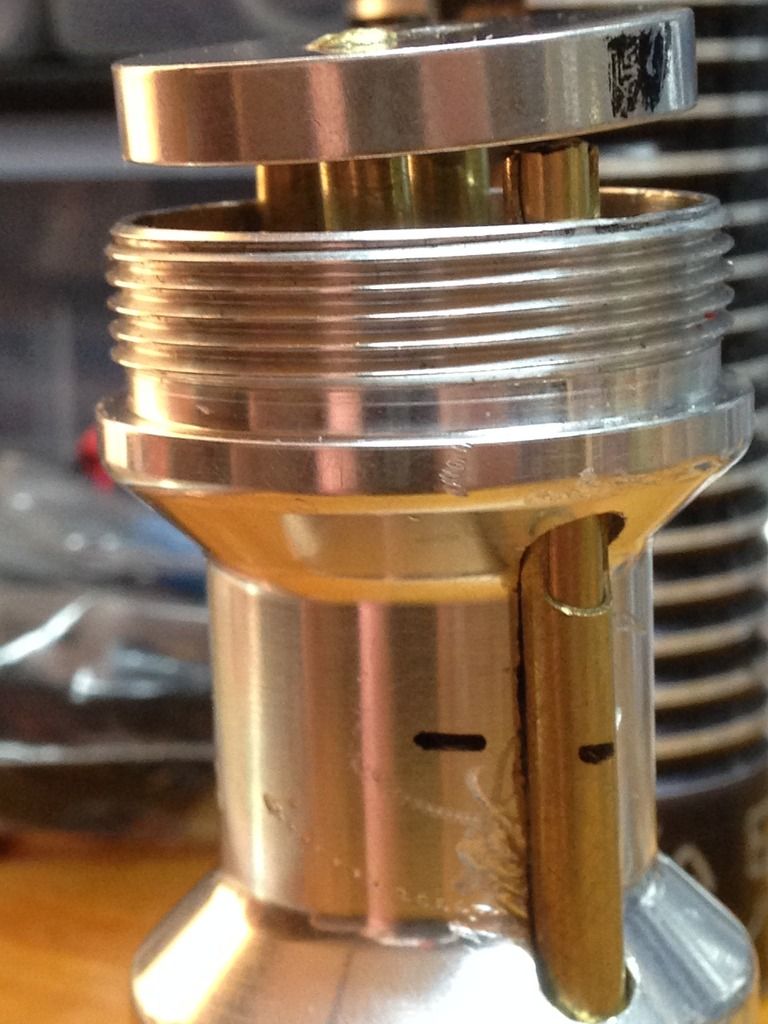 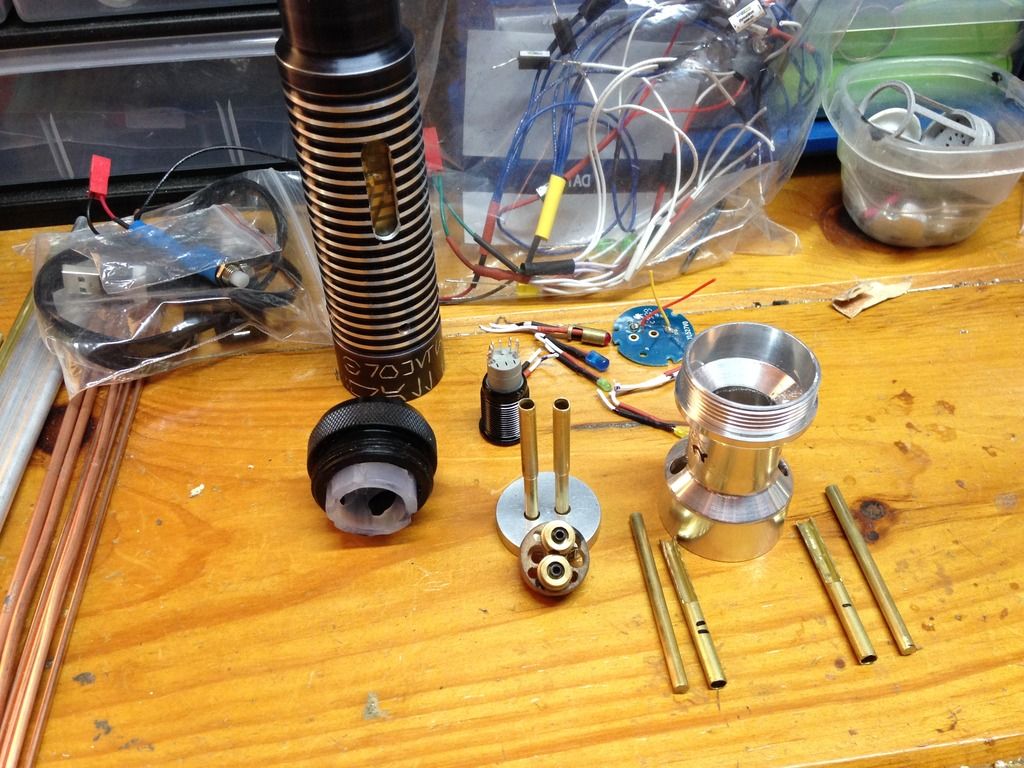 I'm very close to being able to make that cut through the choke- and once that's done- this part will really start to take shape . Keep you posted, MTFBWY. |
|
|
|
|
Logged
|
|
|
|
|
sedstiskyfaller
Artisan of the Azure Order
Knight Commander
Force Alignment: 617
Posts: 2214
Blue is my color, it is who I am

|
|
« Reply #154 on: June 14, 2016, 10:03:49 PM » |
|
This thing is looking quite hefty, Rev! With you're cramming skills, you might as well make this a double bladed saber at this point  |
|
|
|
|
Logged
|
|
|
|
|
RevanReborn
Technomancer of the Graflex Order
Knight Commander
Force Alignment: -1086
Posts: 1121
|
|
« Reply #155 on: June 14, 2016, 10:20:28 PM » |
|
HAHAHAHA! Whoa whoa whoa Sedsti, let's not get carried away here lol, I think that might wreck the sort of minimalist charm I was going for on this one... (Rev tries to keep straight face and fails) hahaha! Thanks buddy . |
|
|
|
|
Logged
|
|
|
|
|
RevanReborn
Technomancer of the Graflex Order
Knight Commander
Force Alignment: -1086
Posts: 1121
|
|
« Reply #156 on: June 18, 2016, 11:48:13 PM » |
|
|
|
|
|
|
Logged
|
|
|
|
|
Calculon
Knight Commander
Force Alignment: 435
Posts: 560
We Will Win!
|
|
« Reply #157 on: June 19, 2016, 12:56:05 AM » |
|
 Whole...notha...level!!! Whole...notha...level!!! |
|
|
|
|
Logged
|
|
|
|
|
RevanReborn
Technomancer of the Graflex Order
Knight Commander
Force Alignment: -1086
Posts: 1121
|
|
« Reply #158 on: June 19, 2016, 01:28:02 AM » |
|
hahahaha!! that's Awesome thanks man! I'm really loving that spring raffle custom you did- the proportions and just how all the little details and lines jive so well, it looks like it should be a saber in someone's regular line up. Especially like the splash of gold and those grips . |
|
|
|
|
Logged
|
|
|
|
|
Bulvoy
Knight Commander
Force Alignment: 500
Posts: 547
~Sipra Gehaz~ Rebel Legion "Ghost Base"
|
|
« Reply #159 on: June 20, 2016, 07:11:23 PM » |
|
Really coming together awesomely. Pretty soon it won't even be considered a US saber . Lol
|
|
|
|
|
Logged
|
UltraSaber's by bulvoy, on Flickr Menace - Emerald V4s- RavenSS pommel Manticore V4s-CG- S /FOC-Renegade small pommel Crimson Scorpion- V4s-BR- O/FOC Dominix V3s-SRD Initiate V4 Lite- VA "Im here to chew bubblegum & kick ass, and I'm all outta bubblegum"...
|
|
|
|
RevanReborn
Technomancer of the Graflex Order
Knight Commander
Force Alignment: -1086
Posts: 1121
|
|
« Reply #160 on: June 26, 2016, 12:46:08 AM » |
|
Thanks Bulvoy and Calculon! I always see these pics of other major players hilts all done up with like the crazy harp and yoda reveals and stuff like that, but you never see UltraSaber hilts with that kinda thing- and i know i have a long way to go before i can ever make something that even resembles that caliber of work, but eventually i wanna start crank'n out US with those amazing brass, almost steampunk style, reveal chassis etc . painting some parts, also finishing up with the reveal, but been distracted this week... still being super productive, just went deep on a tutorial for recharge ports and a couple other things, but no worries, by tomorrow i'll be done all these mini side projects and back full time on the stunt. Good to take a break every once and blue moon and keep things fresh .   the box is for my raffle entry project which will be done by tomorrow and posted . Wait till you see that, it's gonna be sweet! |
|
|
|
|
Logged
|
|
|
|
|
GregG124
Knight Commander
Force Alignment: 436
Posts: 1479
There is only The Force.
|
|
« Reply #161 on: July 04, 2016, 05:20:53 AM » |
|
You're not done are you?!
|
|
|
|
|
Logged
|
Sabers I Own:
Dominix LE V4 (Obsidian V3) - Consular Green
Arbiter (Obsidian Lite) - Consular Green
Liberator V3 (Stunt) - Guardian Blue
Light Side Points Appreciated
|
|
|
|
RevanReborn
Technomancer of the Graflex Order
Knight Commander
Force Alignment: -1086
Posts: 1121
|
|
« Reply #162 on: July 04, 2016, 01:04:31 PM » |
|
O no way not even close! I've still got a ton left to do on this. Still picking away at all the little things like crazy, will have more updates soon . I let myself wander into a quick little side project just to take a break/ keep things fresh. Really happy with how it turned out, and worked like I was hoping- really excited/ re-energized to get back at it. If you haven't seen you should check that side project out, was a lotta fun. Next order of business here is completing the upper portion of chassis, where the recharge port and kill key will go. Then I need to start assembling and wiring this whole pommel/ reveal chassis/ switch piece- it all needs to be put together and wired in in a very specific order/ way. But I'll be able to have this whole added piece finished and working with the leads sticking up ready to attach to rest of internals- then I'm just wiring it all together . Doesn't sound like much, but the way it all plays out is actually still a huge amount of work. Keep you posted. |
|
|
|
|
Logged
|
|
|
|
|
Zing
Knight Apprentice

Force Alignment: -29
Posts: 32
Zing is a name. Lord Wrath is who I am.
|
|
« Reply #163 on: October 17, 2016, 04:00:23 AM » |
|
An insanely meticulous amount of work you put into this  . Looks great! Have a -1 point on me. Whaaaaaaaat..your last post was in July?  . Howz bout an update. Maybe some pics. We need to see this through to completion. |
|
|
|
|
Logged
|
Sabers......Bane, Frankensaber (Bellicose and Apprentice mash up), various sabers I constructed
|
|
|
|
RevanReborn
Technomancer of the Graflex Order
Knight Commander
Force Alignment: -1086
Posts: 1121
|
|
« Reply #164 on: October 17, 2016, 05:13:49 AM » |
|
Hahaha!! Fair enough Zing lol . I'm still picking away when I can- but I've literally got 6 projects on my bench ATM, and not one of them is mine lol! So as soon as I finish up eveyone else's projects, it's go time again in big way . Keep you posted! Will be SO worth the wait! |
|
|
|
|
Logged
|
|
|
|
|
|


