Hey everybody

Thanks you guys!! You're too kind!! I can't tell you how much i appreciate the support- it's been a pretty intense/ strenuous few days trying to hurry up and get this install licked in time for Ethan's last treatment- it's had it's fair share of challenges and just tough goings in general, and i've been just relentless about it out of necessity (well ok let's face it I'm just like that anyways lol), but all that can have the effect of burning you out pretty quick- no matter how excited you are for a project or how much you're loving the saber etc, that constant pressure can start to get to you. There were honestly a few times, especially here in the final stretch, where i could feel my nerves getting a bit raw so to speak just in general... but hearing all the wonderful words of support and encouragement is SUPER rejuvenating/ re-energizing etc! basically, you guys are keeping me sane haha!!

Wow, I am SO close to calling this a wrap it physically hurts lol!

So first thing i did was go back to the first rig/ internals i put together for this (the mk 1 set up) and used it to play around with/ tweak the colour mix on the rgb accent- specifically the yellowness of the second stage. the green was just a bit too overpowering initially. when the red kicks in and mixes with green it should look golden yellow, but there was a bit too much green hue left originally. so i popped a volt meter on the leads with the green and found that the dynaohm was getting about 3V to that die, i cheated that up to about 3.2 so that i knew I'm figuring on the high side. it's a 20mA dynaohm so i know the current obviously, and i know my supply, 7.4 (8 ) volts- so with that info i calculated that the variable resistor was providing about 240 ohms of resistance for the green in the rgb. so all i needed to do was go with a bit more resistance on the green and when the red fires up to mix with it i'll get a better yellow in the second stage. i pulled a giant bag of 1/4W resistors out of my resistor drawer and started sorting them lol- took forever just labelling/ grouping them all and picking out ones that would be useful, cause i buy all these in lot/ bulk.

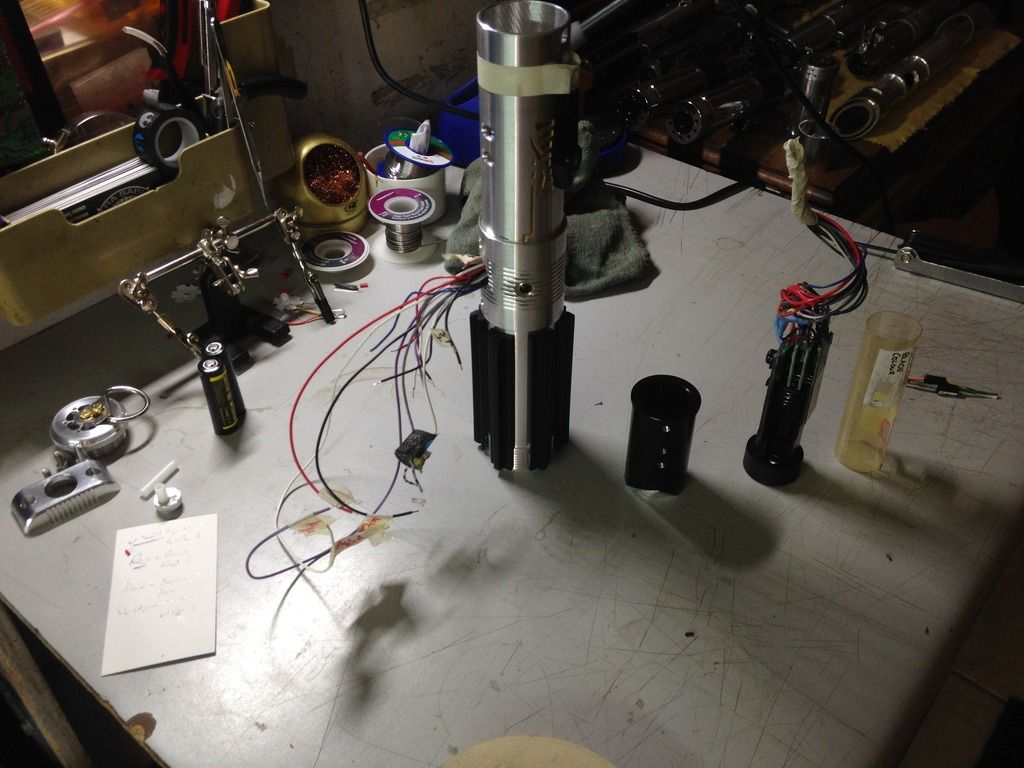
i was kinda close with the 2 guesses/ options i picked out for replacement resistors, i scooped a 220ohm and then a 56 and 69, so that in series they'd total 276 and 289 ohms respectively. they were getting there... but i actually had to jump all the way up to 330 to get a better mix. works for me lol, cause that way i don't need to waste the space with 2 together (small but they rep a little spot of wire that can't bend- REALLY wanna avoid those as much as poss in a cram fu job like this one). you can see the single little 330 ohm resistor on the bottom left of pic, if you follow the positives from port you'll see it.
I'm not joking about the magic wand i'm gonna need for this install lol. Just to see what i was up against right from the start, i took the emerald/ obsidian/ spk pack in the shield and slid it up into place so that the pommel could close all the way...

those orange wires are coming right off the friggn harness lol, it pretty much touches the port. so the boards completely fill up to the switch and port, nothing fits under- the bottom of the module sits just above the sleeve, and obviously the switch sticks down straight into all this... so if you picture all that stuff boxing me in the clamp/ sleeve area... (which already houses the port and switch lol) you can see an area about 3/4" by 3/4" to the left and sorta behind/ under the switch and port that will have to contain EVERY SINLGE WIRE IN THIS THING haha!! I'm cursed i tell you lol! no matter what i do i end up with rubix cube's straight from down under- and i'm not talking Australia lol! I even said to myself, Rev, keep it simple for this one due to time/ sanity etc- there was a lot i wanted to put together for Ethan in a short time so i didn't wanna go biting off more than i could chew- i just came up with a nice simple yet cool design- an rgbw/ emerald, obsidian, cool switch, an accent, and some etching. piece of cake i said lol. keep that 3/4" pocket in mind as we get this thing ready for the final countdown lol.
So the first part to get mounted was the port. that was like the first omen lol- over an hour of wishing i could just shrink my bloody arm or something lol. but i got her good and locked tight
. Next came the module, which i just tacked in place with the retention screw for now cause the accent needs to go on before the module screw can actually be attached lol. but i couldn't just put the accent in first cause then the module wound't get past it lol.


it was important i keep that screw in as much as possible, not just cause the module placement is so crucial, but because when i go to run accent wires, i need to be sure they don't end up under this screw/ pinched- only way to be sure is make it impossible and have the screw already down when those wires pass.
ok so now that the module is in exact place i can run the accent through... yikes, don't even ask me how i did this lol! tense, to say the least- thought about making a you tube vid of it- but it'd be like a 2 hour long steady 'bleep' lol. But hey, like the port- it might not have been graceful lol, but the job is done, and done well
.

had to pop that screw out to get the bulb release box on, but i waited till the wires were safely run through and didn't move anything else until it was back in. so i know nothings pinched there.


sweet so now that all that's in i can actually get most of this thing assembled again- starting with the blade holder... which, as it turns out, i didn't quite remove enough of a cavity in for the accent wires lol, so i threw that back on the bench and dug out a bigger slot- forgot to get a picture but its the exact same thing expanded by like a 1/16" lol.
it was nice to get all these cluttered pieces back in place and out of the work space- but you can see what i mean about the sheer amount of wiring in the sleeve. that will all get soldered at the switch hole and tucked in.

once i tweaked the blade holder (slides over accent connections without rubbing etc) i could get the whole top end back together again.

and also you can see I've cleaned up the board/ battery side a bit too.

so with that, i think we've reached the big finale lol, the DANGER ZONE! lol ugh, LC's got me watching Archer again lol. but tomorrow morning after work i get home, i shower, i say a prayer lol, then i solder a few more wires onto the board side of the wiring and pop the shield on, slide that all up inside and out the switch hole to be joined to the rest. I'll be carefully trimming slack and awkwardly soldering and carefully packing inside until i can turn it on and
play with it a bit test it so it's good for Ethan, ahem.
The intensity/ difficulty has been steady building lol, but so has the potential pay off! This thing is gonna be INSANE! I love it, and i'm sure Ethan will too
. Plus I've got a whole sort of package with it thats gonna be sweet- have a cool looking crate done all up to pack it in and i'm even excited about how it'll be presented and all that
. Keep you posted. Wish me luck haha!
Oh also D7 i love the profile pic i've been meaning to say- looks like my favourite kind of panther!


