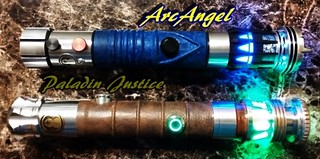
RevanReborn
Technomancer of the Graflex Order
Knight Commander

Force Alignment: -1086
Posts: 1121
|
 |
« Reply #30 on: February 24, 2016, 07:54:11 PM » |
|
Rev, if I wanted to use pins of a fluorescent tube, could I just shatter the light outside to lower my overall risk? I'm clumsy and I would hate to get the pressure crap on me.
yyyyep  . Think that's the easiest/ fastest way by far... not to mention funnest! Feels like you're in the movie office space lol. If you're worried about the area you're doing it in might be sensitive to glass lying around (i mean you can just sweep up, but say if its like a driveway or something and you wanna be sure) you can always slip a garbage bag over one end, and then tap that end with a hammer- it'll contain all the mess, then you just carefully fish out the end cap, and tap it a bit more with the hammer- there will be a bit of glass and gross junk stuck right up inside to the end cap, but even just light tapping will shake/ break that off. Just break away the layers of vacuum tubes that house the filaments right in the end cap, and take any kind of cutters/ pliers and there will just be two little filaments/ wires to snip, they actually go right into the electrical pins from behind- then you can yank those puppies out. Its super easy don't let my long winded description fool you . |
|
|
|
|
 Logged
|
|
|
|
|
GregG124
Knight Commander
Force Alignment: 436
Posts: 1479
There is only The Force.

|
|
« Reply #31 on: February 24, 2016, 10:50:28 PM » |
|
yyyyep . Think that's the easiest/ fastest way by far... not to mention funnest! Feels like you're in the movie office space lol. If you're worried about the area you're doing it in might be sensitive to glass lying around (i mean you can just sweep up, but say if its like a driveway or something and you wanna be sure) you can always slip a garbage bag over one end, and then tap that end with a hammer- it'll contain all the mess, then you just carefully fish out the end cap, and tap it a bit more with the hammer- there will be a bit of glass and gross junk stuck right up inside to the end cap, but even just light tapping will shake/ break that off. Just break away the layers of vacuum tubes that house the filaments right in the end cap, and take any kind of cutters/ pliers and there will just be two little filaments/ wires to snip, they actually go right into the electrical pins from behind- then you can yank those puppies out. Its super easy don't let my long winded description fool you . Thanks for the info, I can't wait to see your finished activation box. |
|
|
|
|
Logged
|
Sabers I Own:
Dominix LE V4 (Obsidian V3) - Consular Green
Arbiter (Obsidian Lite) - Consular Green
Liberator V3 (Stunt) - Guardian Blue
Light Side Points Appreciated
|
|
|
|
RevanReborn
Technomancer of the Graflex Order
Knight Commander
Force Alignment: -1086
Posts: 1121
|
|
« Reply #32 on: February 25, 2016, 06:35:41 PM » |
|
Test fitting- Still have to dress up the plastic casing/ port where the wire comes in a little, but only main thing left on this box is to add the trimmed circuit card piece on the top. The teaser shot lol... 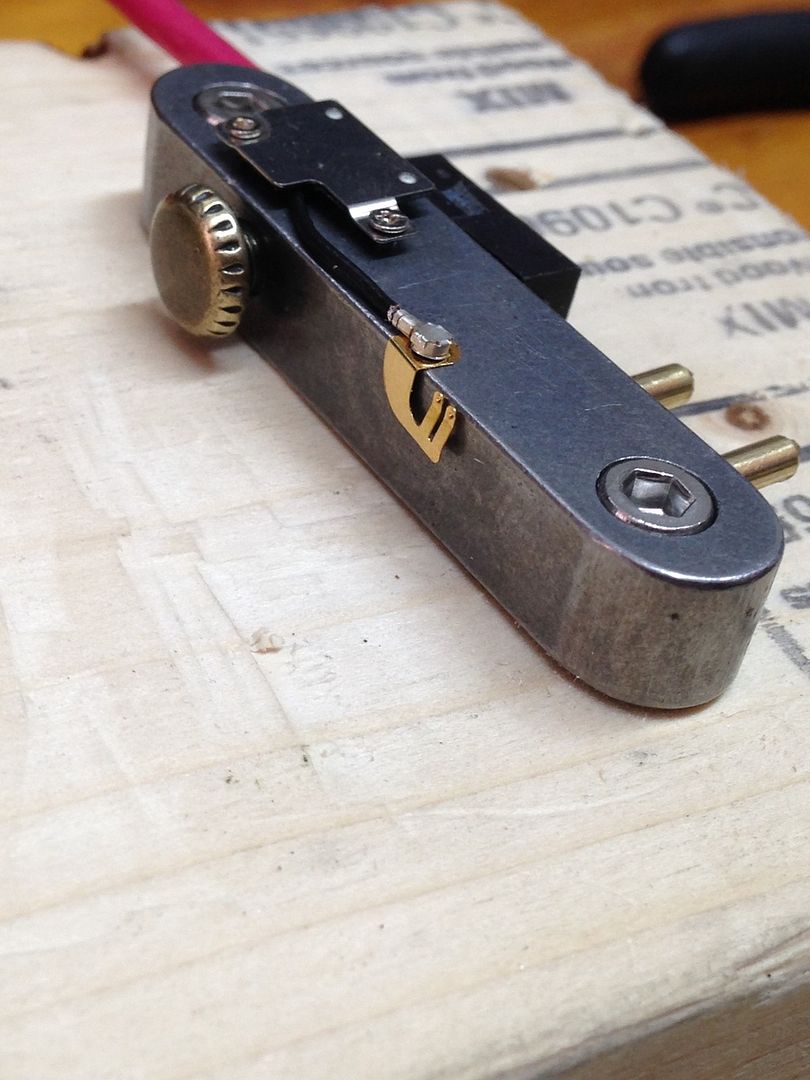 Ok, ok, there they are lol. 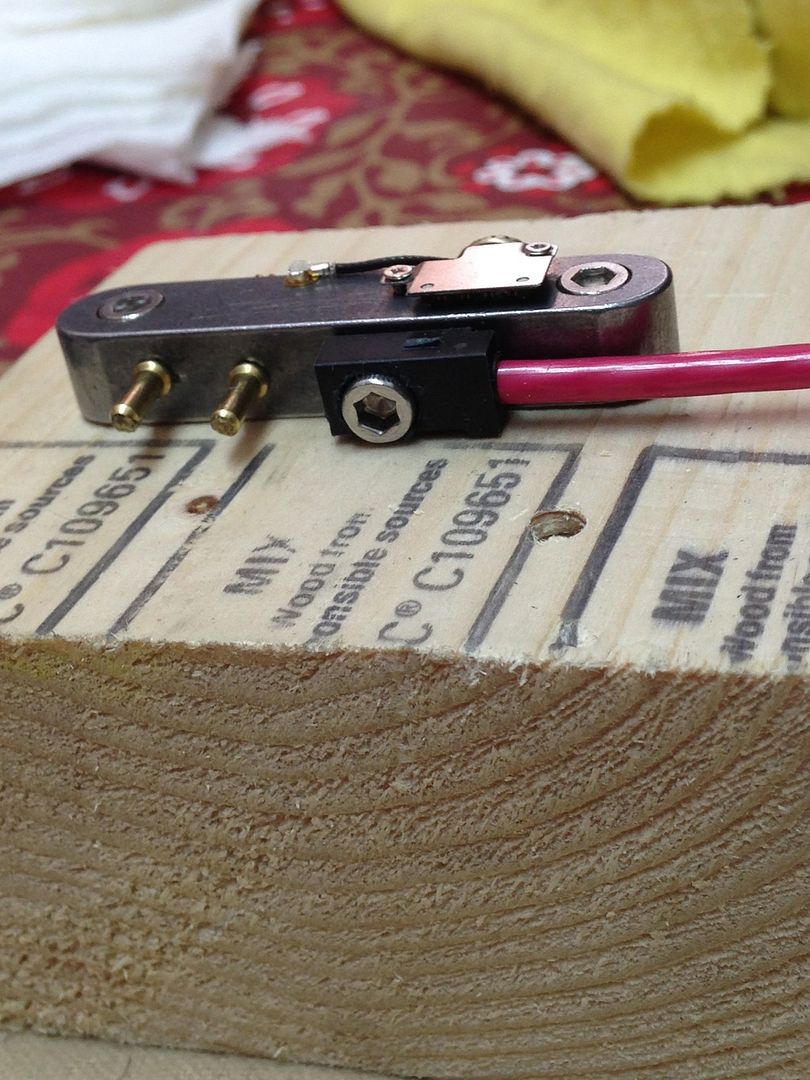 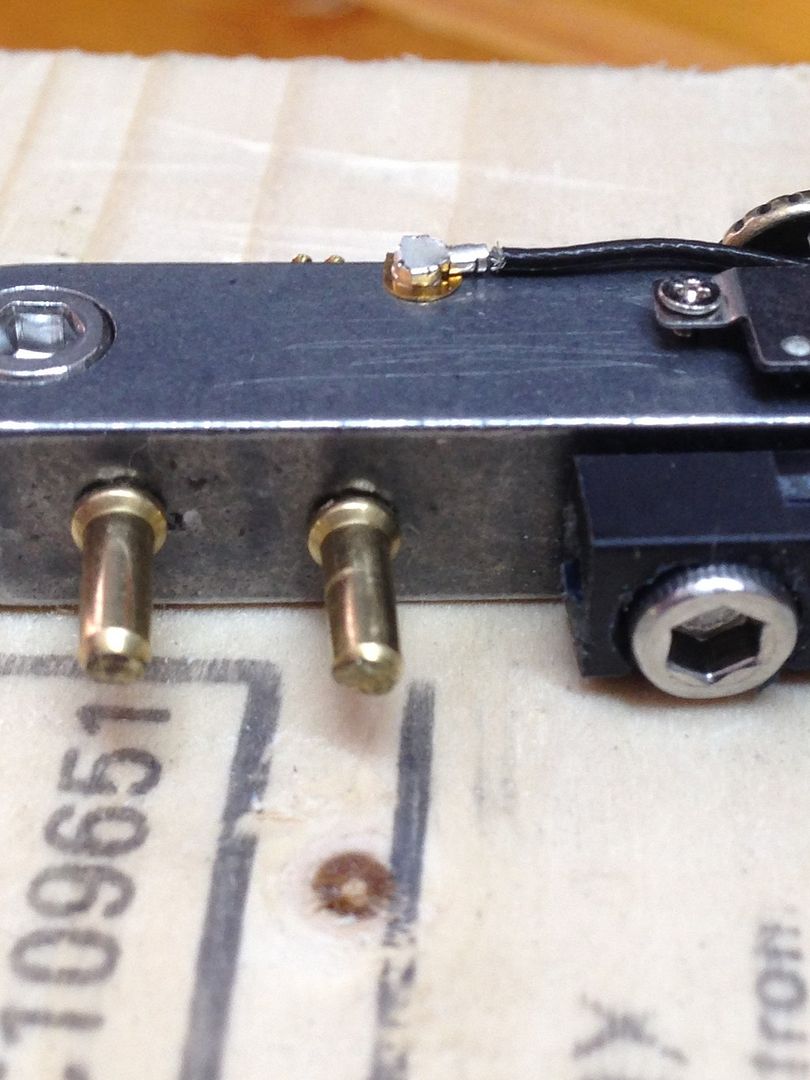 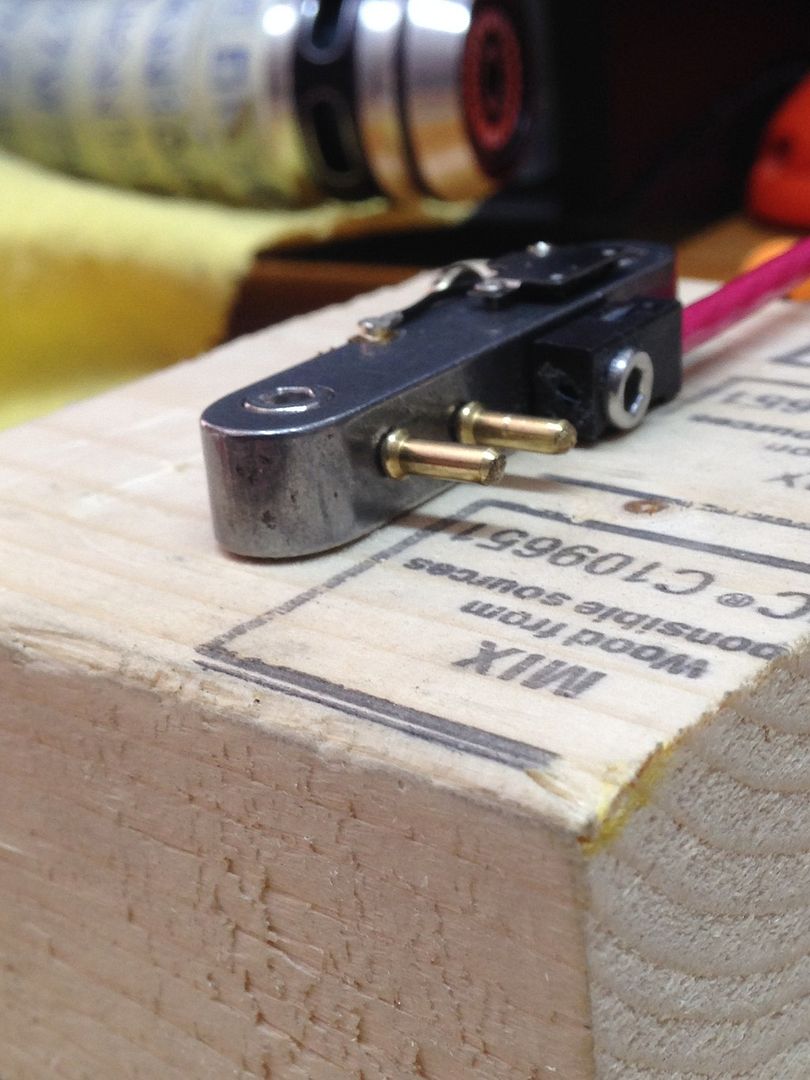 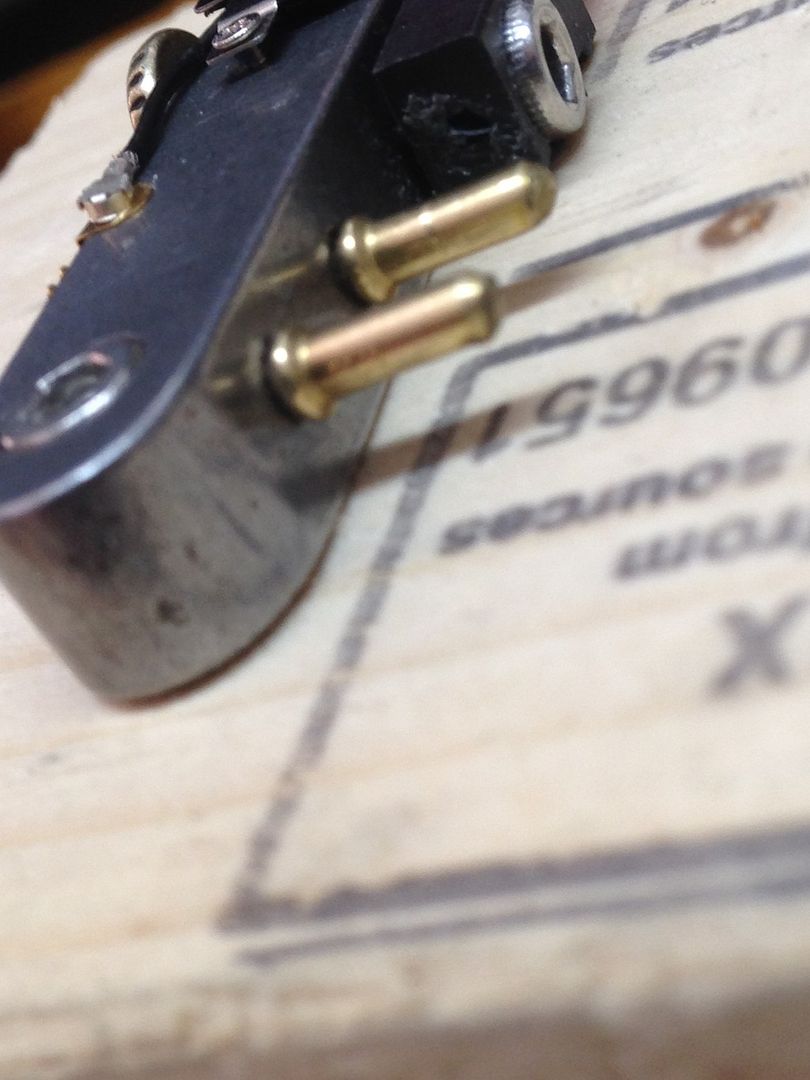 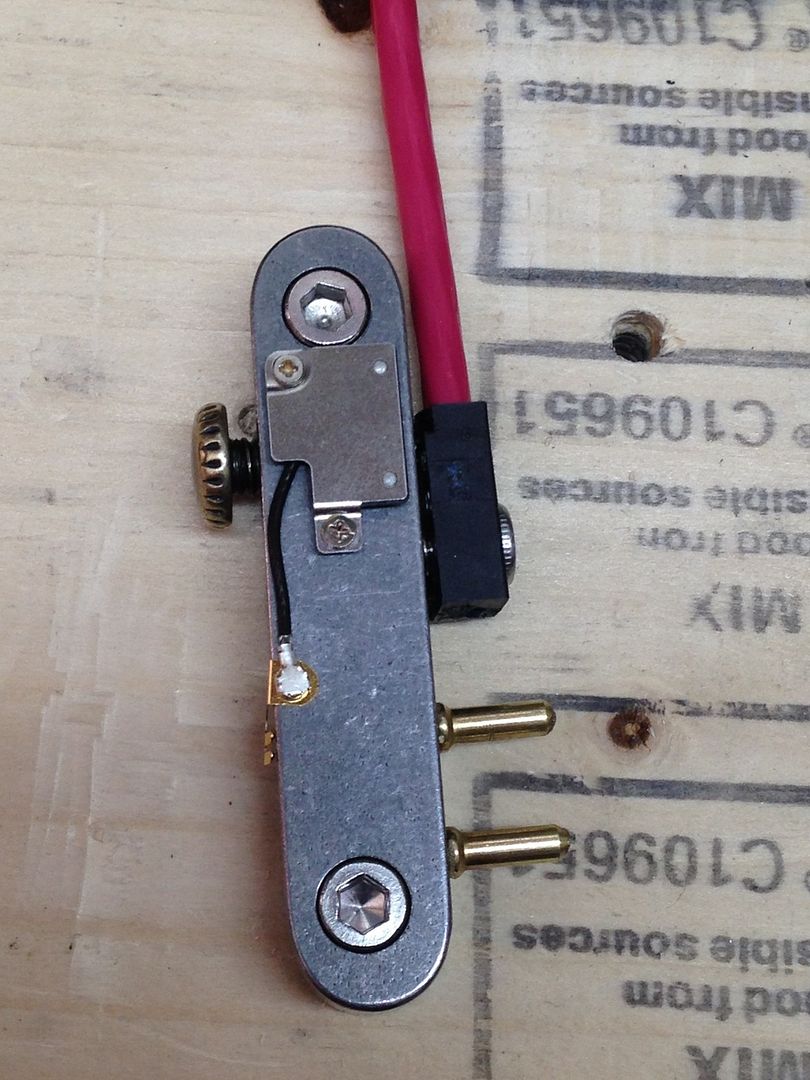 So, about the card. It'll sit on the top surface of the box/ base piece, with the aluminum piece, wire, and gold solder pad bunny ears thingy all sitting on top of the card. It's gonna look sweet: 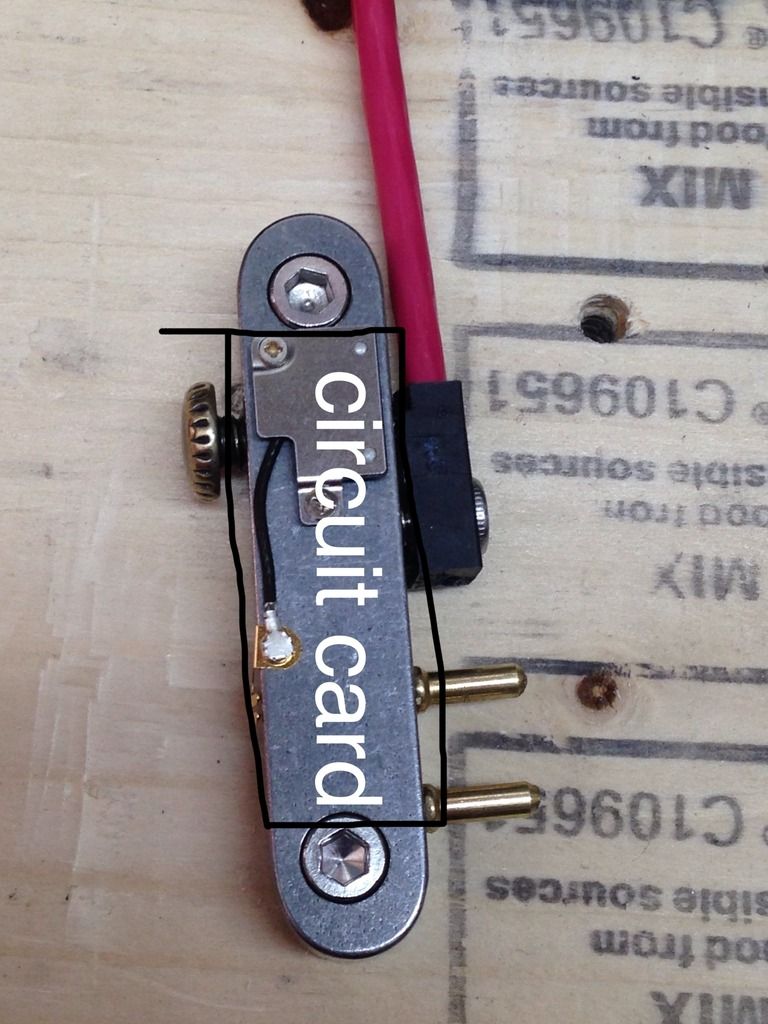 Now, I'm on the fence about which card I'm gonna go with ATM- i got a few variations on me already... But they're SO dear to my heart, these ones, that I'm not sure I'll be able to hack one up lol. These might just get saved for something SUPER special... Though I DO love them so much so it'd be cool to have one on my dueler, would look amazing!! 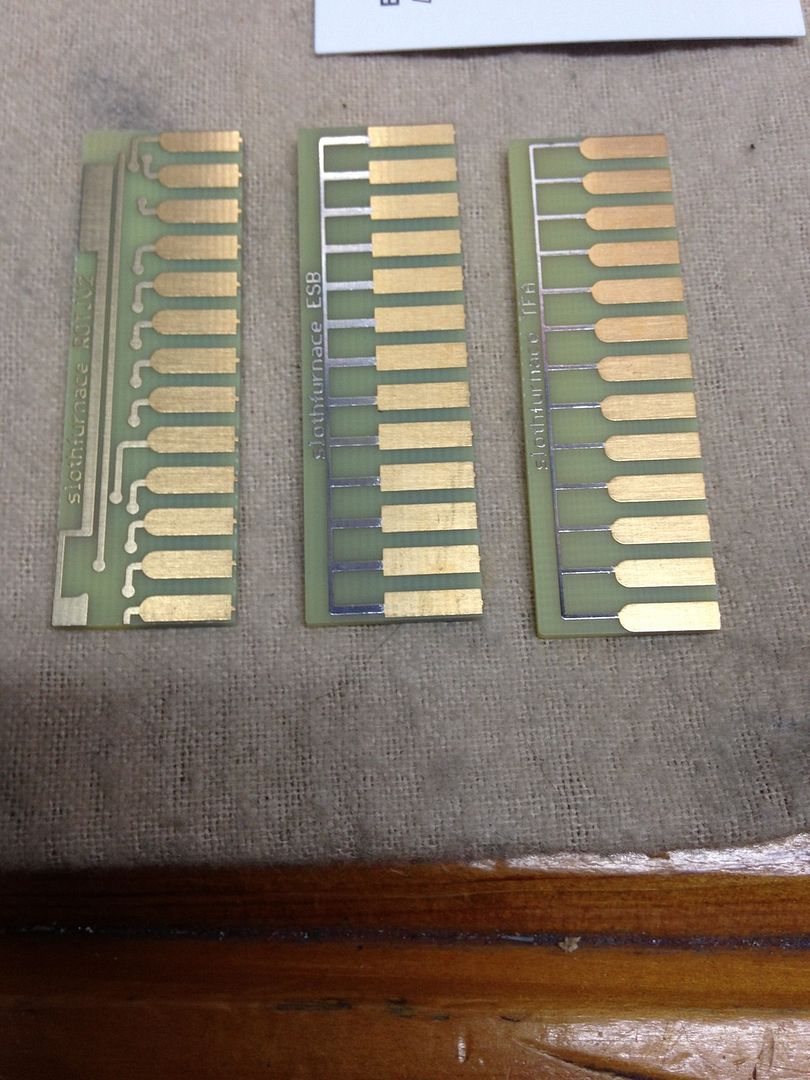 I can't decide if I should use, and on top of that I'm not sure which I'd use in that case- I'm gonna trim the card so that I can preserve the general look of it (since my box is narrower, the image/ plating would get cut off in odd way when I fit it to the top surface of the box- but if I strategically trim out a swath down the middle and capture the right cropping / proportion of silver trace and gold it'll just basically look like a tiny little narrow version of the same image). Well basic idea anyway, I'll just make it look right for the size/ shape. I've got a few more types of circuit card on their way, so I'm gonna wait to make the call till I can check those too. One in particular I'm holding out hope for, cause it's also really high quality like this, with gold plating and whatnot, only it's cheaper and I've got more of it lol. We'll see- keep you posted. MTFBWY. |
|
|
|
|
Logged
|
|
|
|
|
Dauntless Seven
Lady of the Sage Order
Knight Commander
Force Alignment: 2037
Posts: 5444
|
|
« Reply #33 on: February 25, 2016, 10:06:17 PM » |
|
Hey Rev. You lost me on this customization a long time ago but it does look quite intriguing. +1 for your efforts and ideas so far.  |
|
|
|
|
Logged
|
|
|
|
|
RevanReborn
Technomancer of the Graflex Order
Knight Commander
Force Alignment: -1086
Posts: 1121
|
|
« Reply #34 on: March 06, 2016, 05:02:29 PM » |
|
More progress on the saber- sorry it's been so slow! I've got a ton going on behind the scenes right now with parts n stuff coming in etc, but i'm still plugging away. I decided to go with a completely different circuit card just because it suited the piece best IMO- cut and sanded it to shape with a dremel, thin cutting disk, and drum sanding bit (used tape to protect top surface). It'll get tweaked just a tiny bit when i fit and secure everything for the last time, but i gotta wait to do that until i mount it on the body, because i'll likely take a torch to the base once I've screwed it down, and draw a bead of metal working solder around the join of the base and hilt to seal the crevice and give it that welded look. then i'll be able to attach everything for the last time and give the final touches. I should have the engraving done soon too so i'll keep you posted . It's tedious work using the scriber to go back over the stuff i did with the electric engraver, but it's definitely worth it. 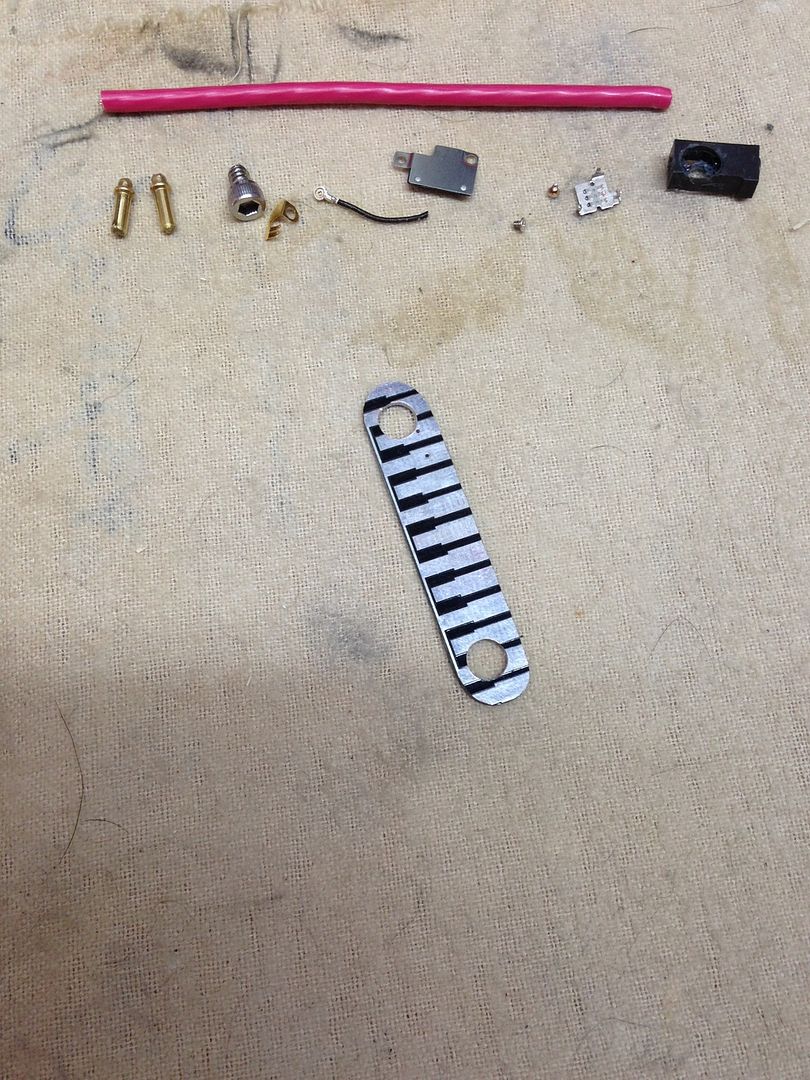 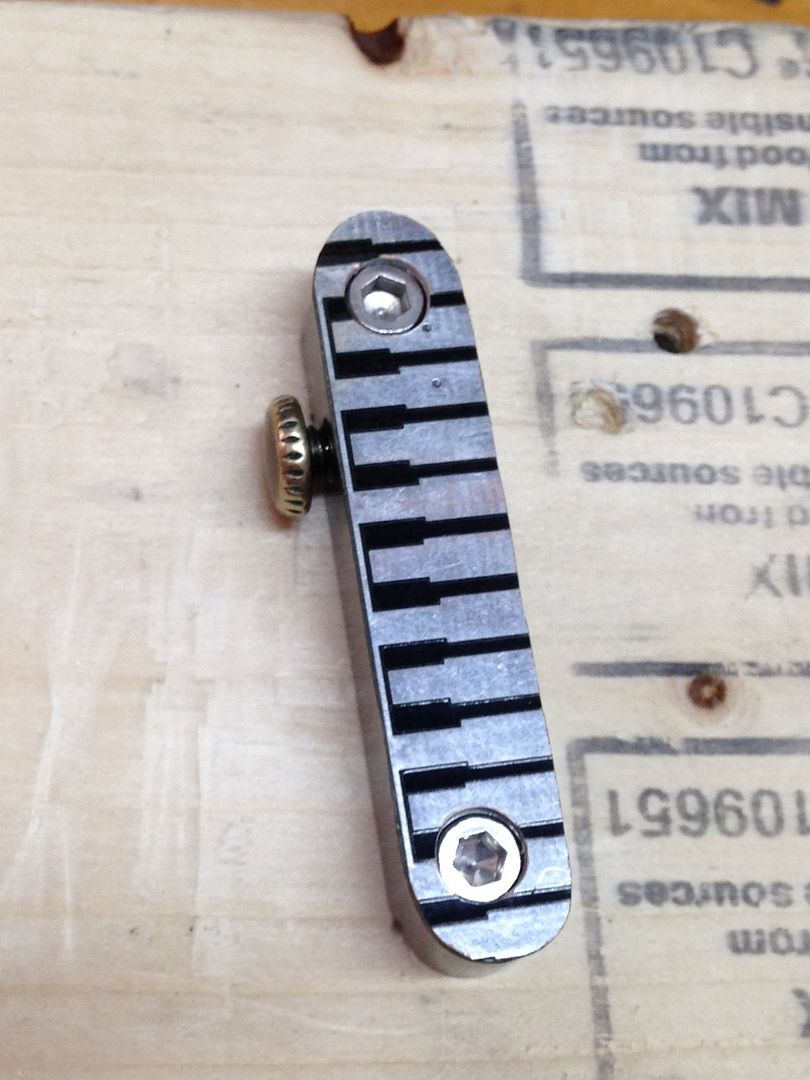  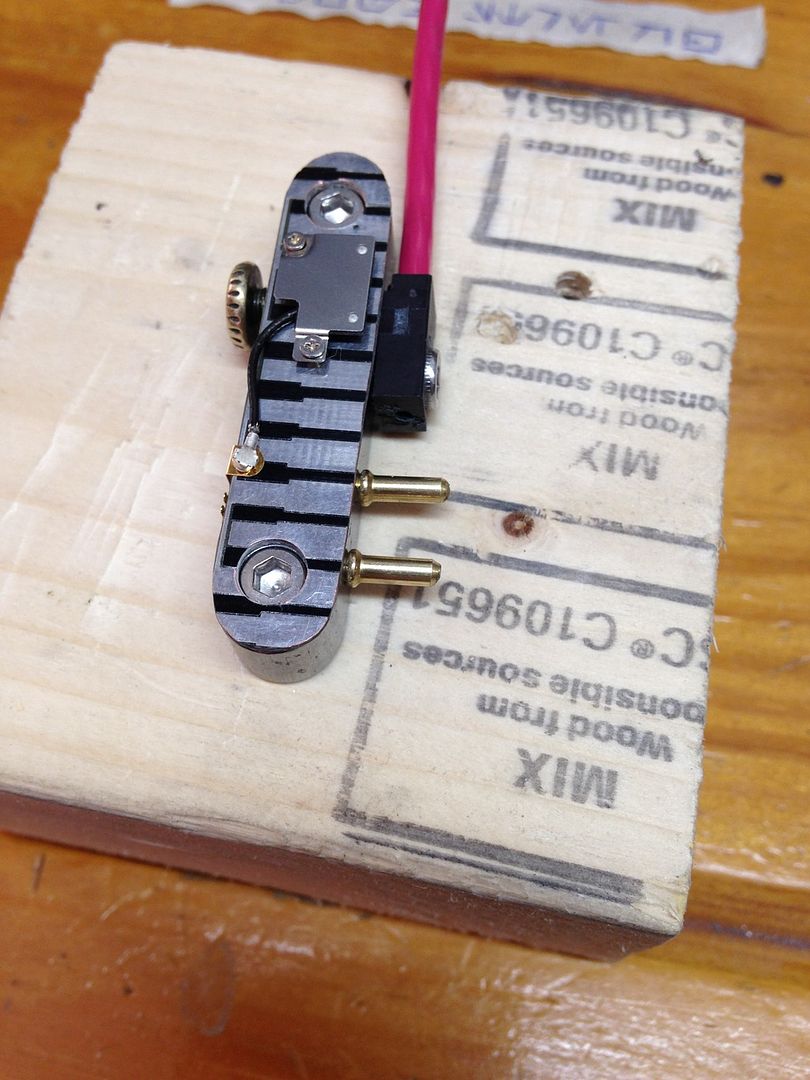 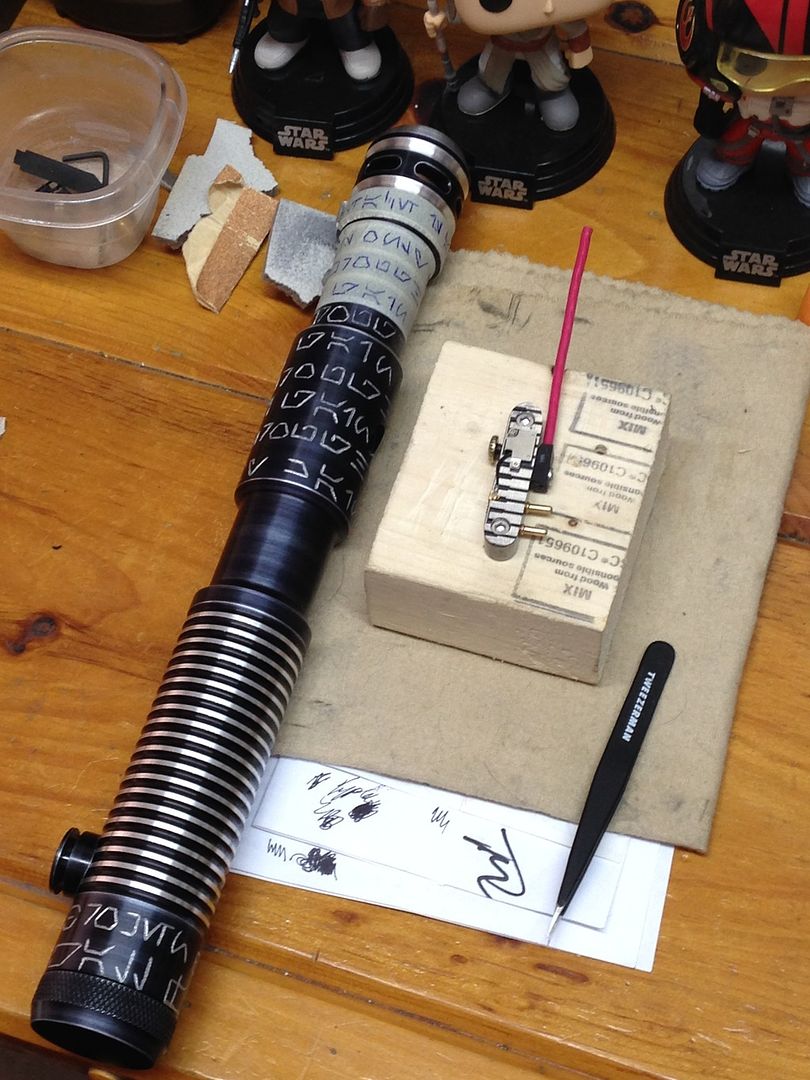 MTFBWY . |
|
|
|
|
Logged
|
|
|
|
|
sedstiskyfaller
Artisan of the Azure Order
Knight Commander
Force Alignment: 617
Posts: 2214
Blue is my color, it is who I am
|
|
« Reply #35 on: March 06, 2016, 10:47:09 PM » |
|
Wow, I'm really late to this party  This looks like some awesome work you have going on for this saber. So many tiny pieces coming together on this saber. I remember when I was younger, I tried to build a toy lightsaber that looked more like the ones from the movies, rather than those plastic ones with the telescoping blade. I took a styrofoam rod and cut it to length, covered it with some contact paper, and cut a piece off the top as a base. Then I found this old camera in the house (a cheap one mind you) that wasn't used anymore and broke it apart and started using pieces of it on the saber, with a pommel made out of a hose cap and a marble (of all things). I even tried to find a colored tube to put on the end, but never found anything that worked like I wanted it to. Anyway, I'll definitely be keeping up with this project. I can only imagine how many things you must be working on  |
|
|
|
« Last Edit: March 06, 2016, 11:04:48 PM by sedstiskyfaller »
|
Logged
|
|
|
|
|
Master Medwyn
Resident Master
Knight Commander

Force Alignment: 788
Posts: 1302
Silver Blade of the Distant Earth Knighthood
|
|
« Reply #36 on: March 06, 2016, 11:03:35 PM » |
|
Awesome thread! Very nice work, it adds a whole lot to the default hilt!
|
|
|
|
|
Logged
|
|
|
|
|
RevanReborn
Technomancer of the Graflex Order
Knight Commander
Force Alignment: -1086
Posts: 1121
|
|
« Reply #37 on: March 07, 2016, 02:20:59 AM » |
|
Thanks guys! Yeah Sedsti, I totally know what you mean- it made me feel like a kid again digging thru the found parts and getting all excited lol . Lol, and yeah, I've got just a TON on the go ATM , sooo much saber stuff to do... I wouldn't have it any other way lol. |
|
|
|
|
Logged
|
|
|
|
|
GregG124
Knight Commander
Force Alignment: 436
Posts: 1479
There is only The Force.
|
|
« Reply #38 on: March 07, 2016, 03:56:20 AM » |
|
That circuit card really makes the activation box pop! Can't wait to see what else you've got planned!
|
|
|
|
|
Logged
|
Sabers I Own:
Dominix LE V4 (Obsidian V3) - Consular Green
Arbiter (Obsidian Lite) - Consular Green
Liberator V3 (Stunt) - Guardian Blue
Light Side Points Appreciated
|
|
|
|
RevanReborn
Technomancer of the Graflex Order
Knight Commander
Force Alignment: -1086
Posts: 1121
|
|
« Reply #39 on: March 07, 2016, 05:05:22 AM » |
|
Thanks Greg! I can't wait to get into the rest of this hilt, I've got some really cool stuff in the works for it . Keep you posted, MTFBWY. |
|
|
|
|
Logged
|
|
|
|
|
Hansrad
Knight Commander
Force Alignment: -670
Posts: 748
Jedi? Sith? I'm the one with the lightsaber.
|
|
« Reply #40 on: March 07, 2016, 11:05:52 AM » |
|
Once again amazing work. Can't wait to see how this one develops.
|
|
|
|
|
Logged
|
Own: Emerald Overlord, BHManticore, BR Renegade,FO Dominix LE V4 (stunt), CG Dominix LE V4 (stunt), GB Apprentice LE(stunt),BR Dark Initiate LE V4 (stunt), AS Apprentice LE V4 (stunt), CG Dominix V3 (stunt), SRD Darkish Liberator (stunt) Emerald Lost Grey.
|
|
|
|
RevanReborn
Technomancer of the Graflex Order
Knight Commander
Force Alignment: -1086
Posts: 1121
|
|
« Reply #41 on: March 07, 2016, 12:38:54 PM » |
|
Thanks Hansrad! Really appreciate . You guys keep me so motivated, I can't thank you enough for the encouragement and for taking the time to pop in and see what I'm up to. I'm always so driven, excited to pop on the forum and share my progress with everyone and listen to their input- there's so much inspiration here on the forum, it's insane. Keep you posted, MTFBWY. |
|
|
|
|
Logged
|
|
|
|
|
Bulvoy
Knight Commander
Force Alignment: 500
Posts: 547
~Sipra Gehaz~ Rebel Legion "Ghost Base"
|
|
« Reply #42 on: March 08, 2016, 10:28:19 AM » |
|
Kewl, its starting to come together, Best part about imagination is seeing it unfold in the physical world |
|
|
|
|
Logged
|
 UltraSaber's UltraSaber's by bulvoy, on Flickr Menace - Emerald V4s- RavenSS pommel Manticore V4s-CG- S /FOC-Renegade small pommel Crimson Scorpion- V4s-BR- O/FOC Dominix V3s-SRD Initiate V4 Lite- VA "Im here to chew bubblegum & kick ass, and I'm all outta bubblegum"... |
|
|
|
RevanReborn
Technomancer of the Graflex Order
Knight Commander
Force Alignment: -1086
Posts: 1121
|
|
« Reply #43 on: March 08, 2016, 06:42:47 PM » |
|
So, when i attach the box to the grip section of the saber... I DON'T want it to look like this lol:  I guess you could call that the 'before' shot. To avoid that, all you need are the lungs, and stones lol, of a free diver hahah!! No but seriously, i don't think i dared take one breath the whole time i worked at this lol. The grip section here is the one place on this whole hilt where the metal is pretty thin actually. Clenched jaw, white knuckled was an understatement lol. I had to cut down through the ridges but not take anything deeper than the bottom of the grooves to preserve the precious little metal wall of the hilt in this section so that there'd be enough left for good threads when i tapped it. To be honest, as i touched the cutting disk to the hilt here for the first time, i wasn't sure i could pull this off lol! (mostly just used the disk believe it or not- tiny bit of grinding at very end) But i'm surprised, it actually achieved a really good fit . 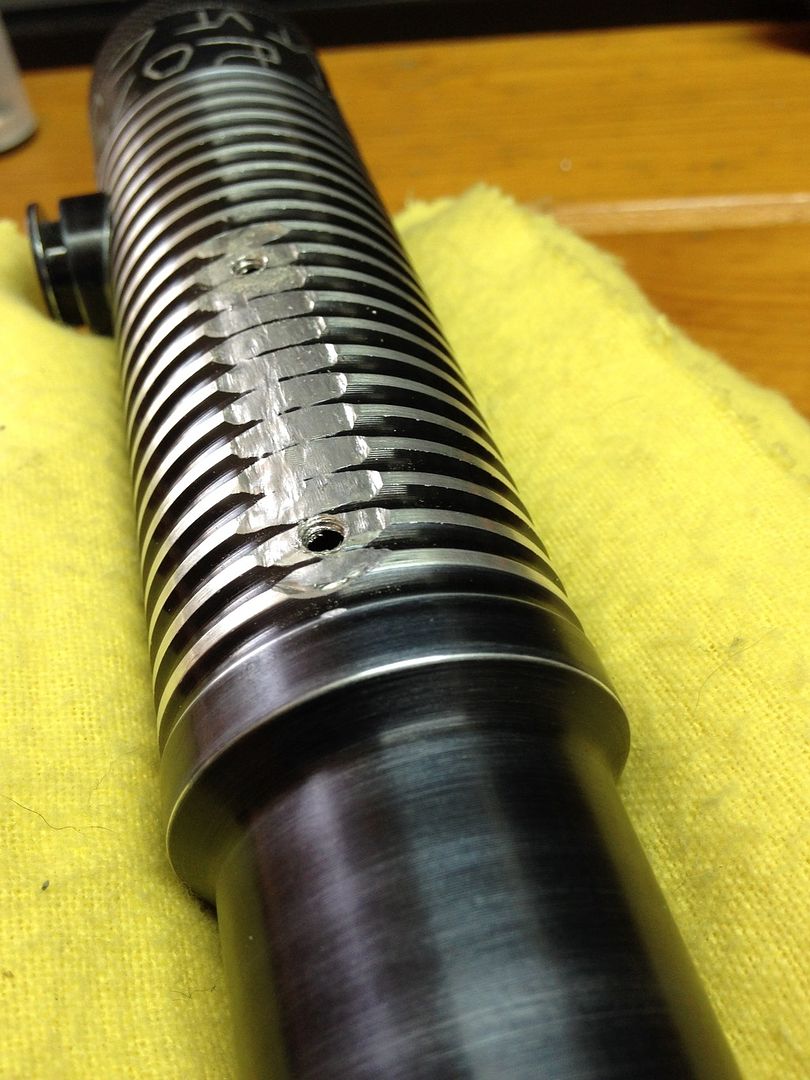 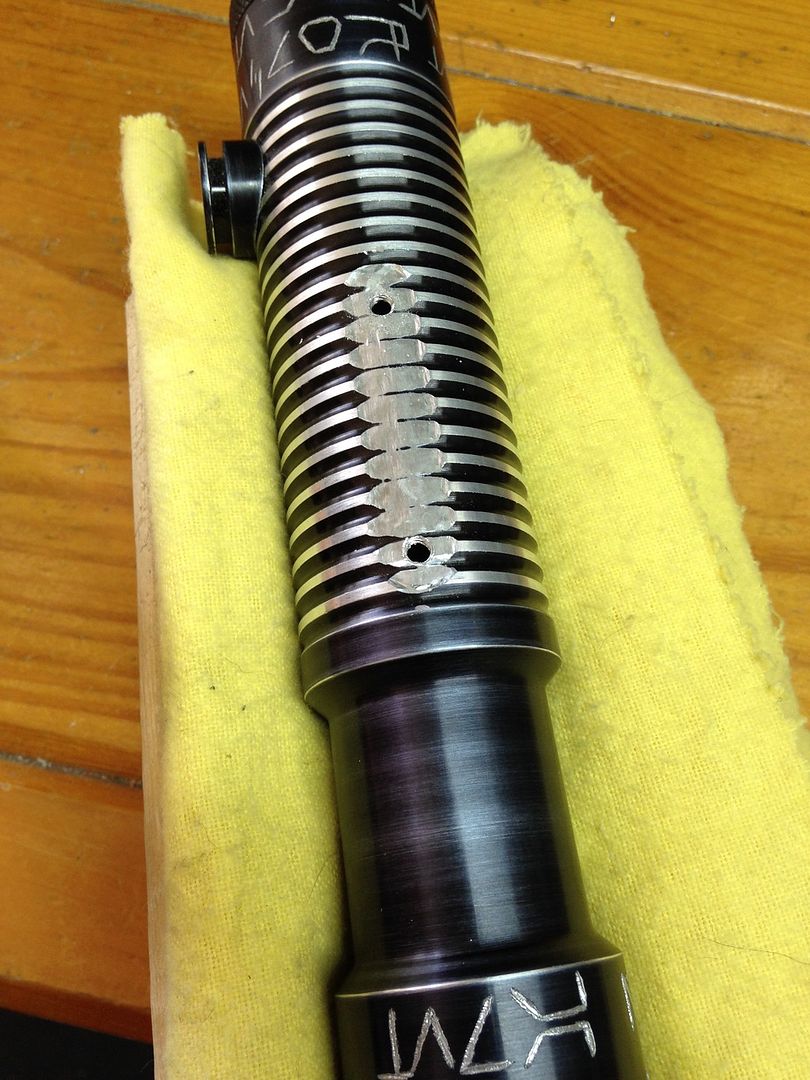 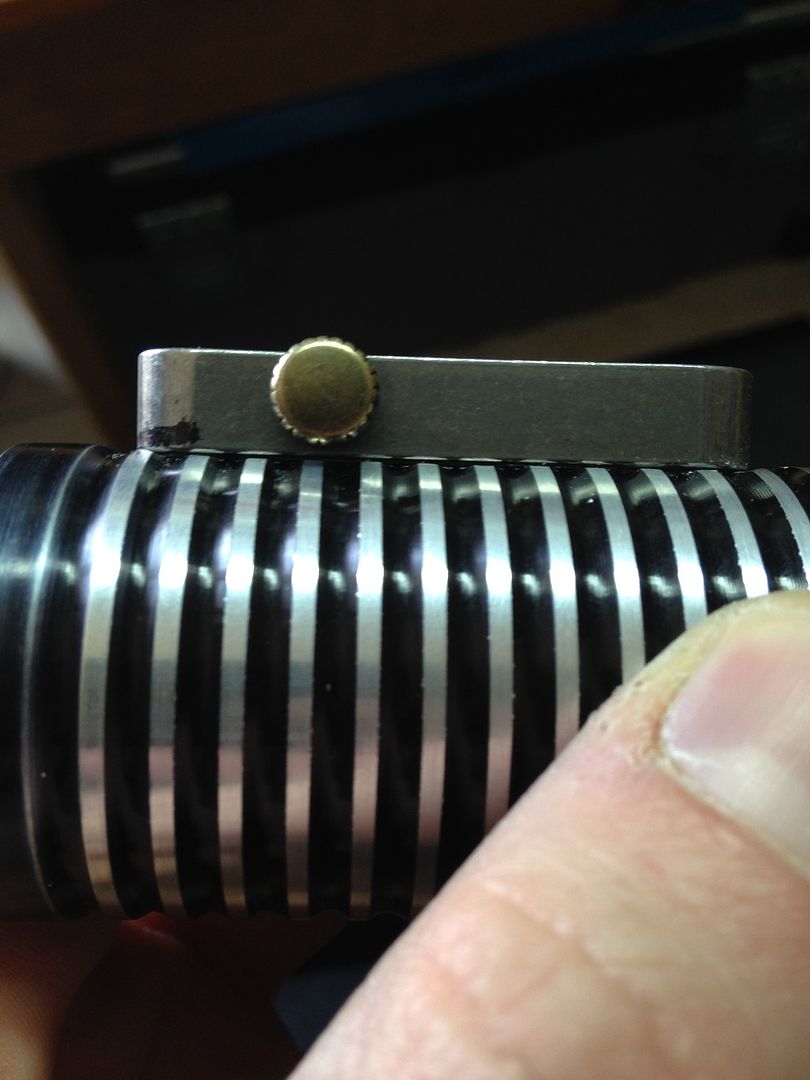 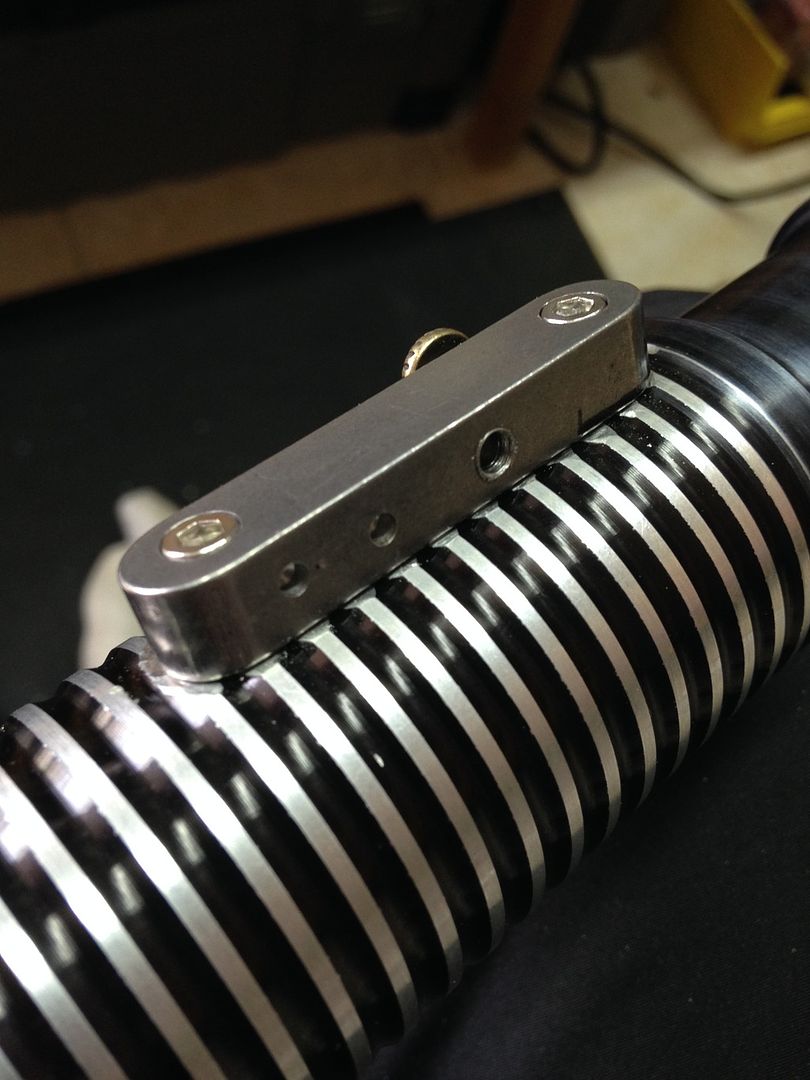 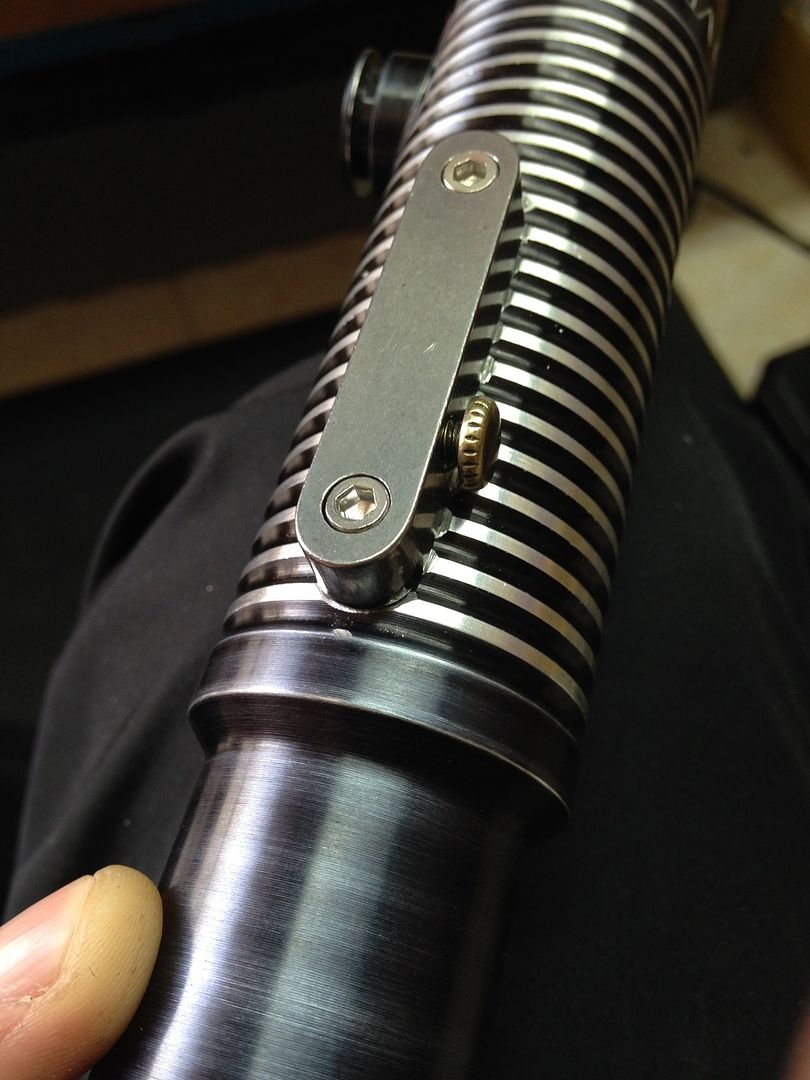 Now, I've always been the first to admit i'm a newb when comes to electronics lol... but i'm pretty sure these little guys aren't ideal lol . 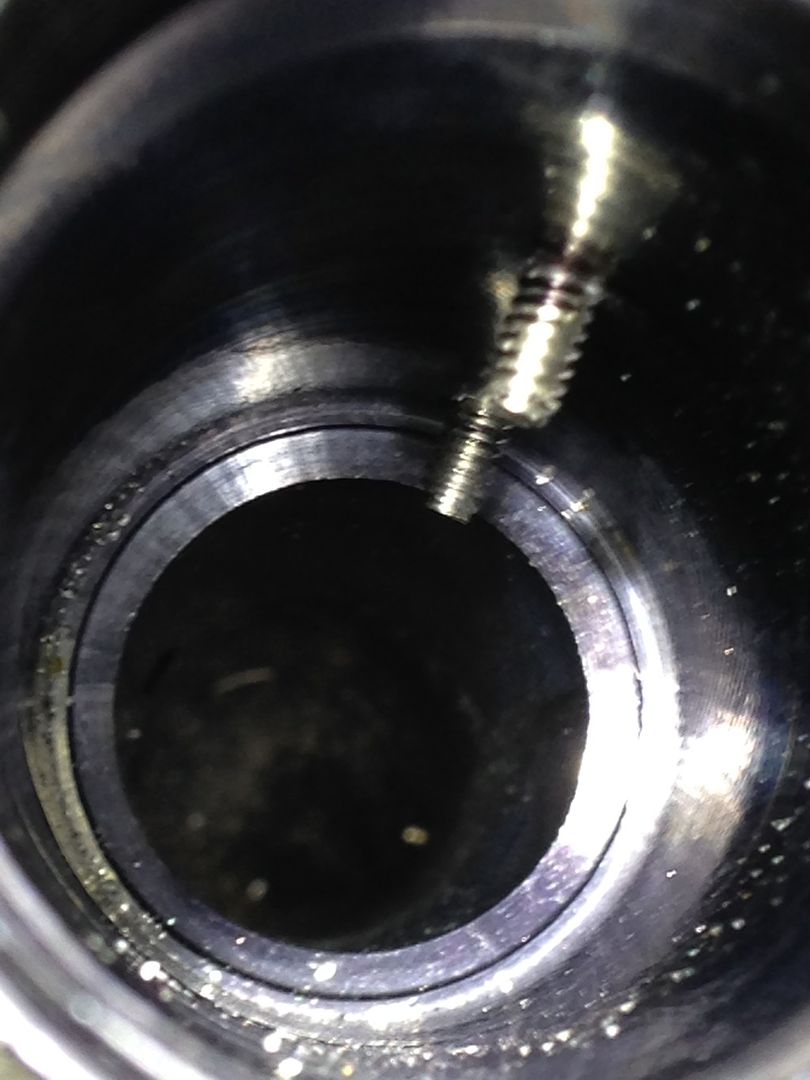 Easy fix. See the sharpie marks right at where the threads stick into the inside of the body? I just marked the spot- now its as easy as just slapping a couple nuts on the screws and hacking the threads off, then when you unscrew the nuts they'll clean up/ restore the mangled thread back to usable- works every time . Also, one thing i always do whenever possible, though some would call it cheating i guess lol. 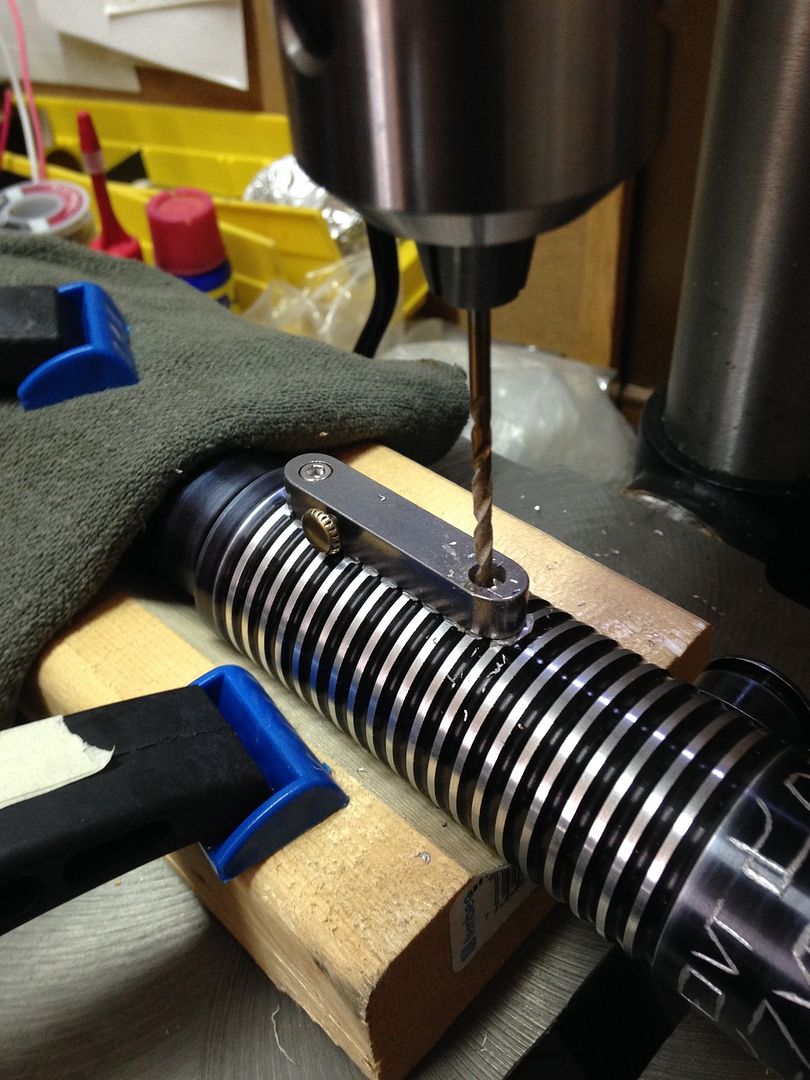 I actually used the box piece to ensure everything aligned. I did the same thing to tap. I actually held the tapping wrench right in the recessed holes in the box and tapped right down through so it was easy to see how straight i was. Sounds stupid, but even the slightest bit of an angle to that tap and my screw heads wouldn't have fit right inside the recesses. I'm likely still going to take the torch to this and put some metal (not electronics) solder down around the join- either that or powder coat the gouged area black just for that extra touch so the box looks extra tight in the grips. Keep you posted, MTFBWY . |
|
|
|
|
Logged
|
|
|
|
|
Bulvoy
Knight Commander
Force Alignment: 500
Posts: 547
~Sipra Gehaz~ Rebel Legion "Ghost Base"
|
|
« Reply #44 on: March 08, 2016, 07:37:38 PM » |
|
Excellent finesse. On the flush fit good work
|
|
|
|
|
Logged
|
UltraSaber's by bulvoy, on Flickr Menace - Emerald V4s- RavenSS pommel Manticore V4s-CG- S /FOC-Renegade small pommel Crimson Scorpion- V4s-BR- O/FOC Dominix V3s-SRD Initiate V4 Lite- VA "Im here to chew bubblegum & kick ass, and I'm all outta bubblegum"...
|
|
|
|
|


