Click here for lightsabers
  • Home
  • Help
  • Login
  • Register
Pages: 1 ... 7 8 [9] 10 11 12   Go Down
Author Topic: my main duelling saber: log  (Read 52680 times)
RevanReborn
Technomancer of the Graflex Order
Knight Commander
*

Force Alignment: -1086
Posts: 1121


« Reply #120 on: May 09, 2016, 02:18:35 AM »

Thanks so much everyone!  Very grateful for the support and encouragement Smiley.  

I totally hear you Daunltesss and Shield Maiden lol!  I always took art and extra English lit classes, French, and that type thing- languages.  I sold my vehicle a while ago cause I live right up town and just barely used anymore, but used to drive me crazy that all I could ever handle was oil changes and changing tires etc.- simple stuff- meanwhile all my friends who took shop and auto etc. can all change their brakes and all kinds of stuff I'm clueless about.  

You know it's funny, it totally looks all crazy cause the ideas just kinda arose naturally/ on the fly, like I just let the back of my mind go nuts and start shooting out ideas from who knows where lol, and since using unconventional components in unconventional ways... But it's actually all quite simple/ run of the mill stuff in essence (albeit gone about in very unusual ways lol) Smiley.  

That was kind of the whole idea behind this project though- basically just wanted to go off the deep end and see how far I could push/ how creative I could get with adding accent features and flourishes to a hilt- wanted this one to look like sort of a hodge podge of all kinds of mad science, alchemy, and like 'after market' upgrades so to speak- like I picture the wielder of this saber as a sith just absolutely obsessed/ to the point of insanity, just bent on relentlessly upgrading his weapon with power ups and hacks.  Like some kind of sith slicer/ hacker type, or like a weapons specialist, increasingly, narrowly fixated on the weapon in this spiral of madness fuelled by the dark side.

MTFBWY Smiley
Logged

Magor Mongo
Knight Aspirant
*

Force Alignment: 0
Posts: 13


« Reply #121 on: May 11, 2016, 08:01:07 AM »

dude love that weathered look...how'd you do that???
Logged

RevanReborn
Technomancer of the Graflex Order
Knight Commander
*

Force Alignment: -1086
Posts: 1121


« Reply #122 on: May 11, 2016, 03:07:30 PM »

Thanks Mongo Smiley

dude love that weathered look...how'd you do that???


Which- the ribboned fade pattern on the sentinel (sanded) or on the saber down in my sig (chemical treatments)?
Logged

RevanReborn
Technomancer of the Graflex Order
Knight Commander
*

Force Alignment: -1086
Posts: 1121


« Reply #123 on: May 15, 2016, 08:01:22 PM »

While I'm waiting for the parts to ship, decided to start tinkering/ experimenting for the recharge port hatch.  It's not that anything involved on the port is all that difficult/ complicated in itself- but just made so by the insanely small area it'll have to go in- a choke, so basically the same 1" diameter as blade holder.


Awful long way to go here- basically just making this up/ designing/ test fitting as i go- then once I've got something done I like, I'll disassemble, dress it all up and finalize, but even this I suspect will need to wait till extension in hand.  But I can at least build all the components now and then just size the whole thing after.  keep you posted, MTFBWY Smiley
Logged

Calculon
Knight Commander
*

Force Alignment: 435
Posts: 560


We Will Win!


WWW
« Reply #124 on: May 15, 2016, 08:18:38 PM »

You seating that over your window or going custom pommel?
Logged

The Wolfpack Lives!

RevanReborn
Technomancer of the Graflex Order
Knight Commander
*

Force Alignment: -1086
Posts: 1121


« Reply #125 on: May 15, 2016, 08:48:37 PM »

Was thinking telescoping reveal at the lowest choke, just above pommel Smiley.  Got an mhs choke coming in to use as extension at bottom/ before pommel.  The switch and kill key would detach and slide back with the pommel and bottom half of the choke.  The top half of this piece will mount just at the end of power bank, almost at where the threads of the body and top (male) half of choke will be, and then extend down through the choke to insert into this one which will allow for the telescoping.  These ones here are 7/32 brass tubes, the top will be 3/16 with 6/32 threaded rod running through it for support (fills tubes nicely).  The top rods slide into the tubes of this one.  Haven't actually made the base that will be screwed through to mount top of any of that yet- ran outta time lol.  Still have to design this piece etc too.  This will be where Dressed up USB port will sit Smiley.  Keep you posted.
Logged

Calculon
Knight Commander
*

Force Alignment: 435
Posts: 560


We Will Win!


WWW
« Reply #126 on: May 15, 2016, 08:59:09 PM »

I see it! Dude you're gonna have fun with a crystal chamber.
Logged

The Wolfpack Lives!

RevanReborn
Technomancer of the Graflex Order
Knight Commander
*

Force Alignment: -1086
Posts: 1121


« Reply #127 on: May 16, 2016, 11:21:41 AM »

Thanks Calculon Smiley.

Yeah, I'm totally having a blast with this thing already lol!  Gonna be challenge for sure, cause first time doing anything like this, and tight area, but totally fun/ exciting. 
Logged

GregG124
Knight Commander
*

Force Alignment: 436
Posts: 1479


There is only The Force.


WWW
« Reply #128 on: May 16, 2016, 04:11:17 PM »

Man Rev, you blow me away every time you update this project!
Logged

Sabers I Own:
Dominix LE V4 (Obsidian V3) - Consular Green
Arbiter (Obsidian Lite) - Consular Green
Liberator V3 (Stunt) - Guardian Blue

Light Side Points Appreciated

Bulvoy
Knight Commander
*

Force Alignment: 500
Posts: 547


~Sipra Gehaz~ Rebel Legion "Ghost Base"


« Reply #129 on: May 16, 2016, 06:55:49 PM »

I seen this coming  Grin. Always fun watching this unfold nice , nice..
Logged

UltraSaber's by bulvoy, on Flickr
Menace - Emerald V4s- RavenSS pommel
Manticore V4s-CG- S /FOC-Renegade small pommel
Crimson Scorpion- V4s-BR- O/FOC
Dominix V3s-SRD
Initiate V4 Lite- VA
            "Im here to chew bubblegum & kick ass, and I'm all outta bubblegum"...

RevanReborn
Technomancer of the Graflex Order
Knight Commander
*

Force Alignment: -1086
Posts: 1121


« Reply #130 on: May 16, 2016, 09:14:38 PM »

Thanks guys!  SLOWLY starting to be able to see where I'm going with this- the base will get a coat of metallic gold, and with all the brass, there's a really good pallet to start pooling different colours of light around to really set off whatever coils and rods I dress this thing up with.  Really happy with how the ideas translating- I knew the red would likely wash out next to all these other brighter colours, so was hoping that it'd be protected mounted down in that tube, actually went just like I was thinking Smiley.  And the green, yellow, Amber, and blue really do get nice splashes bouncing around the brass.  The largest tube is where the actual wire of the saber will run through and become part of the design in this chamber- figure it's time I made this huge mess of wiring work for me instead of against me all the time lol.  I just stuck some scrap wire in there so you could get idea.  Also you'll notice one smaller tube that's still empty- gonna make a coil that rises from that and works its way up toward the rest of the feature.
Quick shot of wiring- all this still needs to be disassembled so just kinda tacked in for time being.


Probably hard to tell in pics, but shows in person, I took a lot of time to make sure that everything went in on its own plane, vertically- so each light rises to a slightly different height, which helps create the effect I'm going for when lit up.
So like, I countersunk/ recessed some of these 3mm's in from the backside to diff depths, making sure the hole at the surface was big enough to let the sweet spot of the diode come through but not big enough for the little flange at the base of the diode, resulting in them protruding diff amounts. 


So here you can see where I'll run the real wire up into the design (thanks for that idea Greg Smiley ), and that little empty tube will house the coil.

Aaaaannnd... (Even in brightly lit room) ... IT'S ALIVE HAHAHA!! Wink.


Still a million miles to go here lol- keep you posted- MTFBWY Smiley.
And thanks again for kind words everyone! 
Logged

Hansrad
Knight Commander
*

Force Alignment: -670
Posts: 748


Jedi? Sith? I'm the one with the lightsaber.


« Reply #131 on: May 16, 2016, 11:11:44 PM »

it's insane that everytime I come here it's just another giant level increase of awesome. Wow just wow!
Logged

Own: Emerald Overlord, BHManticore, BR Renegade,FO Dominix LE V4 (stunt), CG Dominix LE V4 (stunt), GB Apprentice LE(stunt),BR Dark Initiate LE V4 (stunt), AS Apprentice LE V4 (stunt), CG Dominix V3 (stunt), SRD Darkish Liberator (stunt) Emerald Lost Grey.

GregG124
Knight Commander
*

Force Alignment: 436
Posts: 1479


There is only The Force.


WWW
« Reply #132 on: May 17, 2016, 05:22:02 AM »

How did I give you that wire idea?? LOL
Logged

Sabers I Own:
Dominix LE V4 (Obsidian V3) - Consular Green
Arbiter (Obsidian Lite) - Consular Green
Liberator V3 (Stunt) - Guardian Blue

Light Side Points Appreciated

RevanReborn
Technomancer of the Graflex Order
Knight Commander
*

Force Alignment: -1086
Posts: 1121


« Reply #133 on: May 17, 2016, 07:55:23 AM »

Thanks so much hansrad!

How did I give you that wire idea?? LOL

Back when I was running the huge wire from act box you asked about it- I had considered it/ wanted to as well but was just too vulnerable there.  Here it's a no brainer since, where else am I gonna run wire if not inside hilt lol.  When I had the idea I thought 'ha, Greg will like this' lol. 
Logged

RevanReborn
Technomancer of the Graflex Order
Knight Commander
*

Force Alignment: -1086
Posts: 1121


« Reply #134 on: May 24, 2016, 12:13:45 PM »

Super excited- the choke and latching AV i need are traveling towards me as I'm writing this, and i recently ordered a pommel i'll need, which I'm assuming will arrive with Ultra Saber's usual lightning speed, so soon i'll be able to move forward with the last aspects of this project!  I had been waiting till i actually had those parts because the areas I'm working in are so insanely small that i'll have to finish the designs and assemble the last features to fit the room that's actually there- which i can't know for sure till I've got it together in front of me.  I got a good start on these aspects, but its just too tight for me to finalize and then try to fit after the fact. 

i was gonna wait to show you guys this until i actually had it installed in those proper parts, so you could see how this will actually sit, but seeing as how its just around the corner now i think i can go ahead and post my early tinkering/ prep work/ test fitting- plus i just can't sit quiet on this any longer it's too awesome Smiley.

now, first of all, as much as i'd like to lol i can't take any of the credit for this feature- that belongs 100% to one of our resident masters, JediXIX who recently shared an idea with me.  I would have never thought of this.  It was something he had been kicking around/ pondering but hadn't had a chance to actually use much in projects yet, that he knew would be right up my alley in general and just perfect for this project.  When he showed me what he was thinking my jaw hit the floor!  The idea was to take one of the cool blade plugs (the US one appeared most conducive to this) and mount an illuminated AV smack dab in the middle of it, then mount that whole thing in a vented pommel, and then backlight it with something.  Wicked, right?!  so here's one interpretation of this idea Smiley.

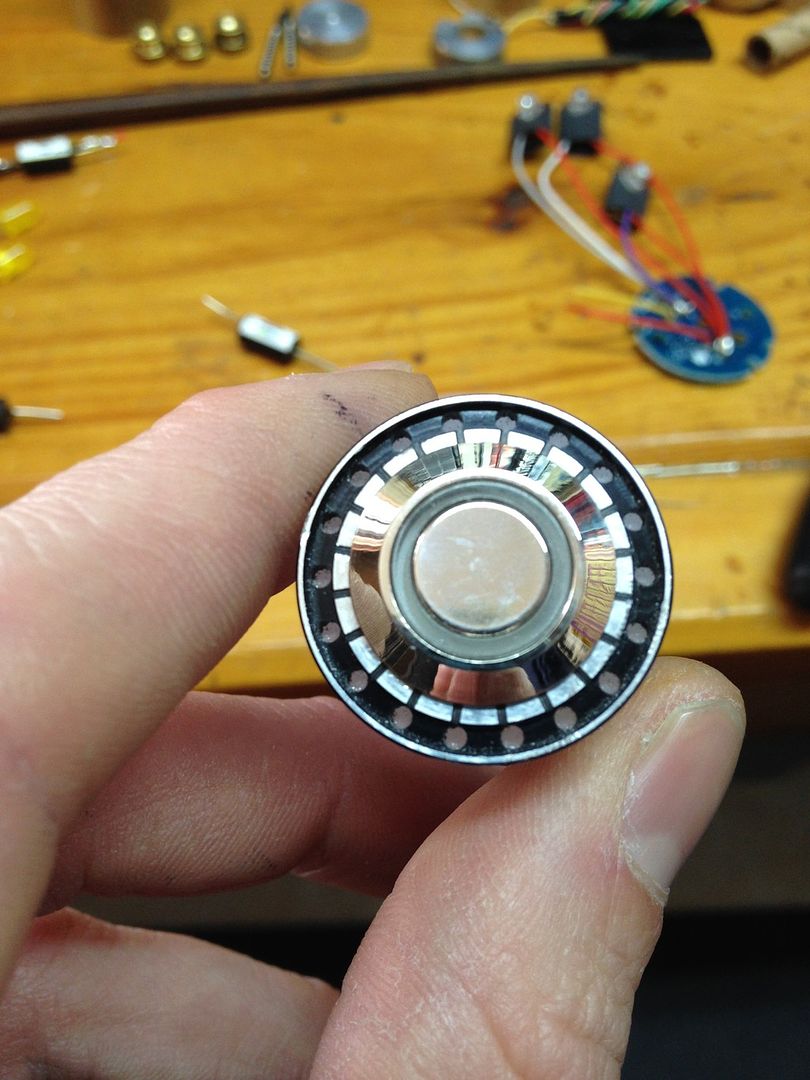
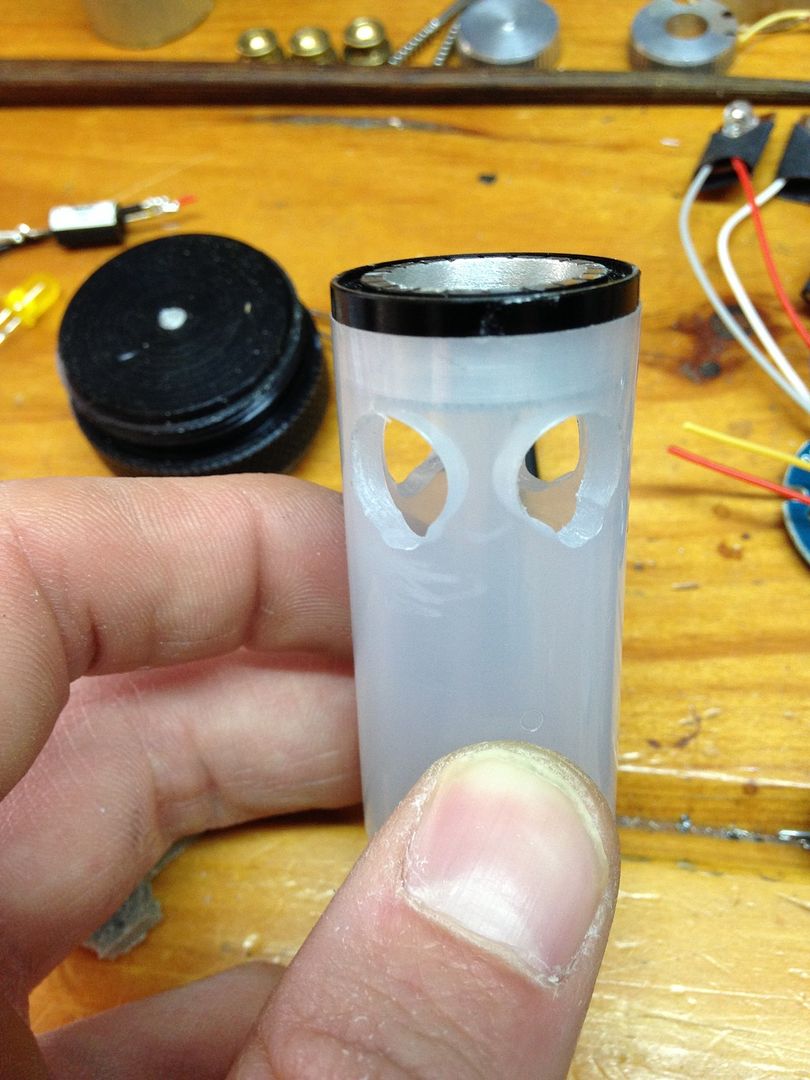
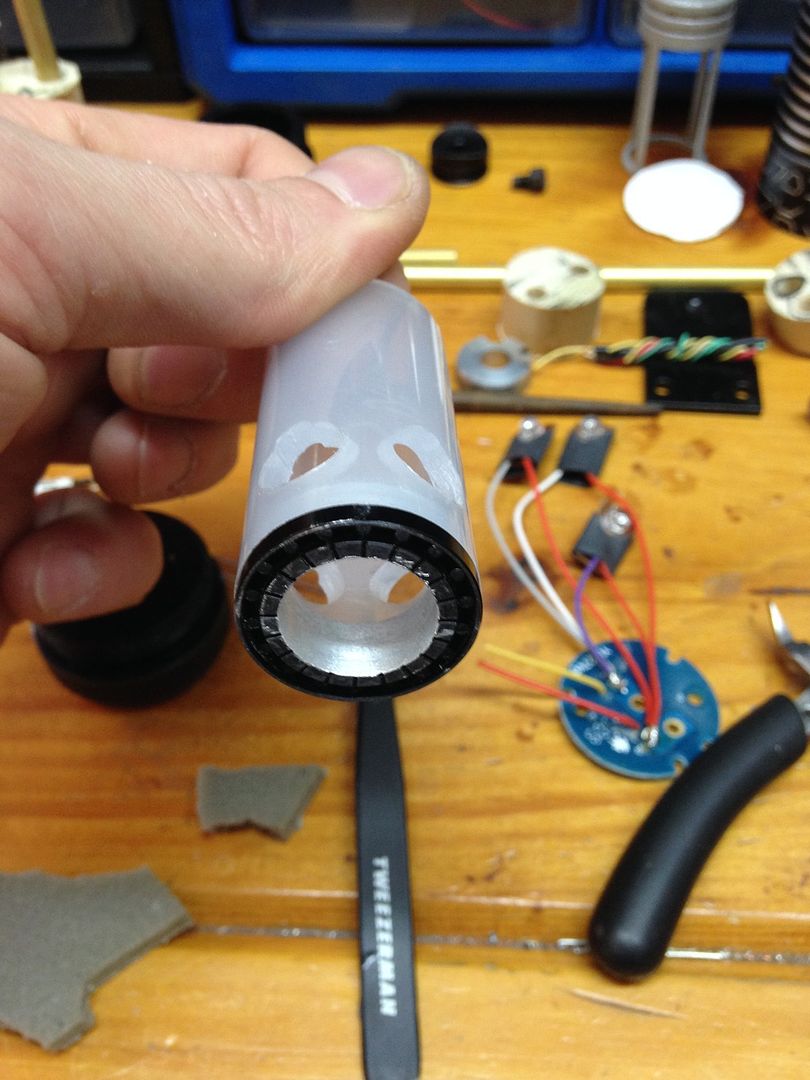
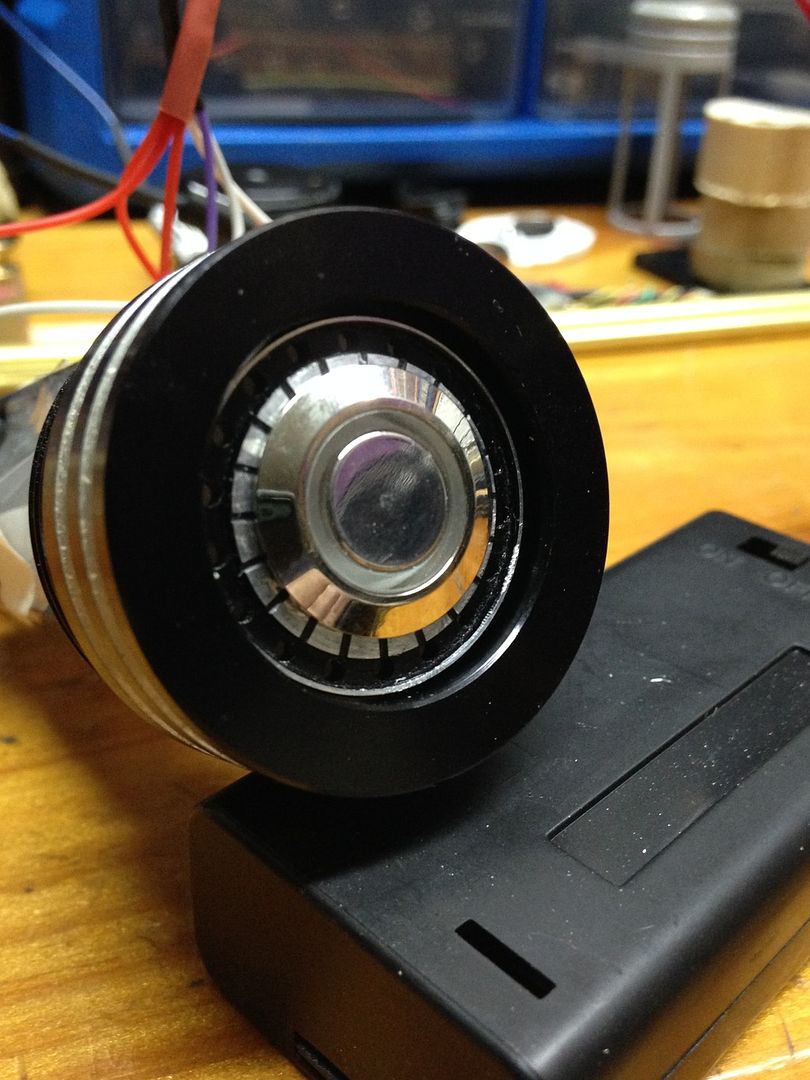
now i didn't have a US plug handy- so i decided i'd test out the circle plug... what a nightmare lol!  though i will say, if you're willing to put in the work, i rather like how there's this little raised/ grooved ring left behind like a trim or bezel- looks good sitting behind the switch.  But man, what a pain- eventually had to switch to the dremel and burs and stones to remove the entire middle area of the plug (and the holes) and then just drill out what was left.  hitting it from the front was a no go- and even from the back those holes seemed exactly placed to give the 5/8" bit the hardest time lol.  It wasn't so much the thickness that made it challenging, but there's some question as to whether all the plugs are this thick, or whether some batches may be thinner- which might help?   

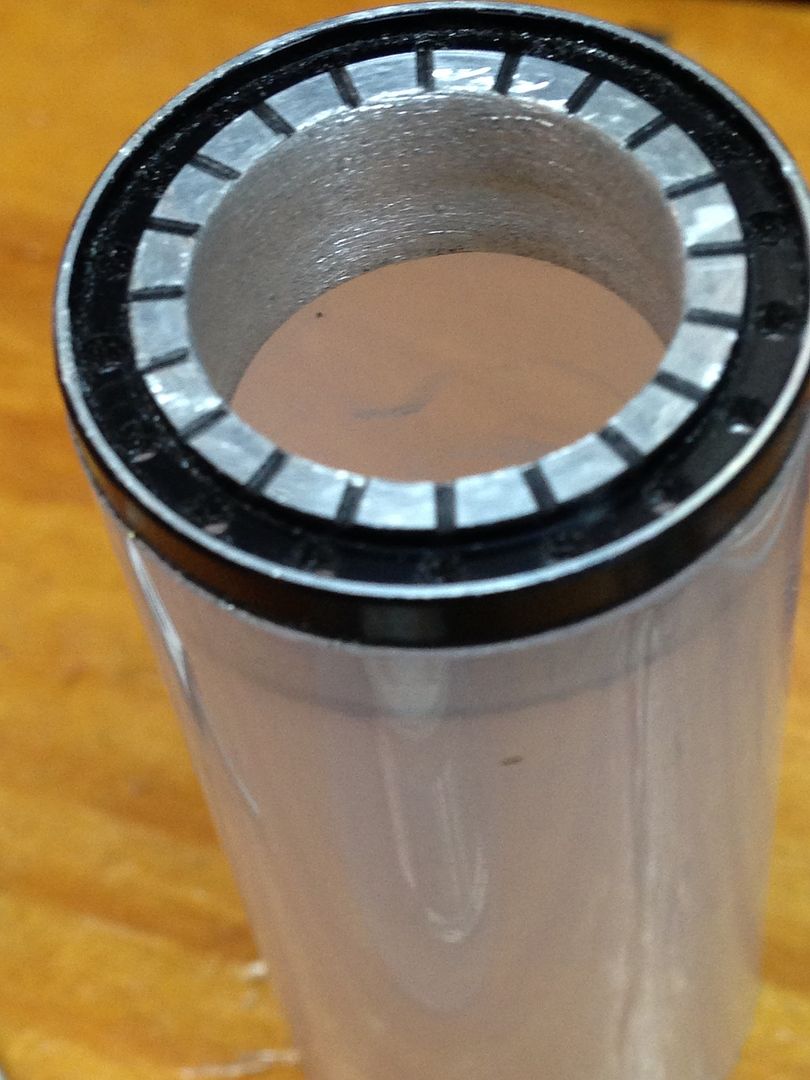
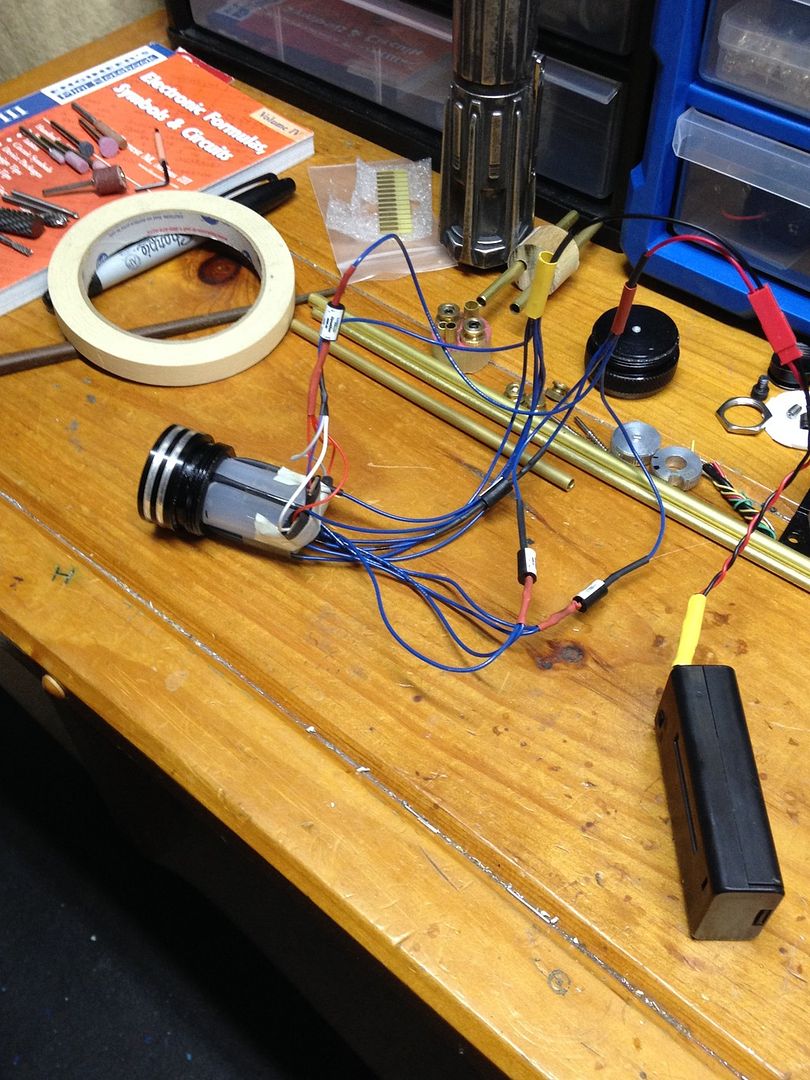
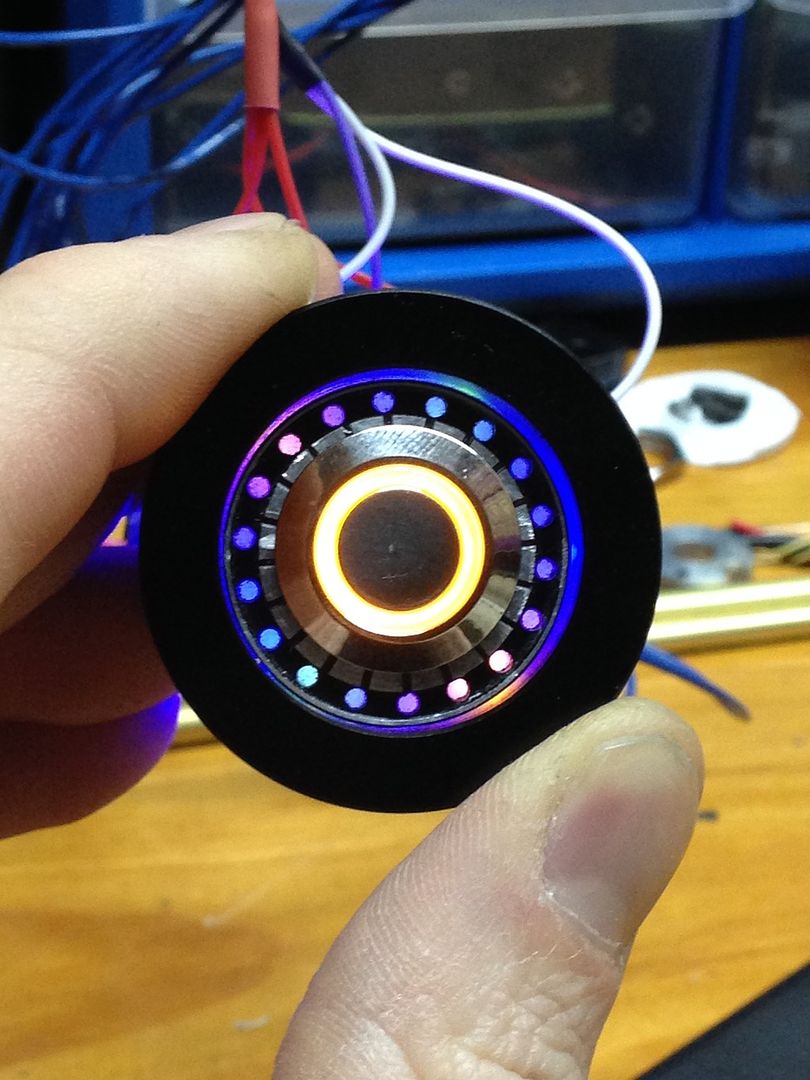
One thing to keep in mind- all this stuff you'll see is just thrown in loose because it's actually gonna end up in the incoming parts, so you might notice things sitting off centre etc in some pics, but only cause not mounted properly atm- just wanted to show you the basic formation of this feature and this sort of test fitting so can get basic idea.  So here's everybody's favourite circle plug as is, thrown in one of the only vented pommels i had handy- just as reminder what i started with.

... and after a few choice words lol.


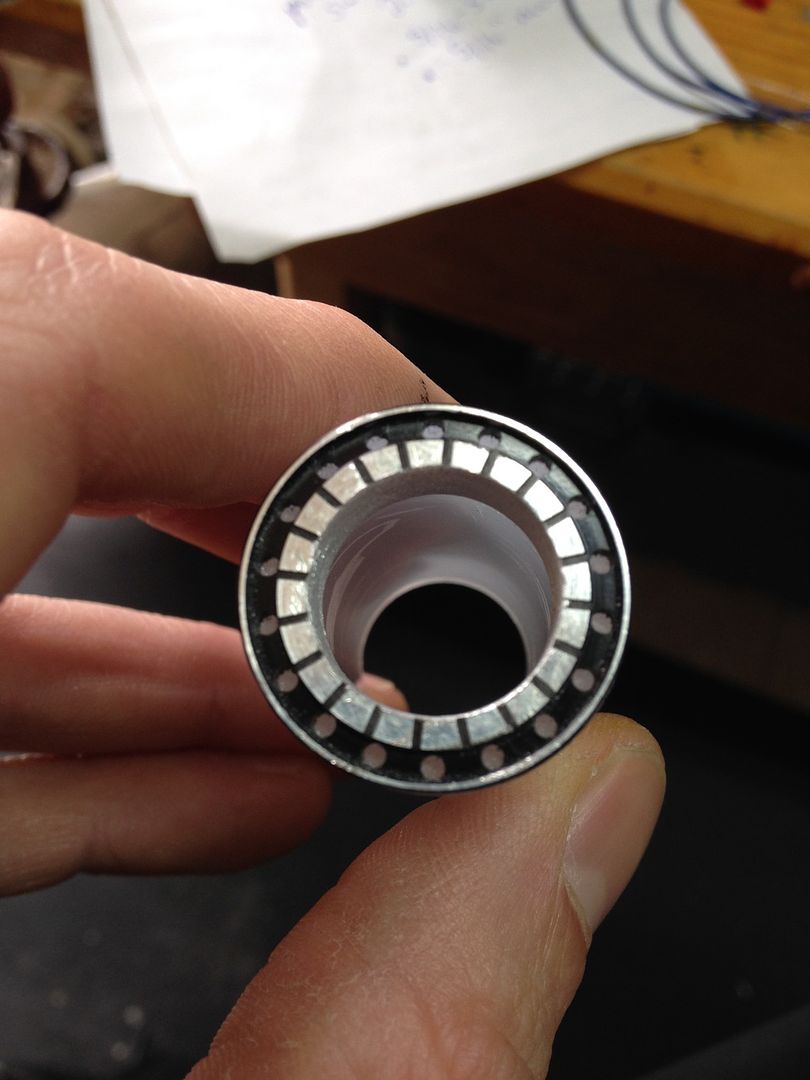
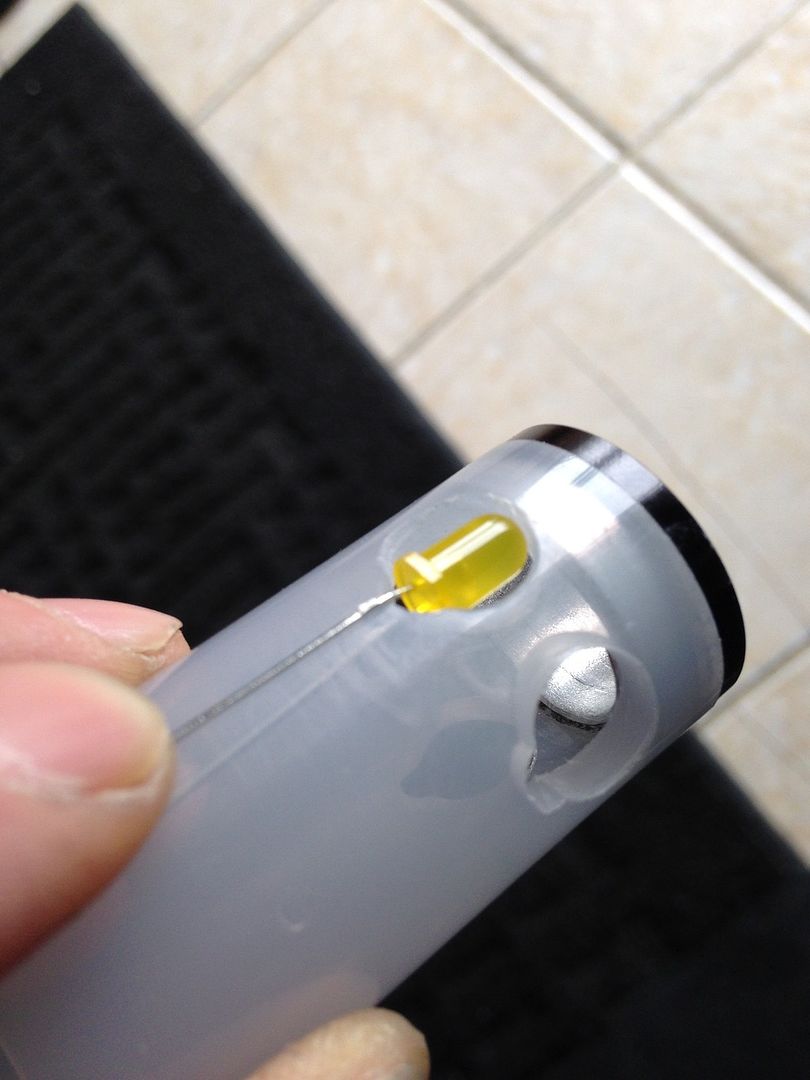
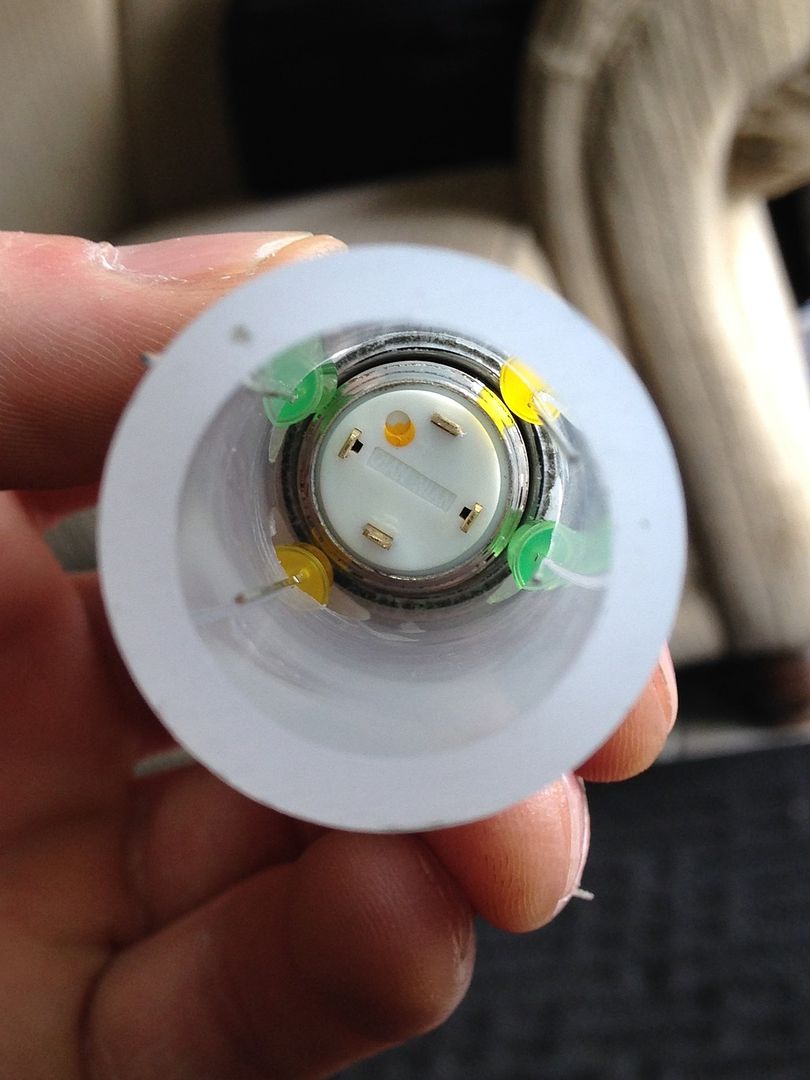
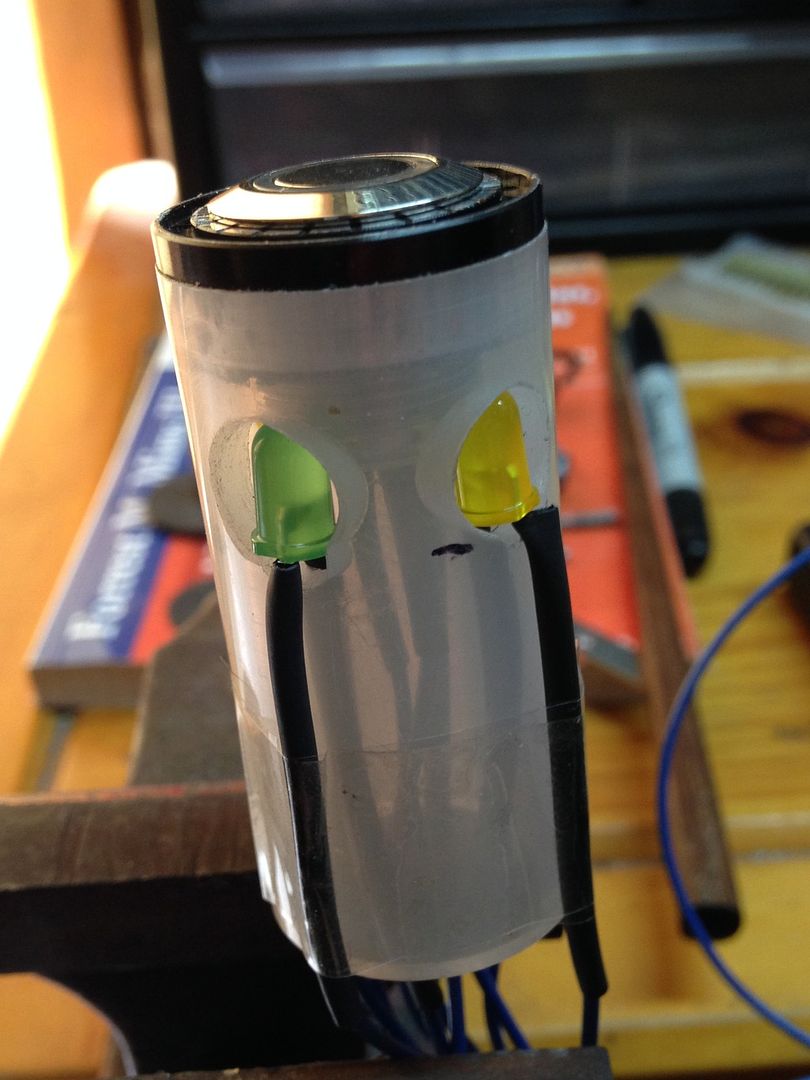
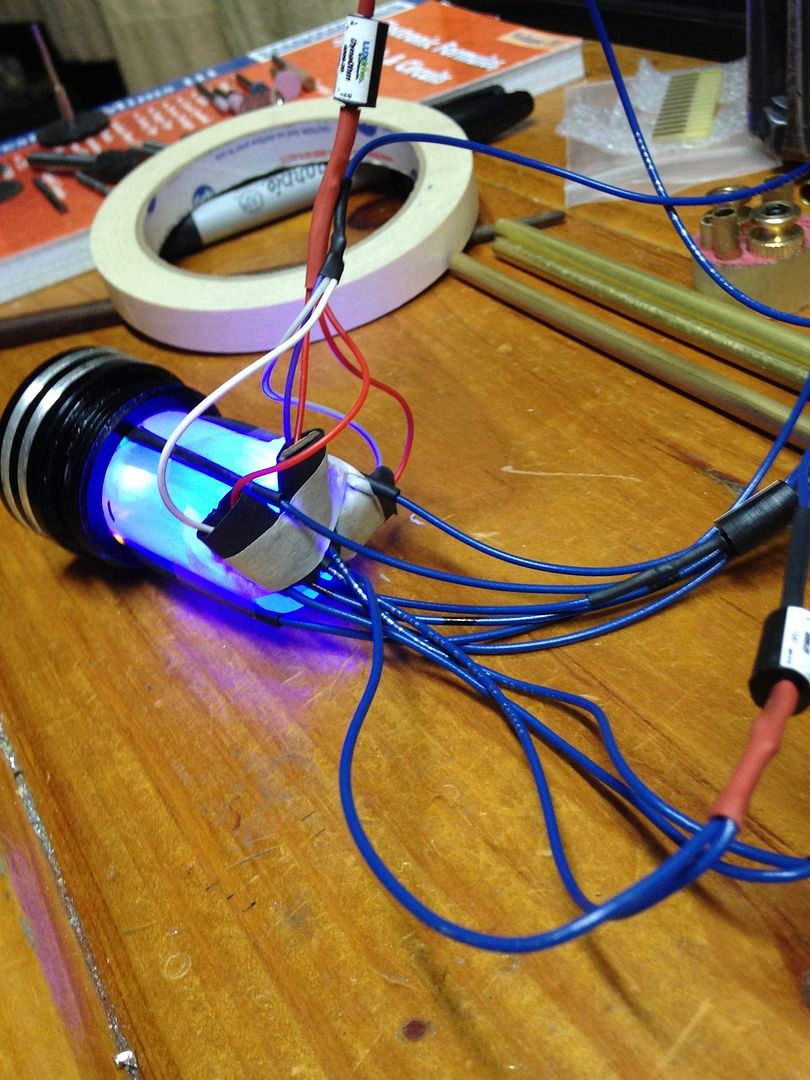
So, if you've ever looked really closely at a 5mm led before (i hadn't really before this) you'll notice they have a little flat spot in the thin flange at the base of their lens, above the cathode.  So if you make holes with little notches in the bottom of them like this, you can actually seat the led's inside the wall of the poly carb tube flush- they won't exceed the profile of the plug and so it will still clear a 1" ID Smiley


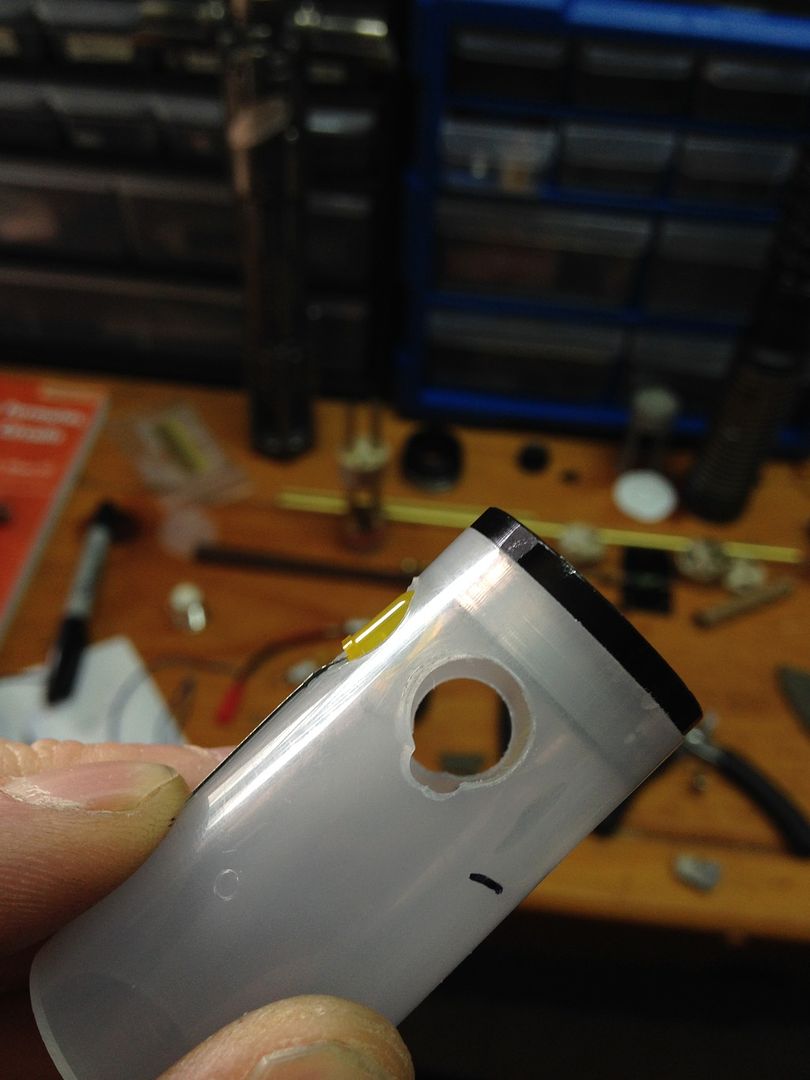
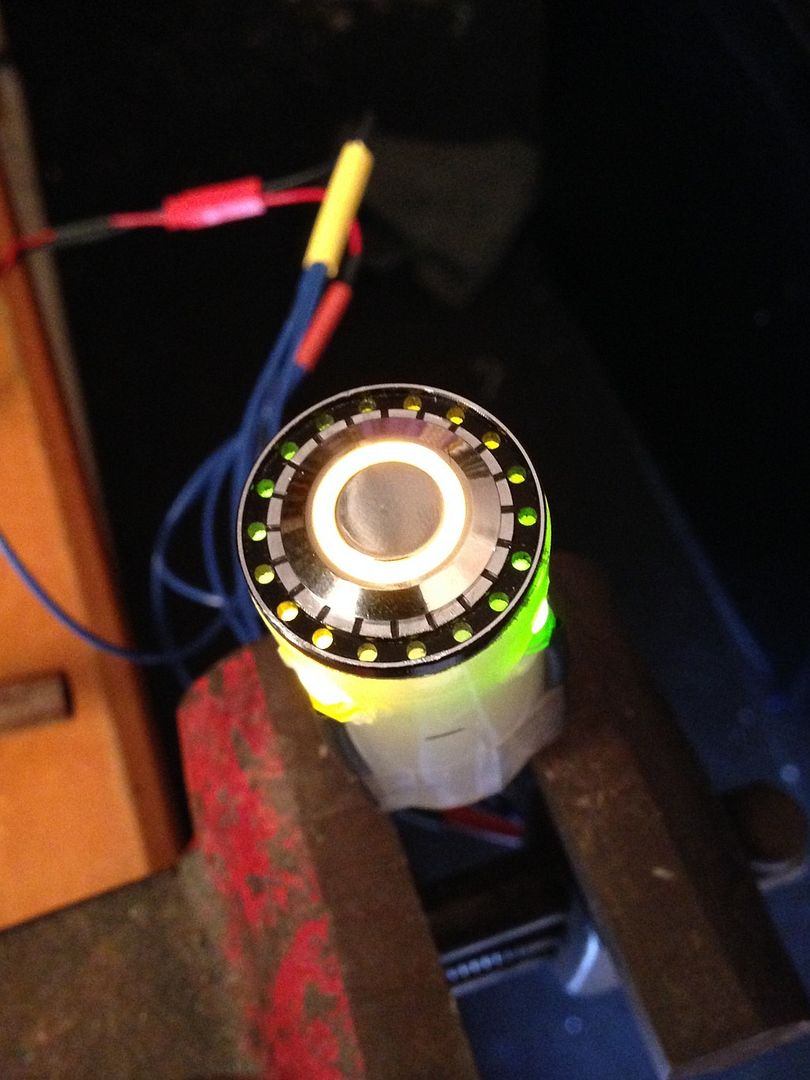
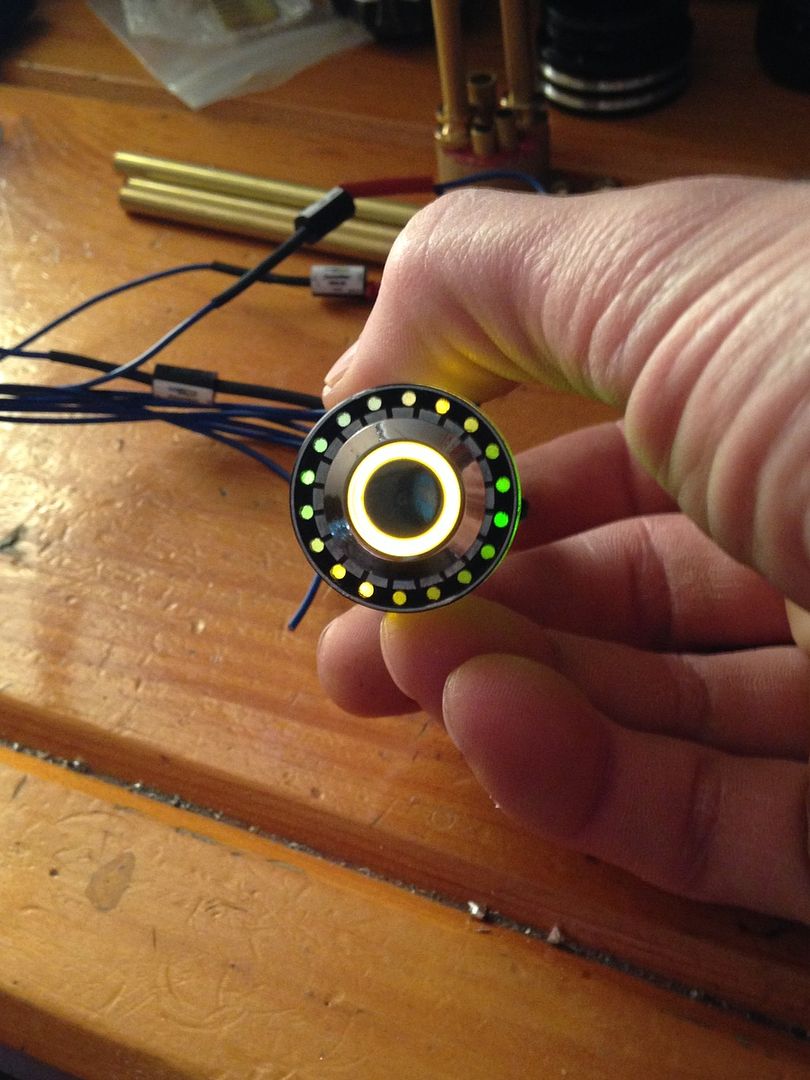
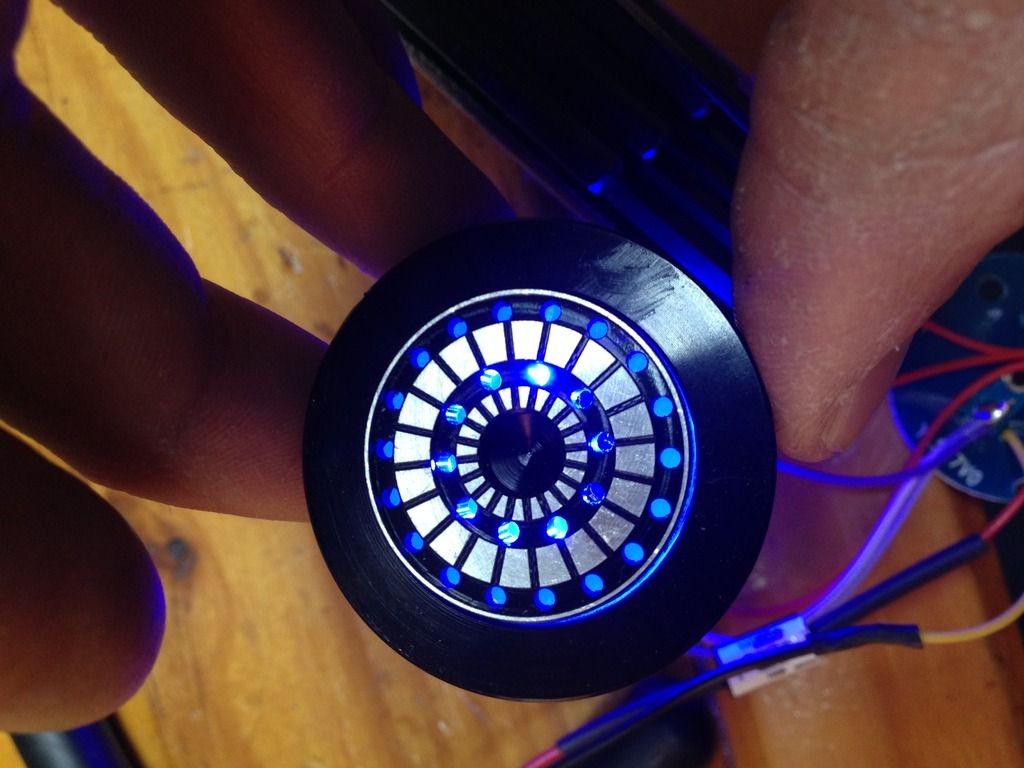
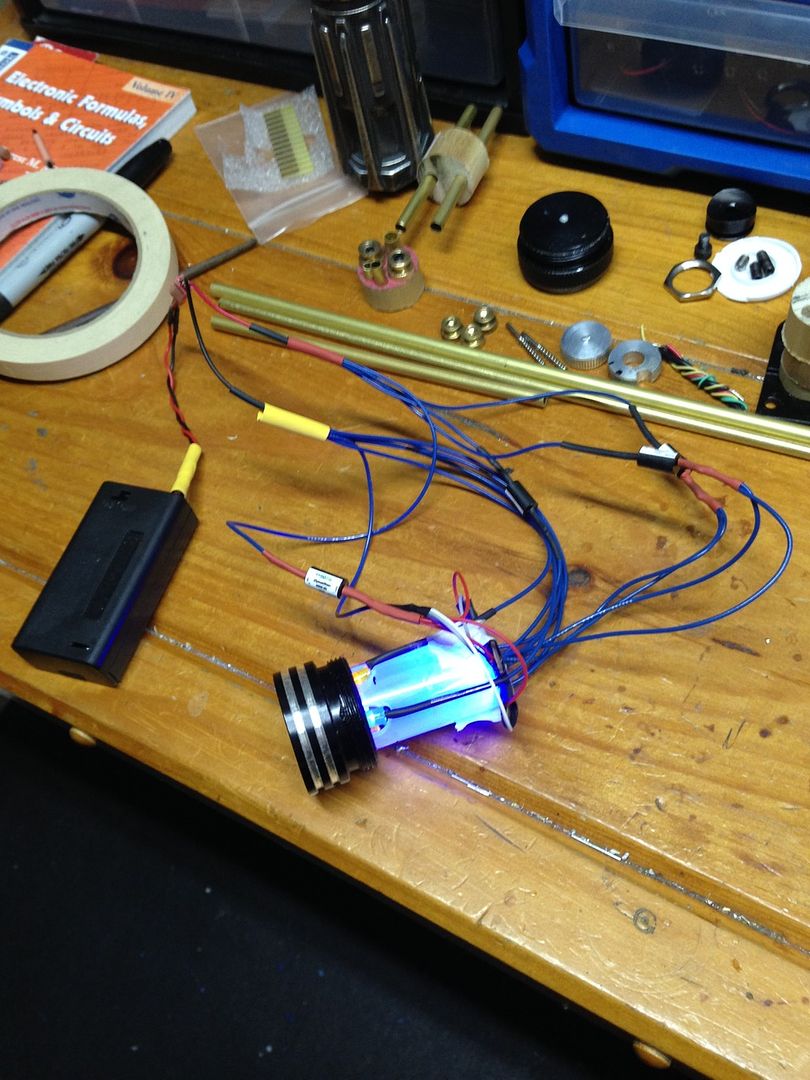
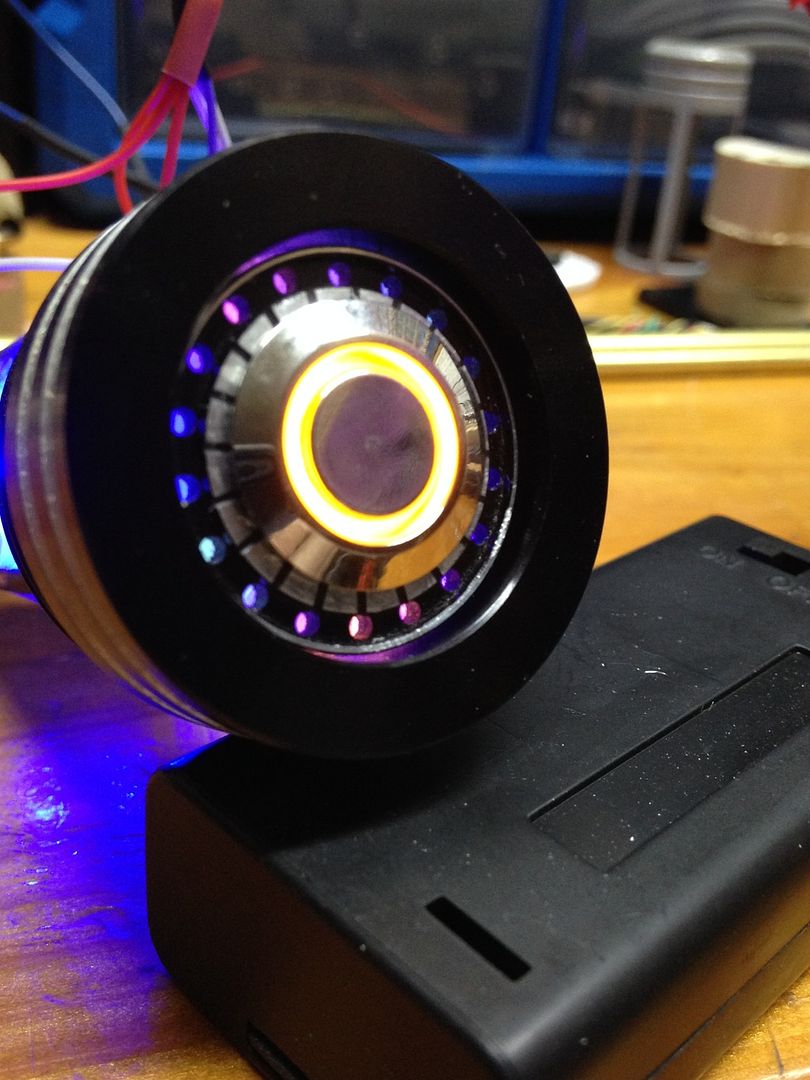
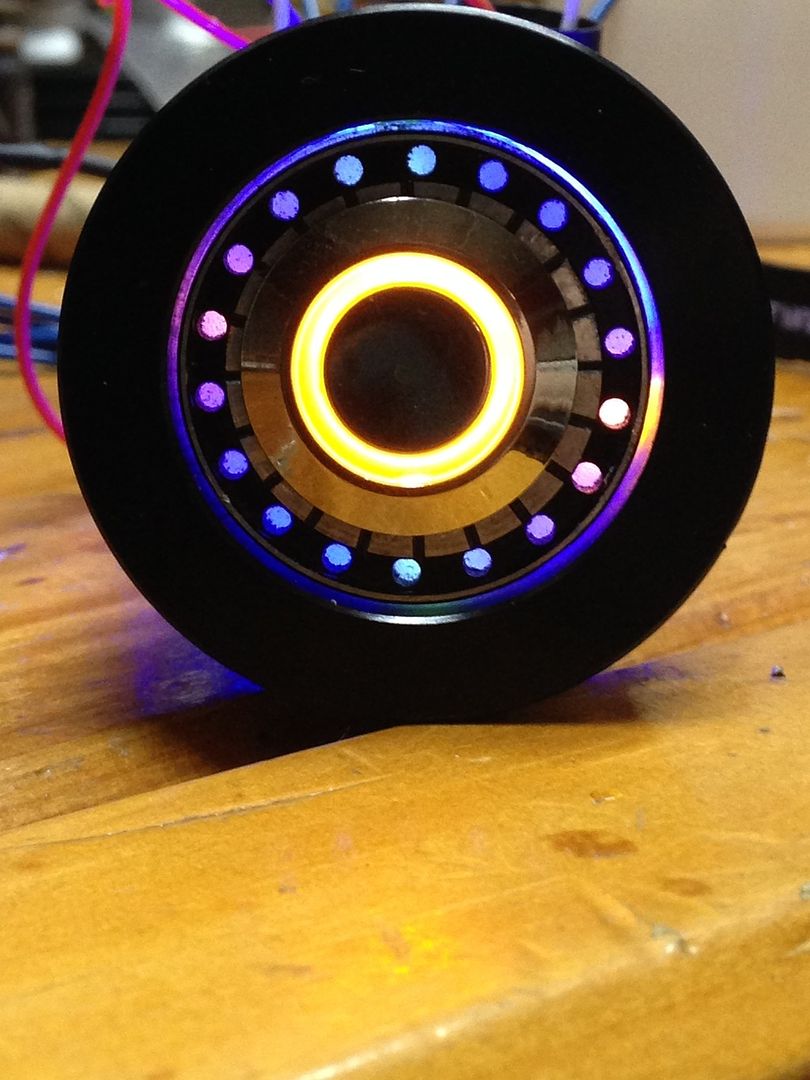
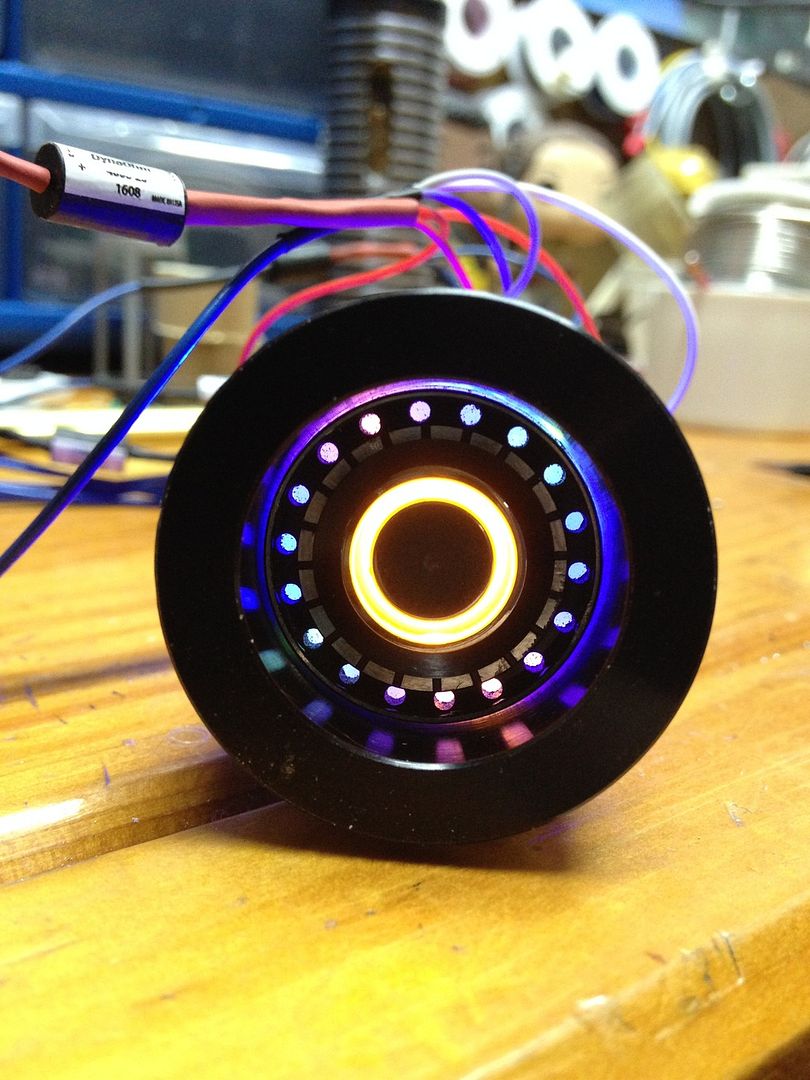
ok, now the only illuminated switches i had at time were momentary, which didn't matter at all for testing since only wring up it's led, but the only red ones i had were dots, and the actual switch i'll be using is a red ring illuminated black latching AV, so i figured i'd get best sense of the look by going with a yellow ring i had in testing.  if this were a jedi saber i'd probably leave it at this here, especially if was yellow or green bladed- but since this sith saber's gonna have a red switch all day long, its a good thing that the whole point of ALL that stuff was merely to get a pattern of variation in the colour of the backlighting... so that when i add the real horse power of illumination, it goes like this (well, something like this, i'll def tweak/optimize it when i mount the real deal):

It is gonna be seriously challenging fitting this all in, but i can't wait!  Also can't wait to finalize the look of the chamber with recharge port and kill key for switching to display mode.  Ive wanted to get into that kind of thing for a while now so pretty pumped- Thanks again to Jed for sharing this wicked idea!  keep you posted, MTFBWY Smiley.   
Logged

Pages: 1 ... 7 8 [9] 10 11 12   Go Up
Send this topic | Print
Jump to: